

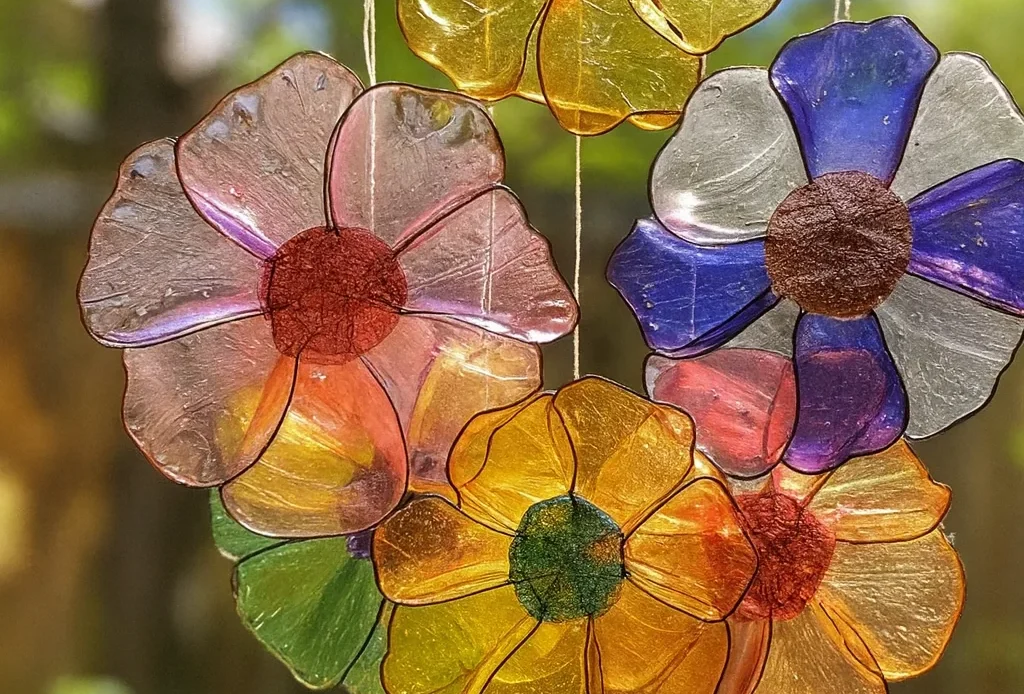
Have you ever seen sunlight pour through a window and light up a craft project like it’s glowing from within? That’s the magic of wax paper flower suncatchers. These DIY crafts are not only fun and colorful, but they’re a perfect mix of creativity, science, and a dash of sunshine. Whether you’re looking to brighten up your kitchen window or keep kids busy with an engaging art project, this guide shows you how to turn simple household items into dazzling displays. Let’s dive in and create some magic with just wax paper, crayons, and heat!
What You Need to Make Wax Paper Suncatchers
Alright, so let’s talk supplies. I can’t even tell you how many times I’ve dived into a DIY kids crafts project only to realize—halfway through—I’m missing, like, three crucial things. Been there?
Here’s what I’ve learned: when it comes to wax paper suncatchers, having everything ready from the jump makes it way more fun and way less stressful. And thankfully, most of what you need is probably already hiding in your junk drawer or craft bin.
✂️ Basic Supplies List (Don’t Skip These)
- Wax paper – You’ll need two sheets for each suncatcher. This is the magic layer that melts and traps all that colorful goodness.
- Crayons – Broken bits are perfect! You’ll shave them down to create vibrant flakes. Bonus tip: the off-brand ones melt faster, but Crayola gives cleaner colors.
- Cheese grater or pencil sharpener – Use whatever you have to create those waxy shavings. Just watch your fingers—I learned the hard way 😬.
- Iron (low heat, no steam) – This is your melting tool. Set it low and go slow. Too much heat can turn your flower into a muddy blob.
- Old towel or parchment paper – To protect your table and your iron. Melted crayon wax is clingier than a toddler at bedtime.
🌈 Optional Extras (Totally Worth It)
- Glitter or sequins – I know, I know, glitter gets everywhere. But just a pinch takes these from cute to WOW.
- Tissue paper pieces – Adds texture and a little transparency. Try layering colors!
- Cookie cutters or flower templates – These help if you’re going for a more polished look. But freehand is fun too, especially for younger kids.
- Hole punch + string or fishing line – For hanging in windows. Clear thread makes them look like they’re floating in sunlight!
👩👧 Safety Tips (Because Melted Wax Is No Joke)
Look, I’ve let my five-year-old help with this project—but only with supervision. The grating and ironing parts? That’s grown-up territory. If you’re doing this in a classroom or as part of a creative learning activity, maybe pre-shave the crayons so the kiddos can just focus on the fun parts.
Also: test your iron heat on a scrap first. Once, I left it on high and completely torched the wax paper. It was… not my finest moment. Smelled like sad crayons and regret.
These are one of those budget-friendly crafts that feel way more expensive than they are. I love it because it blends safe art supplies, indoor educational activities, and that warm fuzzy feeling of “look what we made!” when the sun hits just right.
Step-by-Step: How to Make Wax Paper Flower Suncatchers
Alright, time to roll up those sleeves. Making wax paper flower suncatchers is honestly the most satisfying thing. The way those crayon colors melt and swirl together? Chef’s kiss. But I’ll be real—my first attempt was a hot mess. I used way too many dark crayons, melted it too long, and ended up with something that looked like burnt lasagna. 😅
But once you nail the technique? These things are downright addictive. So here’s exactly how I do it now—with zero chaos and all the color.
🖍 Step 1: Shave the Crayons
Start with clean, unwrapped crayons—the waxier the better. I like to use a pencil sharpener because it gives you little curls instead of dust. If you’re making these with kids, go ahead and prep this step ahead of time (unless you love vacuuming tiny crayon bits out of every corner).
Pro tip: Keep your colors sorted. I used to mix everything together, and it turned into gray slush. Now I do “petal” piles (pinks, purples, reds), “leafy” greens, and sunny yellows. It helps when you’re designing later.
🧼 Step 2: Prep Your Workspace
This is crucial. Lay down an old towel or parchment paper over your counter or table. Then plug in your iron—but set it to low and turn off the steam. You’re melting, not pressing shirts.
I once forgot the towel and ended up with melted crayon wax fused to my cutting board. Took me an hour with a butter knife and a bad attitude to scrape it off.
🌸 Step 3: Layer the Magic
Place one sheet of wax paper flat on your surface. Then start sprinkling the crayon shavings like you’re seasoning a pizza. Don’t overload it—less is more if you want the colors to blend without turning brown.
Try making flower shapes with color combos—like purple petals, yellow centers, and green leaves. Or just go full Jackson Pollock and throw color everywhere. That works too.
🧺 Step 4: Melt It Gently
Now the fun part. Put another sheet of wax paper over the top, sandwiching your design. Then, lay another piece of parchment or towel on that to protect your iron.
Gently press the iron for a few seconds at a time, moving it slowly. The crayons will melt fast. You’ll see them spreading and mixing—don’t overdo it or it’ll all run together.
Let it cool for a minute before touching it. Trust me, hot wax sticks to skin like peanut butter to the roof of your mouth.
✂️ Step 5: Cut Your Flower Shapes
Once everything’s cool and flat, grab some scissors or a flower-shaped cookie cutter. This is where your design really comes to life.
I’ve done single blooms, double-layered petals, even a few abstract sunflower-meets-fireworks kind of deals. There’s no wrong way.
That’s it! You’ve basically made sunshine you can hang up. Seriously, I could watch the colors catch the light all day. And don’t worry if the first one turns out funky. Mine looked like a jellyfish exploded. But now? My windows look like stained glass made by a glitter-happy rainbow fairy.
Creative Flower Design Ideas for Suncatchers
Okay, this is the part where things get really fun. Once you’ve melted that first wax paper masterpiece, your brain just starts popping with ideas. I mean, who knew shaving crayons could unlock a whole new world of flower art?
But here’s the thing—I used to stick with basic circles and blobs (no judgment if you’re in the same boat). Then one rainy Saturday, my kid brought over a daisy cookie cutter and was like, “Can we use this?” Game. Changer.
🌼 Use Cookie Cutters as Flower Templates
If you want your flowers to actually look like flowers, cookie cutters are magic. Think tulips, daisies, roses—heck, even star shapes work if you call them “cosmic blooms.” 😂 Just press them gently into the wax paper once it’s cool and cut around the edges.
If you’re more freehand (or forgot cookie cutters exist), sketch your flower shapes on the top layer of wax paper with a washable marker before you cut. Easy peasy.
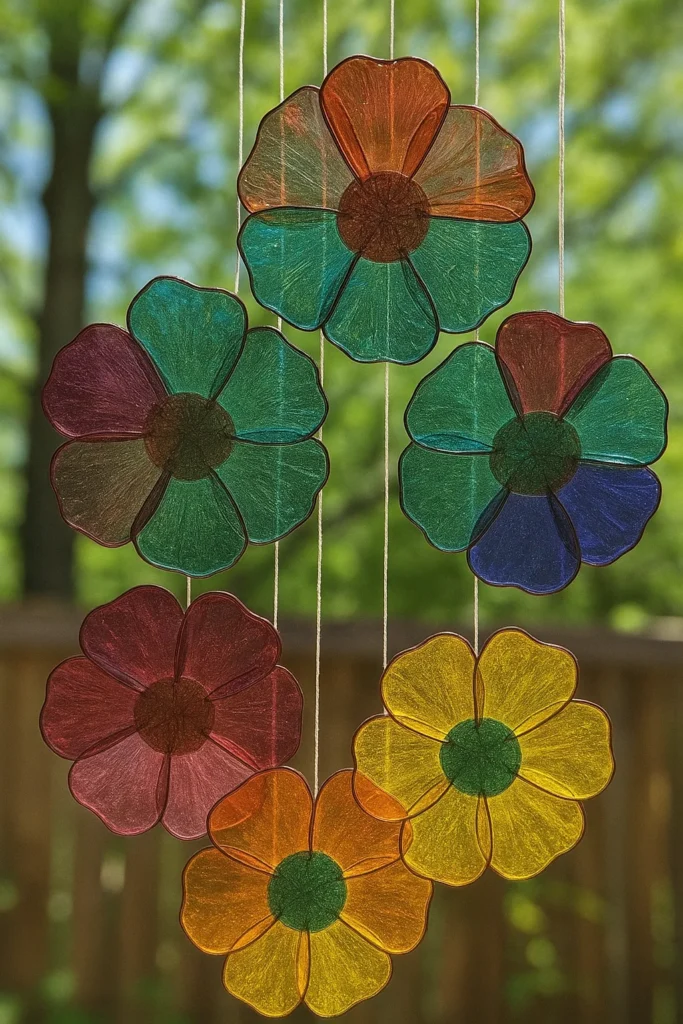
🎨 Blend Warm and Cool Crayon Colors
Here’s where it gets juicy. If you just toss red and green shavings next to each other, you’ll get brown. Not exactly suncatcher goals. So try these combos:
- Pink + purple = dreamy petals
- Yellow + orange = sunny marigold vibes
- Blue + green = cool leaf blends
- Red + yellow = fiery hibiscus energy
I once layered red-orange-yellow from center to petal tips—looked just like a flame burst. I was weirdly proud.

✨ Add Texture with Glitter & Tissue Paper
If you want sparkle, go for glitter—but like, the fine kind. A little goes a long way. Or try tiny bits of tissue paper sandwiched inside for a soft, watercolor look. I even used gold confetti once (leftover from New Year’s) and it gave the flower an almost 3D shimmer.
Want serious pop? Use metallic crayons. Just know they melt differently, kind of like they’re in slow-mo. But the shine? Worth it.
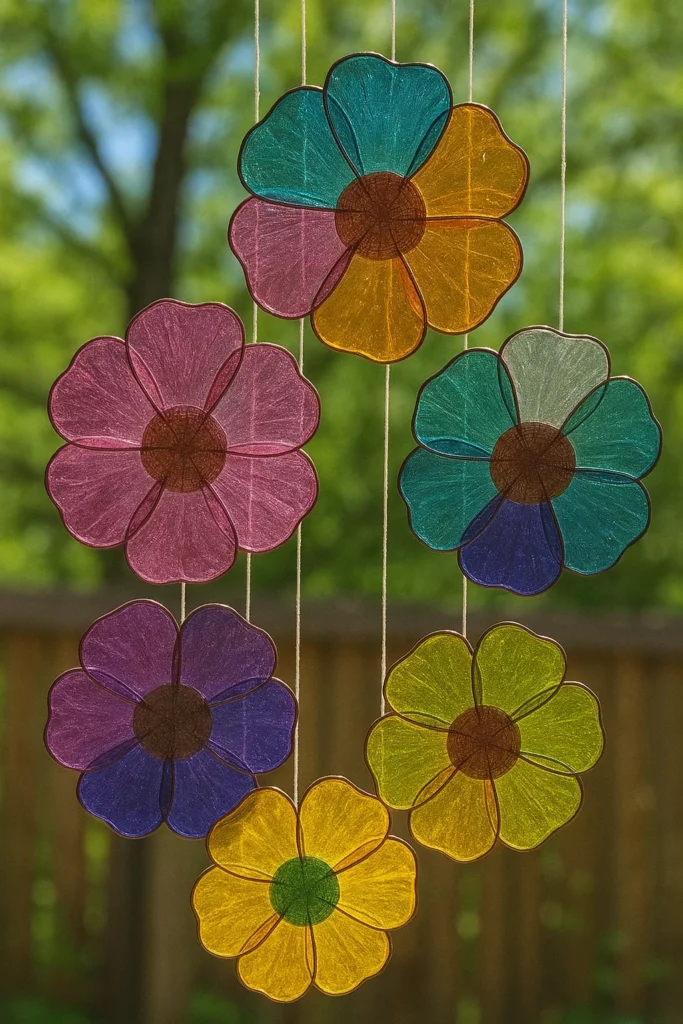
🌸 Make Layered Petals
Cut two or three different-sized flowers and layer them with a glue dot or clear tape. Boom—dimensional flower! Stack contrasting colors for that “wow” factor. I did pink on purple with a yellow center once and it looked like something from a botanical art exhibit. (Okay, maybe a kid’s version, but still.)
Experimenting with flower suncatcher designs is like mixing art with sunlight and a little magic. There’s no perfect flower. Just play with shape, color, texture—and don’t be afraid to mess up. Honestly, some of my “mistakes” turned out cooler than the ones I planned.
Hanging and Displaying Your Wax Paper Suncatchers
Once you’ve cut out your colorful little masterpieces, it’s time for the best part—showing them off! This is where all your creativity (and crayon mess) finally pays off. I remember the first time I hung one in our kitchen window… the sunlight hit it just right and my five-year-old literally screamed, “It’s glowing!” Pretty sure the neighbors heard.
Now I hang these things all over the place—bedroom windows, sliding glass doors, even the porch if the weather’s good. Here’s what I’ve learned works best:
🪟 Pick Sunny Windows
I used to hang them wherever looked cute. Then I realized—sunshine is everything. South-facing windows work best, or any spot that gets bright, natural light for at least a few hours a day.
Avoid rainy-day windows or areas with lots of shade. Without light shining through, they lose that stained-glass magic and just look like melted crayon puddles. Ask me how I know 😬.
🧵 Use Clear Thread or Fishing Line
If you want that floating flower vibe, go with fishing line or clear thread. Just punch a hole near the top of your suncatcher (standard hole punch works fine) and tie a loop. You can tape it to the top of the window frame, curtain rod, or even a suction hook.
For younger kids, colorful yarn works too. It’s easier for small hands to tie—and if the suncatcher falls, no biggie. They’re super light.
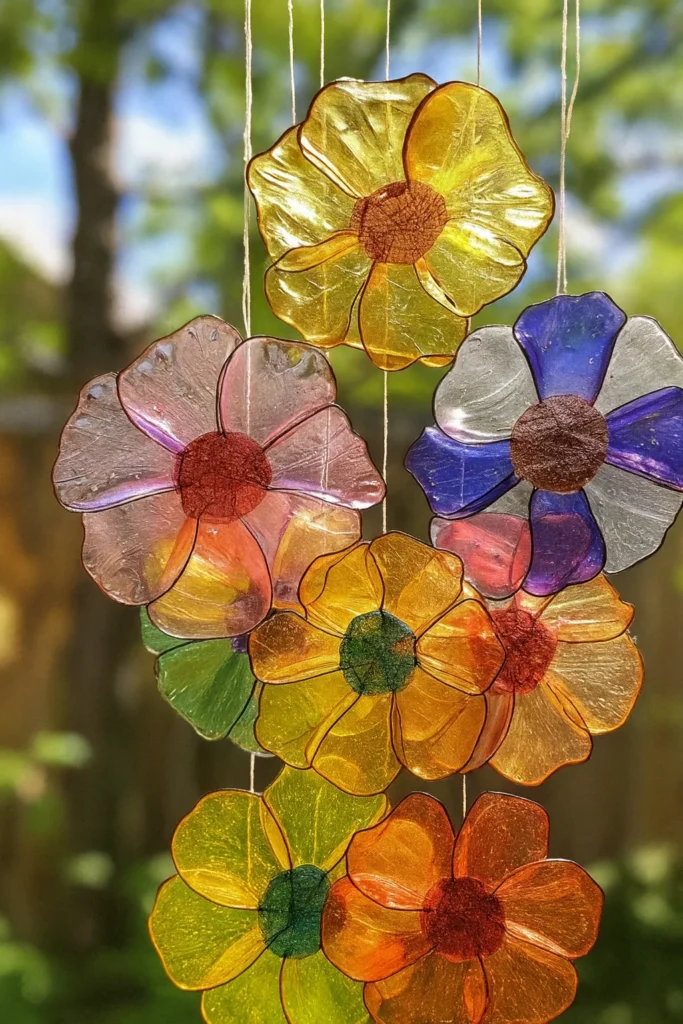
🧺 Group Displays = WOW Factor
Here’s a trick I learned after doing this project with a group of kids: hang multiple suncatchers together in clusters. Like a suncatcher bouquet. It makes the whole window come alive.
Try mixing shapes and sizes, maybe add some leaf shapes in between flowers. I’ve even seen people string them like a garland. Total Pinterest-worthy moment.
📏 Layer at Different Heights
Hanging your suncatchers at different levels adds instant charm. I cut the string at different lengths and tape them inside the window so they don’t swing around too much. (Especially important if you’ve got a cat who thinks they’re toys.)
One time I accidentally cut three the exact same length and they just clumped together. Not a great look. Vary it up!
So go ahead—light up that window! Seeing those flower suncatchers catch the sun is seriously one of those small, feel-good moments that never gets old. Every time I walk by, I smile.
And there you have it—wax paper flower suncatchers, from crayon bits to full-blown sunshine art. I’ve done a lot of crafts with my kids over the years (some wins, some… total disasters), but this one? This one hits different. It’s simple, mess-friendly, and the results are so beautiful you’ll want to leave them up year-round.
Plus, it’s not just about the final product. It’s about creative learning, fine motor skills, color theory, even a little science when the wax melts. And let’s be real—it’s just plain fun.
Whether you make one, five, or fill every window in your house, these DIY suncatchers bring a splash of happy to any room. And if you’ve got a classroom, a craft table, or just a sunny spot by the sink? You’ve got the perfect place to hang one.
So go on—grab your wax paper, raid the crayon bin, and start melting.
And hey—don’t keep those masterpieces to yourself!
Snap a photo of your favorite design, upload it to Pinterest, and inspire someone else to create their own glowing blooms. Add a little glitter if you’re feelin’ fancy. Trust me, your windows (and your feed) will thank you.

Hi!
I love the idea of these, but cannot figure out how you outlined each petal or how you managed to make clearly round centers. Also, did you make the petals and centers separately and then overlap them together before ironing?
Many thanks for your help!