

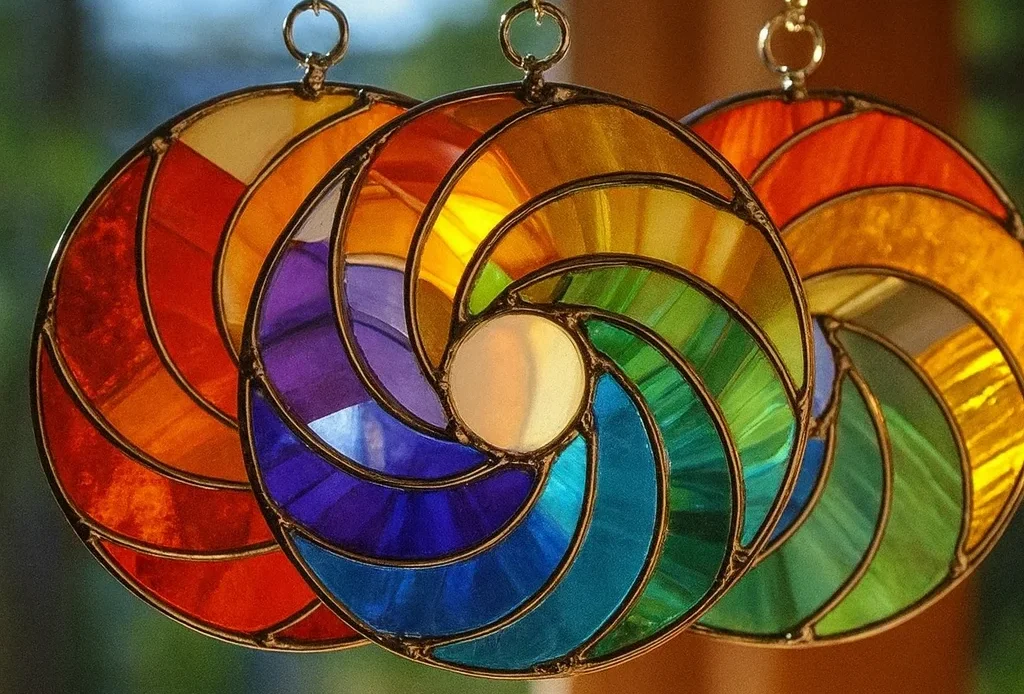
Ever wonder what to do with that dusty stack of old CDs? Here’s a bright idea—turn them into Upcycled CD Suncatchers! 🌈 This colorful DIY craft is more than just beautiful window art—it’s a hands-on science lesson for kids and a super fun rainy-day activity. I first stumbled across this when cleaning out a drawer, and now I’ve got a rainbow dancing across my kitchen every morning! You’ll learn about light refraction, color mixing, and creative reuse—all while giving forgotten tech a sparkling second life.
Supplies You’ll Need for Upcycled CD Suncatchers
I’ve tried a lot of DIY crafts for kids over the years, but this one? Total game changer. It’s colorful, surprisingly relaxing, and yes—eco-friendly too. The best part? You probably already have most of the stuff at home. If not, everything is super cheap or easy to grab at a dollar store or on Amazon.
My First Fail (and Fix)
The first time I tried this, I didn’t clean the CDs…big mistake. The glue peeled off like sunburned skin. Not pretty. So here’s pro tip #1: wipe your discs down with rubbing alcohol first. That gets rid of any weird dust or finger grease that’ll mess with the glue sticking.
Here’s exactly what you’ll need:
- Old CDs or DVDs – I used some old Backstreet Boys discs (don’t judge). Anything shiny works.
- Clear School Glue – Elmer’s is my go-to. Don’t use white glue—it turns cloudy and ruins the effect.
- Liquid Watercolors or Food Coloring – Bright colors pop better when the sun hits them.
- Cotton Swabs, Toothpicks, or Tiny Brushes – Swabs are great for kids; toothpicks are perfect for detail work.
- Yarn, Ribbon, or Pipe Cleaners – For hanging your masterpiece.
- Extras (Optional but fun): Glitter glue, sequins, metallic acrylic paint, or beads.
Why It’s Worth It
This craft isn’t just cute—it’s one of the best zero waste crafts I’ve tried. You’re literally taking something that would’ve hit the landfill and turning it into rainbow art. And if you’ve got kiddos? It keeps them busy and teaches them about light refraction and creative reuse.
Practical Tip: Pre-Setup = Sanity Saver
If you’re doing this with multiple kids (I tried it at a birthday party once), pre-cut the yarn and lay everything out like a craft buffet. Makes things smoother. Less fighting over the glitter glue, too.
Also, keep a cookie tray underneath the CDs when the glue is drying. I once set them on newspaper and it fused to the bottom. Not fun.
Step-by-Step Guide to Creating Your CD Suncatchers
Alright, let’s get into the real fun—the part where you turn a boring old disc into a total light show. Trust me, even if you’re not a “crafty” person (I hear that a lot), this is stupid simple. And the end result? Totally Instagram-worthy. 🌈
Step 1: Clean the CD (Seriously, Don’t Skip This)
So I mentioned this before, but it’s worth repeating: clean the shiny side of your CD with rubbing alcohol. I skipped this once and the glue literally slid right off. Wasted an entire bottle of glitter glue and almost cried.
Step 2: Add Glue Like You’re Frosting a Cupcake
Spread a thick, even layer of clear school glue over the shiny side. I use an old brush, but you can also use a cotton swab. Think of it like frosting a cupcake—you want that nice smooth coat.
Pro Tip: Don’t skimp. Too little glue and your colors won’t blend properly. Too much, and you’ll be waiting forever for it to dry. Find that sweet spot.
Step 3: Add Your Color Magic
Now comes the fun part. Drop in your watercolors or food coloring right on the glue. Try swirls, dots, or even stripes. My kid once made a galaxy theme with purple, blue, and silver glitter—looked like something out of a NASA photo.
Use toothpicks or cotton swabs to swirl the colors around. It’s part art, part science experiment.
Step 4: Let It Dry (This Part Tests Your Patience)
Set your decorated CDs somewhere flat where they won’t be disturbed for at least 48 hours. I once checked on one too soon and stuck my thumb right into a wet swirl—instant regret.
If it’s humid where you live, give it a full 72 hours. Don’t rush it. You’ll know it’s ready when the glue goes totally clear and you can see all the colors popping through.
Step 5: Add a Hanging Loop
Punch a small hole near the top with a hole puncher. Thread some ribbon, yarn, or pipe cleaner through it and tie a knot. Done! You’ve got yourself a legit piece of eco-friendly home decor.

Bonus: Want It to Last Outside?
Spray the finished piece with clear acrylic sealant or brush on some outdoor Mod Podge. That’ll help it survive the weather if you hang it on a porch or balcony. (Just don’t forget to do this outside. I learned that the smelly way.)
This whole project is one of my go-to easy crafts for children because it blends art, science, and sustainability. Plus, it’s mess-friendly and low-cost—two of my favorite things when it comes to DIY kids crafts.
Science Behind the Sparkle: How Suncatchers Work
Okay, I’ll admit—I originally did this craft just to keep the kids busy on a rainy Sunday. But when we hung them in the window and those wild rainbow beams started bouncing across the kitchen? We were all wide-eyed. Even my husband, who never notices this stuff, was like, “Whoa, that’s kinda cool.” 😆
So let’s talk about the magic behind the rainbow.
It’s All About Light Refraction
Those CDs? They act like tiny mirrors that split sunlight into different wavelengths. When you coat the shiny surface in clear glue, you’re not just making it pretty—you’re creating little lenses that bend the light. Boom—light refraction in action. It’s literally science class on a string.
And because CDs already have microscopic grooves, they diffract the light into a spectrum. That’s what causes those dancing rainbow patterns on your walls and floor. Kids don’t just love it—they ask why, which turns it into a stealthy STEAM project.
A Teachable Moment (That Doesn’t Feel Like School)
When I did this with my niece, she got super curious about why the CD made colors “without paint.” That gave me a chance to break out the ol’ flashlight and show her how light bends. We even made a mini rainbow light experiment using just a glass of water and a flashlight. She thought I was a genius. I didn’t correct her.
Pro Tip: If your kids are older, turn it into a full-on experiment. Use different kinds of light—LED, flashlight, sunlight—and see which creates the strongest rainbows. Have them log their observations. Boom—science activities for kids that are actually fun.
Why This Matters
There’s something special about teaching science through hands-on fun. These suncatchers aren’t just cute window decorations—they’re entry points to bigger ideas. Physics, sustainability, even art theory.
And let’s be honest, it feels really good when your kid goes, “Wait, we made this from trash and it teaches science?” Yep. That’s a parenting win.
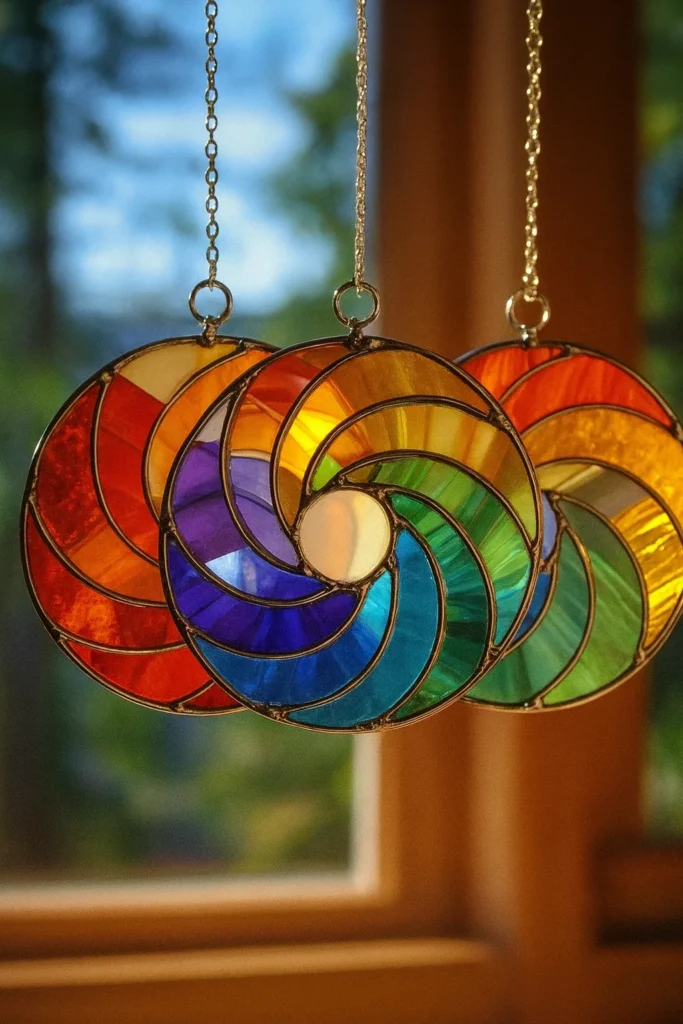
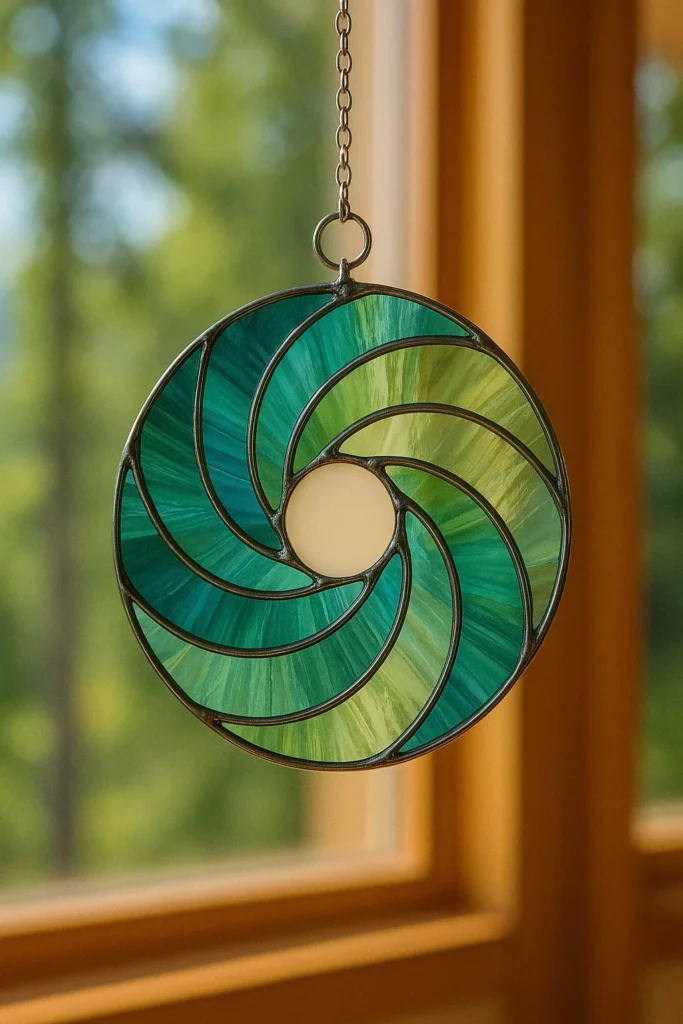
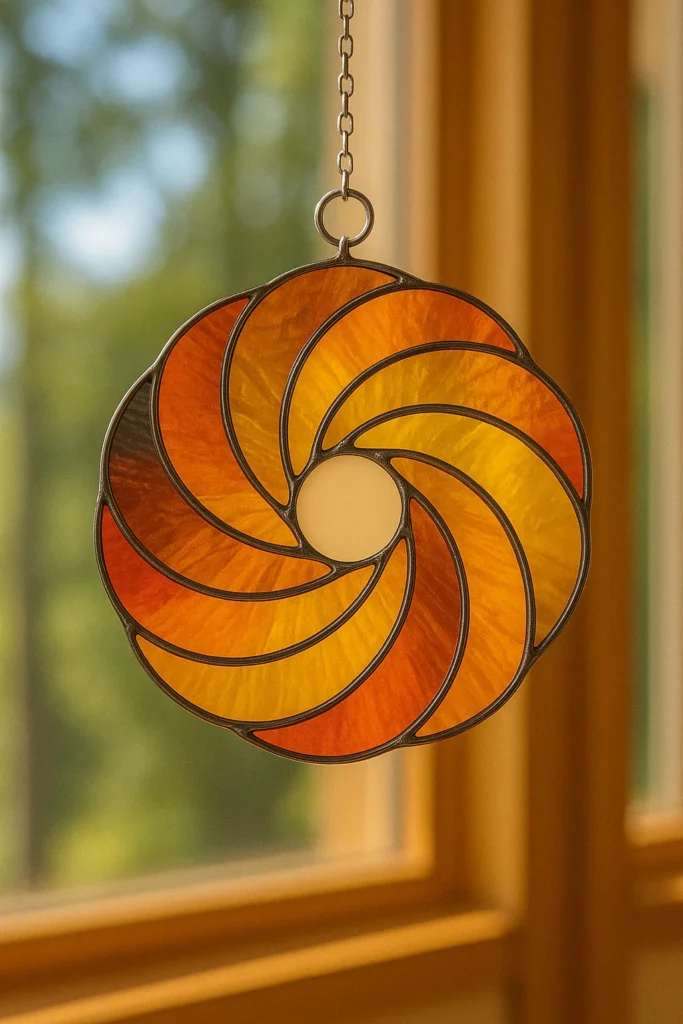
Creative Display Ideas for Your Suncatchers
Once your CD suncatchers are dry and sparkling, the big question hits—where do I hang these things?! Don’t just toss them in a drawer (guilty)—these beauties are made to shine. And trust me, the way they light up a room on a sunny day? Pure magic.
The Sunny Window Trick
Hands down, the best spot is a south-facing window (if you’re in the northern hemisphere). That’s where the sunlight streams in strongest. I hung a few above my kitchen sink and every morning the whole counter lights up like a disco ball. Instant joy while washing dishes.
Use suction cup hooks or fishing line if you want a “floating” look. Or tie them to curtain rods with colorful ribbon for a more playful vibe. I’ve even used washi tape when I ran out of hooks—don’t judge me, it worked.
Create a Suncatcher Mobile
If you’ve made a bunch (which, let’s be honest, you probably will), group them into a hanging mobile. I made one using an old embroidery hoop and some twine. Hung it on the porch and now it’s my favorite piece of DIY window decor. Looks like art, cost me zero dollars.
Pro Tip: Mix in other elements like beads or feathers for extra texture. My kids added star stickers and named theirs “galactic catchers.” The creativity just snowballs.
Decor Ideas for Parties or Gifts
These also make ridiculously cute handmade gifts. Add a little note like “You light up my life” and you’ve got yourself a sweet birthday or teacher present. I even used them as party favors once at a nature-themed birthday—total hit.
Also, you can turn them into holiday ornaments. Paint snowflakes or hearts, use red and green ribbon for Christmas, or make a rainbow theme for Pride Month. So many ways to adapt them.
Outdoor Display? Here’s How
If you want to hang them outside (think porch, patio, or even a tree branch), just seal them first. A few sprays of clear acrylic sealant or a coat of outdoor Mod Podge and they’re good to go. We put some in the backyard and now it’s like we have mini rainbow fairies dancing around every afternoon. ✨
Bottom line? These suncatchers are more than just rainbow crafts for kids—they’re tiny, twinkly pieces of eco-friendly art that can totally brighten your home and mood. Plus, you get bragging rights every time someone says, “Wait—you made that?”
Eco-Friendly Lessons for Kids Through Craft
This project isn’t just artsy—it’s eco-conscious parenting gold. When I first pulled out a stack of scratched-up CDs and told my daughter we were going to turn them into rainbows, she looked at me like I’d lost it. But once we finished the first one and hung it in the window? She was hooked.
From Trash to Treasure
There’s something powerful about showing kids that trash doesn’t have to be trash. These old CDs were once junk, destined for a landfill. Now? They’re hanging in our living room, catching sunlight and turning it into art. It’s a perfect entry point into sustainable DIY projects—especially for kids who are visual learners.
We talked about how long plastic takes to break down, how electronics get tossed way too fast, and how we can do better. No lectures. Just real-life, hands-on action. That’s the kind of lesson that sticks.
Green Crafts That Actually Teach
If you’re into green crafts for kids, this one’s a winner. You’re covering:
- Creative reuse – turning something old into something new
- Light science – how refraction works and why we see rainbows
- Fine motor skills – painting, swirling, gluing, and decorating
- Patience – because that 72-hour drying period is a beast
And the best part? You don’t have to force the conversation. While they’re swirling colors or waiting for glue to dry, that’s your moment to ask things like, “What else do you think we could reuse?” or “What if everything had a second life?”
When It Clicks
One of my favorite moments was when my son asked, “So… does this mean we shouldn’t throw old stuff away just ‘cause it’s old?” YES, child. YES. That’s the whole point. These kinds of recycling lessons for children are sneakily powerful. They’re not just learning about art or light—they’re learning values. Responsibility. Mindfulness. The good stuff.
In a world of fast everything, sitting down to do a DIY eco-craft like this is grounding. It slows things down, gives your brain a break from screens, and—bonus—you end up with a gorgeous window full of rainbows. 🌈
So, what started as a dusty old stack of CDs turned into… well, magic. These DIY suncatchers didn’t just light up my windows—they sparked curiosity, creativity, and some pretty awesome conversations about science and sustainability.
We didn’t just make something—we learned. About light. About reuse. About how even junk has potential when you look at it a little differently.
If you’re a parent, teacher, or just someone looking to add a little sparkle to your space, I highly recommend giving this project a go. It’s low-cost, low-stress, and high-impact. Plus, it makes for some seriously dreamy eco-friendly home decor that’ll have everyone asking, “Where’d you get that?!”
👉 Pin this project on Pinterest so you don’t forget it—and share the joy (and the rainbows) with your friends. Let’s turn more trash into treasure, one CD at a time.
