

Welcome to the definitive guide that will forever change your weeknight dinner game. This is your masterclass in transforming the humble chicken thigh into a culinary masterpiece.
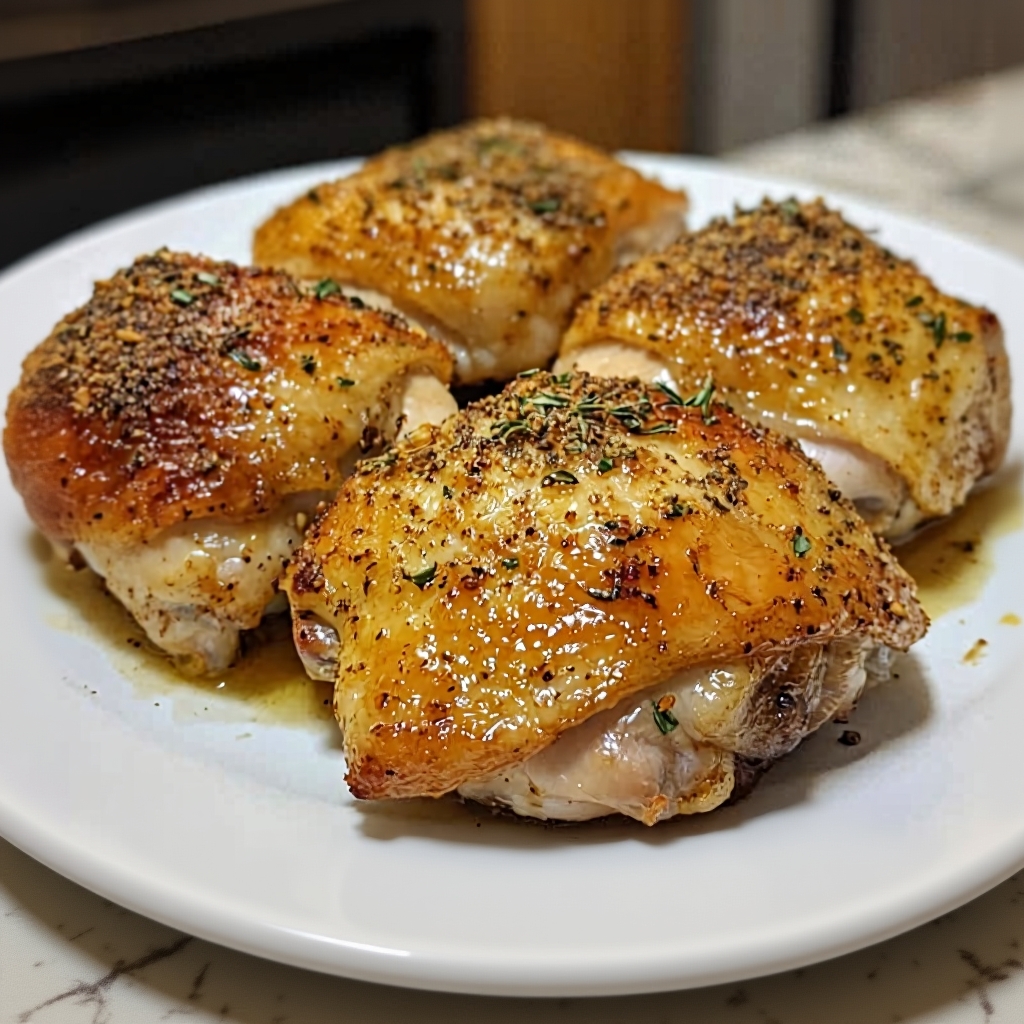
Imagine the sound: a loud, satisfying crackle as your fork shatters a perfectly golden, brittle layer of chicken skin. Beneath this incredible crust, you discover impossibly succulent, flavorful meat so tender it practically melts in your mouth. This isn’t a fantasy dish from a high-end restaurant; this is the Crispy Baked Chicken Thighs you are about to master in your very own kitchen. For far too long, home cooks have been plagued by the common pitfalls of baking chicken: soggy, rubbery skin, bland flavor, or worst of all, dry, disappointing meat. Those days are officially over.
This guide is your promise, a detailed culinary roadmap to achieving flawless, consistent results every single time. We will demystify the entire process, revealing the simple science behind achieving that coveted crispy skin and juicy interior. Using nothing more than a few pantry staples and the correct technique, you will learn how to make oven baked chicken thighs that are not just good, but legendary. Prepare to become the hero of your dinner table.
Why This Will Be Your Favorite Chicken Recipe
Before we dive into the step-by-step process, let’s explore why this specific method for making Crispy Baked Chicken Thighs will become your new go-to. It’s more than just a set of instructions; it’s a formula for success built on a foundation of simplicity, flavor, and incredible versatility.
- Effortless Simplicity: In a world of overly complicated recipes with long ingredient lists, this one stands out for its sheer ease. You need about 10 minutes of active preparation time and a handful of spices you likely already have in your pantry. There are no intimidating culinary techniques or special skills required. It’s a simple oven baked chicken thighs recipe that delivers gourmet-level results, making it the perfect solution for busy weeknights when you crave something wholesome and deeply satisfying without the stress.
- The Perfect Texture Combination: The true magic of this dish lies in its magnificent textural contrast. We are not just making baked chicken; we are engineering a complete sensory experience. You get the loud, satisfying crunch of the crispy skin chicken thighs, which immediately gives way to the supremely moist, tender dark meat underneath. It’s a culinary juxtaposition that never, ever fails to impress and satisfy even the most discerning palates.
- Incredibly Flavorful: Say goodbye to bland, one-note chicken forever. The specific spice blend we use is a balanced symphony of savory, smoky, and earthy notes. It’s meticulously designed not just to sit on the surface, but to form a flavorful crust that locks in the chicken’s natural juices, infusing every single bite with incredible flavor. This is more than just salt and pepper; it’s a purposeful blend that elevates the humble chicken thigh to glorious new heights.
- Ultimate Versatility: Think of this recipe as your kitchen’s secret weapon. It’s fast and easy enough to be a staple easy weeknight chicken thigh recipe, yet it’s so delicious and visually stunning that it’s impressive enough to serve to dinner guests on a Saturday night. Furthermore, these chicken thighs are a meal prepper’s dream. They hold up beautifully in the fridge and reheat perfectly (if you follow our instructions!), making them a fantastic component for salads, wraps, and future meals throughout the week.
- Budget-Friendly and Delicious: Let’s be practical. Chicken thighs, especially the bone-in, skin-on variety we insist upon, are one of the most affordable and flavorful cuts of meat you can buy. This recipe is definitive proof that you do not need to spend a fortune to create a truly memorable, crave-worthy, and satisfying meal. It’s a budget-friendly meal that tastes like a million bucks.
Recipe: The Best Crispy Baked Chicken ThighsINGREDIENTS:
|
The Anatomy of Perfect Flavor: Your Ingredient Checklist
Great cooking is about understanding the “why” behind each ingredient. When you know the role each component plays, you’re not just following a recipe; you’re mastering a technique. Let’s break down the simple yet powerful cast of characters that come together to create the best crispy baked chicken thighs recipe.
Chicken Thighs: The Unsung Hero (Bone-In, Skin-On is Non-Negotiable)
The foundation of our dish is the chicken itself, and the choice of cut is paramount. For this recipe, you absolutely must use bone-in, skin-on chicken thighs. This is not a mere suggestion; it’s the core principle for achieving the dual holy grail of crispy skin and juicy meat.
- Why Bone-In? The bone is a flavor engine. As the chicken bakes, the marrow and collagen within the bone slowly render, infusing the surrounding meat with a deep, rich, savory flavor that you simply cannot replicate with a boneless cut. Furthermore, the bone acts as an insulator, helping the meat cook more evenly and slowing down the cooking process just enough to prevent the thigh from drying out. It’s a built-in safeguard for ultimate juiciness.
- Why Skin-On? The skin is where all the crispy magic happens. It serves two critical functions. First, it acts as a protective, self-basting blanket, shielding the delicate meat from the direct, intense heat of the oven and effectively locking in moisture. Second, as it bakes at high heat, the fat within the skin renders out. This rendering process is what transforms the skin from a soft, pliable layer into the golden, brittle, and utterly delicious crust we’re aiming for. Without the skin, you simply cannot have crispy skin chicken thighs.
When you’re at the butcher counter, look for thighs that are plump and have an even, generous layer of skin. Try to select pieces that are similar in size to ensure they all cook at the same rate.
The Fat: Why Olive Oil is a Great Choice
A light coating of fat is essential before the spices go on. Our preferred choice is a good quality olive oil. Its role is threefold: it helps the spice rub adhere evenly to the entire surface of the skin, it promotes browning by conducting heat efficiently, and it adds its own subtle, fruity flavor to the final dish. The oil kickstarts the crisping process, ensuring the skin begins to sizzle and brown the moment it hits the hot oven. If you don’t have olive oil, avocado oil is an excellent substitute due to its high smoke point and neutral flavor. For a richer, more decadent result, you could even use melted unsalted butter.
The Ultimate Spice Rub: A Symphony of Savory Flavors
This isn’t just a random mix of spices; it’s a carefully balanced seasoning blend designed for maximum impact. Each component plays a specific role in building a complex flavor profile that perfectly complements the rich taste of dark meat chicken.
- Garlic Powder & Onion Powder: These are the undisputed workhorses of the savory world, providing a deep, aromatic, and foundational base of flavor. We use powders instead of fresh garlic or onion because fresh versions contain too much moisture and natural sugar, causing them to burn and become bitter under the high heat required for this recipe. Powders give you all the robust flavor without any risk of scorching.
- Smoked Paprika: This is the secret weapon for color and flavor. Unlike sweet or hot paprika, smoked paprika is made from peppers that have been slowly smoked and dried over oak fires. It imparts a beautiful, rich, reddish-brown color to the chicken skin and adds a wonderful, subtle smokiness that mimics the flavor of food cooked over an open flame. It’s the key to that “wow” factor.
- Dried Thyme: To balance the savory and smoky notes, we add dried thyme. Its earthy, slightly minty, and herbaceous character cuts through the richness of the chicken fat and adds a touch of classic, rustic elegance. It’s a flavor that is intrinsically linked with perfectly roasted poultry.
- Salt & Black Pepper: These are the non-negotiable flavor enhancers. Coarse salt is particularly important. Beyond just making the chicken taste seasoned, salt plays a crucial scientific role in crisping the skin. It draws moisture out from the skin through osmosis, helping to dry the surface before it even enters the oven. A drier surface crisps up faster and more effectively. Freshly ground black pepper adds a gentle, pungent heat that rounds out the entire flavor profile.
Gearing Up: The Right Tools for the Job
A master craftsman is only as good as their tools. While this recipe is beautifully simple, using the right equipment will eliminate variables and guarantee your success. Investing in a couple of key items will make the difference between good chicken and truly exceptional Crispy Baked Chicken Thighs.
Your Baking Vessel: Baking Sheet vs. Cast-Iron Skillet
Where you cook the chicken matters greatly. You have two excellent options, each with a slightly different result:
- The Baking Sheet with a Wire Rack: This is arguably the best method for ensuring maximum, all-over crispiness. By placing a simple wire rack inside a rimmed baking sheet, you elevate the chicken thighs. This allows hot air to circulate completely around each piece, top to bottom. The result is skin that is crispy on top and sides that aren’t soggy. The fat drips down onto the baking sheet below, preventing the chicken from stewing in its own juices. For incredibly easy cleanup, line the baking sheet itself with aluminum foil.
- The Cast-Iron Skillet: If you desire a deep, dark, ultra-crispy bottom crust, a cast-iron skillet is your best friend. Cast iron is prized for its incredible heat retention and even distribution. Preheating the skillet along with the oven creates a searing hot surface that immediately starts crisping the skin on contact, similar to pan-searing. This method produces a wonderfully rustic and deeply browned result, though the top may be slightly less crisp than the wire rack method.
The Most Important Tool: A Digital Meat Thermometer
If you buy only one tool for your kitchen this year, make it a reliable instant-read digital meat thermometer. It is the only way to guarantee perfectly cooked chicken—not just for safety, but for unparalleled quality. It completely removes all guesswork. You’ll never have to wonder if your chicken is done, cut into it to check (and lose all those precious juices), or risk serving undercooked or overcooked meat ever again. For achieving consistently juicy baked chicken thighs, a meat thermometer is an absolute, non-negotiable game-changer.
Expert Takeaway: The secret to perfectly cooked poultry isn’t time; it’s temperature. A meat thermometer is your only path to juicy, safe, and flawless results every single time.
Cooking a Masterpiece: Your Step-by-Step Instructions
Now that you understand the “why” behind the ingredients and tools, it’s time to execute. Follow these detailed steps, paying close attention to the pro-tips, to create your own platter of perfect Crispy Baked Chicken Thighs.
Step 1: Prepare the Oven and Pan (The Foundation of Crispiness)
First things first, preheat your oven to 425°F (220°C). Position an oven rack in the upper-middle position. This high, consistent heat is the cornerstone of the entire recipe. The goal is to render the fat from the skin as quickly as possible. If the temperature is too low, the fat will render slowly, and the meat will overcook long before the skin has a chance to get crispy. The Why: High heat creates an initial shock, causing the skin to tighten and begin crisping immediately. Pro-Tip: Don’t trust your oven’s “preheated” beep! Most ovens are not truly at temperature when they first signal they are ready. Allow your oven to preheat for a full 15-20 minutes to ensure the internal environment is thoroughly and evenly heated. While it preheats, prepare your baking sheet by lining it with foil and placing a wire rack on top.
Step 2: The Most Crucial Step – Pat the Chicken Dry
This step is deceptively simple, but it is the single most important action you will take for achieving shatteringly crispy skin. Take your chicken thighs out of the packaging and use several sheets of paper towels to pat every surface of each thigh completely dry. Get the top, the bottom, and in any crevices you can find. The Why: Moisture is the mortal enemy of crispiness. The oven’s energy is finite. If the skin is wet, the oven must first expend its energy to evaporate all that surface water. Only after the water is gone can the energy go toward rendering fat and browning the skin. By starting with a bone-dry surface, you give the crisping process a massive head start. Don’t be gentle; be thorough. You want the skin to feel dry and tacky to the touch.
Step 3: Mix the Spices and Season Generously
In a small bowl, combine your spice rub: the garlic powder, onion powder, smoked paprika, dried thyme, coarse salt, and freshly ground black pepper. Give it a good mix with a fork to ensure it’s evenly distributed. First, drizzle the bone-dry chicken thighs with olive oil. Use your hands to rub the oil all over each piece, ensuring a thin, even coating. This oil will act as a binder for our spice rub. Now, take your spice mixture and sprinkle it generously over all sides of the chicken. The Why: The two-step process of oil then spices ensures the seasoning sticks perfectly. Don’t be shy with the seasoning; you want to create a thick, flavorful crust. Pro-Tip: Use your hands to really massage the spices into the chicken. If you can, gently lift the edges of the skin and work a little bit of the seasoning directly onto the meat underneath without tearing the skin. This adds another layer of flavor deep inside the thigh.
Step 4: Arrange on the Pan and Bake
Arrange the seasoned chicken thighs on your prepared wire rack, ensuring they are all skin-side up. This is critical—they should remain skin-side up for the entire duration of the bake. Crucially, leave some space (at least an inch) between each thigh. The Why: Overcrowding the pan is a common mistake that leads to steaming, not roasting. When pieces are too close together, they trap moisture, creating a steamy environment that results in pale, soggy skin. Proper spacing ensures hot air can circulate freely, which is essential for even cooking and crisping. Place the pan in your fully preheated oven and bake for 35-40 minutes. The exact how long to bake chicken thighs at 425 will depend on the size of your thighs. Pro-Tip: During the last 10 minutes of baking, you’ll start to hear the satisfying sound of the chicken fat sputtering and sizzling. You’ll see the skin pulling taut and turning a deep golden-brown. These are the beautiful sights and sounds of success!
Step 5: The Optional Broiler Finish for Extra Crispy Skin
After 35-40 minutes, your chicken skin should be well on its way to crispy perfection. If you want to give it a final “turbo-charge,” you can use the broiler. Move the oven rack to a higher position (about 6 inches from the broiler element) and broil for an additional 2-3 minutes. Warning: This step requires your undivided attention. The high, direct heat of the broiler can take the spices from perfectly browned to burnt in a matter of seconds. Do not walk away. Watch it like a hawk until the skin is bubbly, blistered, and perfectly crisp.
Step 6: The Final, Crucial Rest
Once the chicken reaches the correct internal temperature and the skin is gloriously crisp, remove the pan from the oven. Immediately transfer the chicken thighs to a clean cutting board or plate and let them rest the meat for at least 5-10 minutes before serving. The Why: This step is just as important as any other. While cooking, the muscle fibers in the meat tighten up and push all the juices toward the center of the thigh. Resting allows those fibers to relax and the juices to redistribute evenly throughout the entire piece of meat. If you slice into it immediately, all that flavorful juice will run out onto your plate, leaving you with dry, less flavorful chicken. Patience here pays off in juiciness.
Building the Perfect Plate: Serving Suggestions
Now that you have your star protein, it’s time to build a complete and satisfying meal. These Crispy Baked Chicken Thighs are incredibly versatile and pair beautifully with a wide variety of sides.
Starchy Sides
- Creamy Mashed Potatoes: The ultimate comfort food pairing. The crispy chicken skin and savory pan drippings are a perfect match for fluffy, buttery mashed potatoes.
- Garlic Roasted Potatoes: Efficiency at its best! You can chop up some potatoes, toss them with olive oil, salt, and pepper, and roast them on the same baking sheet right alongside the chicken for a one-pan wonder.
- Fluffy Rice or Quinoa: A simple bed of steamed rice or quinoa is perfect for soaking up any of the delicious chicken juices that escape onto the plate.
Vegetable Pairings
- Garlic Roasted Broccoli or Asparagus: Similar to the potatoes, you can toss your favorite green vegetable with a little oil and seasoning and roast it for the last 15-20 minutes of the chicken’s cooking time for an easy side.
- A Simple Green Salad: A crisp green salad with a bright, acidic vinaigrette provides a refreshing and necessary contrast to the rich, savory chicken.
- Sautéed Green Beans with Almonds: A quick and elegant side dish that adds a lovely crunch and freshness to the plate.
Sauces and Drizzles
- Simple Pan Gravy: Don’t let those flavorful drippings (the “fond”) on the bottom of the pan go to waste! You can easily make a quick pan gravy by whisking a little flour into the drippings over low heat and then slowly adding chicken broth until thickened.
- Garlic Aioli: A creamy, pungent garlic aioli is a fantastic dipping sauce for both the chicken and any roasted potato side.
- Hot Honey Drizzle: For a modern, sweet-and-spicy kick, a generous drizzle of hot honey over the crispy skin right before serving is absolutely divine.
Your Crispy Chicken Questions, Answered (FAQ)
Here are answers to some of the most frequently asked questions about making the perfect Crispy Baked Chicken Thighs. This section is designed to be your quick-reference troubleshooting guide.
How do I get my baked chicken thighs skin crispy?
To summarize the most critical points for guaranteed crispy skin, remember these five rules:
- Pat the skin completely dry with paper towels. Moisture is the enemy of crisp.
- Use high, consistent heat (425°F / 220°C). Don’t bake low and slow.
- Do not overcrowd the pan. Give each thigh space for hot air to circulate.
- Always bake skin-side up and uncovered. Never cover with foil.
- Use a wire rack to elevate the chicken for all-around crispiness.
What temperature should chicken thighs be cooked to?
The USDA states that chicken is safe to eat when it reaches a minimum internal temperature of 165°F (74°C). However, dark meat like chicken thighs contains more connective tissue and fat than lean breast meat. For the best possible texture (more tender and juicy), it’s actually better to cook them to a higher temperature, somewhere between 175°F and 185°F (80-85°C). This higher temperature helps break down that extra collagen, resulting in more succulent, fall-off-the-bone meat. Always measure the temperature in the thickest part of the thigh, making sure your thermometer does not touch the bone.
Can I use boneless skinless chicken thighs for this recipe?
Yes, you can, but the result will be entirely different. You will not achieve a crispy exterior since there is no skin. However, the spice rub is still delicious and the meat will be juicy. If using boneless, skinless thighs, you must reduce the cooking time significantly to about 20-25 minutes. Bake at 425°F (220°C) and cook just until the internal temperature reaches 165°F (74°C), as they can dry out more quickly without the protective skin and bone.
Why is my chicken skin not crispy and rubbery?
This is the most common issue, and it’s almost always due to one of three culprits:
- Too Much Moisture: You did not pat the chicken skin dry enough before seasoning. This is the #1 reason for soggy skin.
- Oven Not Hot Enough: Your oven was not fully preheated, or the temperature was set too low. High heat is essential to render fat quickly.
- Overcrowding: The chicken pieces were too close together on the pan. This trapped steam, preventing the skin from drying out and crisping up.
Should I bake chicken thighs covered or uncovered for crispy skin?
Always bake them uncovered. Covering the pan with foil creates a steamy sauna environment. It traps all the moisture being released by the chicken, which will steam the skin and make it soft, pale, and rubbery. Uncovered baking allows that moisture to evaporate into the oven, which is essential for the skin to dry out and become wonderfully crispy.
Can I make these in an air fryer?
Yes, absolutely! An air fryer is essentially a small, high-powered convection oven and is fantastic for making crispy chicken. Prepare the chicken thighs exactly as described in the recipe. Preheat your air fryer to 400°F (200°C). Place the thighs skin-side up in the basket (do not overcrowd) and cook for about 18-22 minutes, until the internal temperature reaches 175°F (80°C) and the skin is deeply golden and crisp. You do not need to flip them.
Your Journey to Perfect Chicken is Complete
You are now fully equipped with all the knowledge, science, and techniques needed to banish soggy skin and dry meat from your kitchen forever. You’ve learned that achieving that perfect, delicious balance of crispy skin and juicy meat isn’t about luck; it’s about following a few simple, crucial steps. This foolproof method for making Crispy Baked Chicken Thighs is more than just a recipe—it’s a core technique that will serve you well for countless delicious meals to come. Go forth, preheat your oven, and prepare to be amazed at the perfection you can create.
