

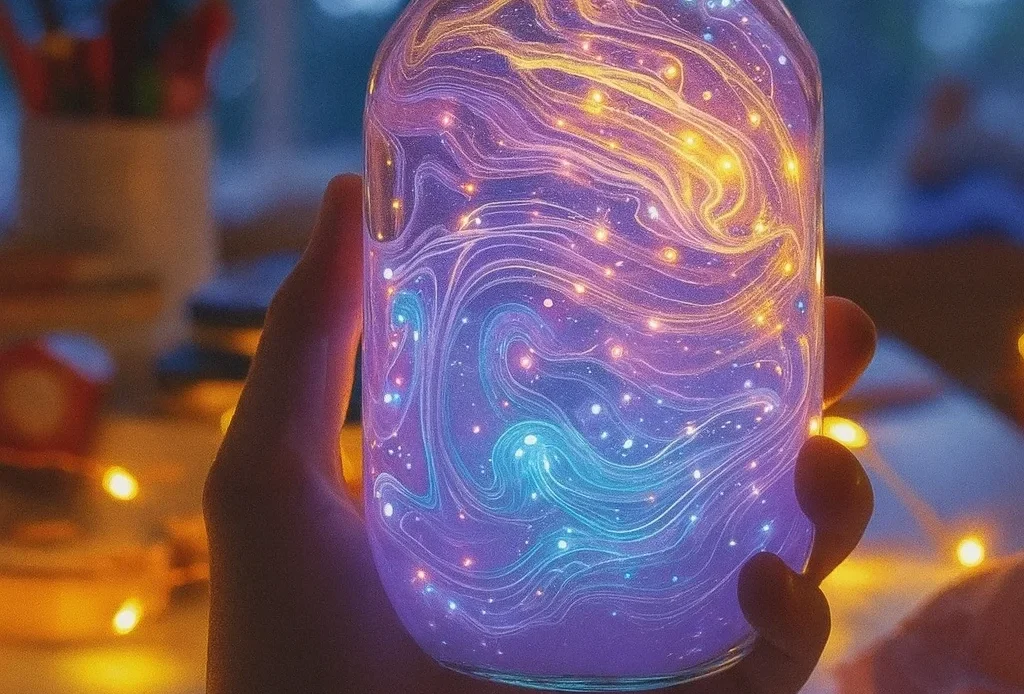
Ever wish you could capture the magic of the cosmos in a jar? 🌌 You’re in luck! Making your own glowing galaxy jar at home is not just wildly fun, it’s surprisingly simple. With just a few household items—think dish soap, glow paint, and glitter—you can create a swirling universe of your own. Whether you’re crafting with kids, decorating your room, or just indulging your inner space nerd, this DIY glow jar is a perfect mix of science and sparkle. One viral TikTok even called it “a nebula in your palm”! Ready to light up your night with a little cosmic chemistry?

Materials Needed for Your Galaxy Jar Craft
Alright, before we dive into swirling up our own little galaxy, let’s talk materials. I can’t tell you how many times I’ve started a DIY craft project thinking I had everything… only to realize I was out of glitter. Not just any glitter—fine holographic glitter, which, trust me, makes all the difference when you’re building a glowing star system in a jar.
The Must-Haves (Don’t Skip These!)
1. A clear jar with a lid
You’ll want something sturdy with a tight seal. I’ve used both mason jars and recycled pasta sauce jars—whatever you’ve got handy. Just make sure it’s clear so all that glow can shine through.
2. Clear dish soap
Not the lemon-scented kind, okay? Use clear. This creates that slow-moving, lava-lamp-like effect. I like to use about 2–3 tablespoons, depending on the jar size. Dish soap is key for that suspended, dreamy movement.
3. Glow-in-the-dark paint or glow stick liquid
Here’s where the real magic happens. Glow paint lasts longer and comes in way more colors (plus, it’s safer for little ones if you’re making this a kids science project). But hey, I’ve cracked open glow sticks in a pinch—it gets messy but works in a hurry.
4. Cotton balls or fiberfill (optional but awesome)
Wanna make it look like a real nebula jar? This is how. Cotton or fiberfill gives it that cloudy, galactic texture. I usually stretch it thin so the glow can still shine through.
5. Fine glitter
This is your starlight. I usually go for silver, blue, or gold. Pro tip? Use a combo of all three for dimension. It sparkles like mad under a blacklight.
6. Water
Just a tiny bit, to thin the soap and help everything swirl. Add too much and your galaxy will go all sloshy and sad.
7. Skewer or straw for swirling
You gotta swirl the layers, right? Don’t shake it like crazy—that turns it into a murky mess. Gently swirl with a skewer for those dreamy trails of color.
Stuff I’ve Learned the Hard Way…
I once tried using cheap glitter gel instead of actual glitter. Total fail. It just clumped up and made the whole thing cloudy. Same with using too much water—it diluted the glow and turned everything gray-ish. Not cosmic. Just… blah.
Also, I recommend doing this over a tray or newspaper. Especially if you’re letting kids get in on the fun (which you should—this makes an epic STEM activity for rainy days!).
Need ideas for where to get your glow gear? Amazon has a DIY craft kit section where I found a bundle of glow paints for under $10. Worth every penny.
Next up? I’ll show you exactly how to layer all this stuff into your jar to make it look like a baby universe. 🌌 Ready?
Step-by-Step Guide to Building Your Glowing Galaxy Jar
I’ve made these glow jars more times than I can count—birthday parties, rainy day boredom, even as a chill activity during power outages. And let me tell you, it never gets old watching a bunch of colors swirl like a mini supernova. But yeah, I’ve also messed up plenty. (Looking at you, neon pink paint that turned everything gray.) So here’s my no-fail method to get that perfect glowing swirl every time.
1. Mix Your Glowing Base
Start with 2 to 3 tablespoons of clear dish soap in a cup or small bowl. Add just a splash of water—seriously, just a few drops. This makes the soap slightly more flowy, but don’t overdo it or you’ll end up with a watery mess.
Now, drop in your glow in the dark paint or glow stick liquid. Use multiple colors if you can! I like green, purple, and blue the most—looks like an alien sunset. Don’t stir too much. You want streaks, not soup. That’s what gives it that DIY science experiment vibe that looks out of this world.
2. Add a Layer of the Mixture to Your Jar
Pour a small amount of your glow base into the bottom of your jar. Just enough to cover the bottom. Already looks kind of cool, right?
3. Add Cotton or Fiberfill (Totally Optional, but Worth It)
Now take a stretched-out piece of fiberfill or cotton ball and gently press it into the glow mix. It’ll soak up the color and create this awesome cloudy nebula look. I skipped this once and the jar looked kinda flat—still glowed, but no depth.
4. Sprinkle in Some Glitter
Here’s the fun part—glitter time! Use a combo of silver, gold, and blue. Too much glitter can actually block the glow (ask me how I know), so go light and build it up.
5. Repeat the Layers
Pour in more of your glow mix, then cotton, then glitter. Keep layering until your jar is full. It doesn’t need to be perfect. In fact, the more uneven and messy it is, the more it ends up looking like a real galaxy.
6. Swirl It Gently
Grab a straw or skewer and slowly swirl everything inside. Don’t go wild or you’ll blend all the colors into one dull blur. Gently swirl in a figure-eight motion—it makes the glow in the dark project look extra spacey.
7. Seal and Charge
Close the lid tight. Give it a light shake (emphasis on light) to mix things up a little more. Then place the jar under a bright light or blacklight for a few minutes. The glow should last for hours, especially if you’re using quality glow paint.
My Pro Tips from Trial and Error
- Use glow paint instead of glow stick liquid if you’re making this as a STEM project at home—less mess, longer glow.
- Don’t use food coloring. It’ll stain the cotton but won’t glow. Been there.
- Want it brighter? Use a flashlight with a UV bulb to supercharge it.
This isn’t just some fun easy craft for kids—it seriously works as a relaxing homemade night light too. I’ve even used mine during yoga just for the vibes.
How to Make It Glow Brightly Every Time
Okay, so you’ve built your glowing galaxy jar—looks awesome in daylight, but now comes the part everyone really wants: the glow. This is where things either shine (literally) or flop hard. I’ve had jars that glowed like a mini supernova, and others that barely lit up at all. Here’s how to get it right.
Charge It Right
You gotta charge it up. The brighter the light source, the better your glow. I always use a strong LED flashlight or a desk lamp for at least 10 minutes. Even better? A UV blacklight. That thing turns your jar into a legit cosmic lantern.
And yes, sunlight works too—but it’s slower. A jar left on the windowsill all afternoon will still glow later. Just not as bright as when you supercharge it.
Choose the Right Glow Paint
All glow paints are not created equal. Some are duds—trust me, I’ve tried like six brands. Look for long-lasting glow paint with a high phosphorescent rating. I once got a deal pack that claimed to glow for 12 hours. Total lie. It lasted maybe 20 minutes.
Brands like DecoArt Glow or Tulip Glow Fabric Paint have never let me down. Also, more layers = more glow. Don’t be shy with the paint.
Use a Blacklight for Best Results
Want that jaw-drop effect? Get a cheap UV blacklight bulb or flashlight. I bought mine for $9 on Amazon, and it’s been a game-changer. The glow is 5x stronger and lights up every little swirl and sparkle inside the jar.
If you’re making this as a DIY glow in the dark project for a party, this step is a must. Makes everything pop—even the glitter.
Keep It in the Dark
Obvious, but overlooked. The darker the room, the better it glows. I made the mistake of showing mine off during the day. Meh. Underwhelming. Do your big reveal in a dim room and boom—instant wow factor.
Quick Fixes if It’s Not Glowing
- Didn’t glow? Try shaking it. That redistributes the glow paint.
- Still not glowing? Reapply some fresh glow paint to the top layer.
- Super faint? Charge longer or swap in new paint.
This part seriously turns your jar into a showstopper. Want that “OMG where did you buy that?” reaction? Master the glow and you’re golden.
Fun Ways to Use Your Galaxy Jar
Now that you’ve got your glowing galaxy masterpiece, don’t just toss it on a shelf and forget about it. There are so many cool ways to use this thing—it’s more than just a craft. I’ve made over a dozen of these for different reasons: gifts, room decor, even as a sensory bottle for anxiety when my nephew had a tough week at school.
Use It as a DIY Night Light
This one’s obvious, but it works. I keep one on my bedside table. After a rough day, it’s oddly calming to turn off the lights, give it a little shake, and just watch the colors float. It’s way more chill than a bright lamp and doubles as mood lighting.
If you have kids? Game changer. Seriously. One mom friend of mine said her toddler finally sleeps through the night because she thinks the jar keeps monsters away. Pretty sure that’s not scientifically proven, but hey—it works.
Turn It Into a Sensory or Calming Jar
If you’re looking for calming jars for bedtime or STEM crafts for kids, this is a two-in-one deal. The slow swirl of glitter and glowing paint makes it ideal for helping kids (or honestly, stressed-out adults like me) wind down. You can even add lavender oil to the cotton if you wanna make it a full sensory experience.
When my little cousin was dealing with anxiety, we made one together and called it her “calm star jar.” She’d shake it, take a few deep breaths, and focus on the glow until she felt better. Worked better than any app.
Use It as a STEM or Art Project
This is the sneaky educational part. Teachers and parents love it because it blends science and art—you’re talking about light energy, phosphorescence, color mixing, density… all while making something gorgeous. I’ve even seen these win blue ribbons at science fairs. So if you need a last-minute STEM craft for kids, this one’s a winner.
Make It a Magical Gift
Looking for a weirdly perfect gift? Boom—glow jar gift idea. I’ve given these as birthday presents, party favors, and even a little “just because” gift when a friend needed cheering up. Tie a ribbon around the lid and add a handwritten tag like “Shake me when you need to see stars.” Instant cosmic charm.
More Random but Awesome Ideas
- Use them as centerpieces for galaxy-themed parties
- Keep one on your desk for mid-day mental breaks
- Use it in photography for cool glowing bokeh shots
- Make a mini one in a small baby food jar as a travel-size night light
This isn’t just a jar—it’s a mood booster, a teaching tool, a personal light show. Kinda wild how something so simple can be so versatile.

And just like that—you’ve bottled a universe. ✨ Making your own galaxy in a jar isn’t just a fun little craft; it’s a full-blown creative experience. You get to play with color, light, science, and imagination all in one go. Plus, you’re left with something that actually looks magical. Whether you’re five or fifty, there’s something oddly satisfying about shaking your jar and watching those glowing swirls float like mini galaxies.
These aren’t just pretty. They’re calming, educational, and honestly, kind of addictive. Once you make one, you’ll want to try different color combos, swap the glitter, or go full sci-fi mode with deep-space purples and cosmic greens. I’ve made these for parties, gifts, and even just as a quick pick-me-up during rough weeks. And every time, they deliver.
So go grab some glow paint and get swirling. Whether you’re making a DIY glowing jar for yourself or sharing the fun with your kids, I promise—it’s way more satisfying than scrolling another reel.
If you loved this project or ended up making your own glowing masterpiece, do me a favor and share it on Pinterest! Your galaxy jar could be the one that inspires someone else to light up their night. 🌌
Want the full step-by-step with pics? Pin it and pass it on. You never know whose night you’ll brighten with a jar full of stars.
