

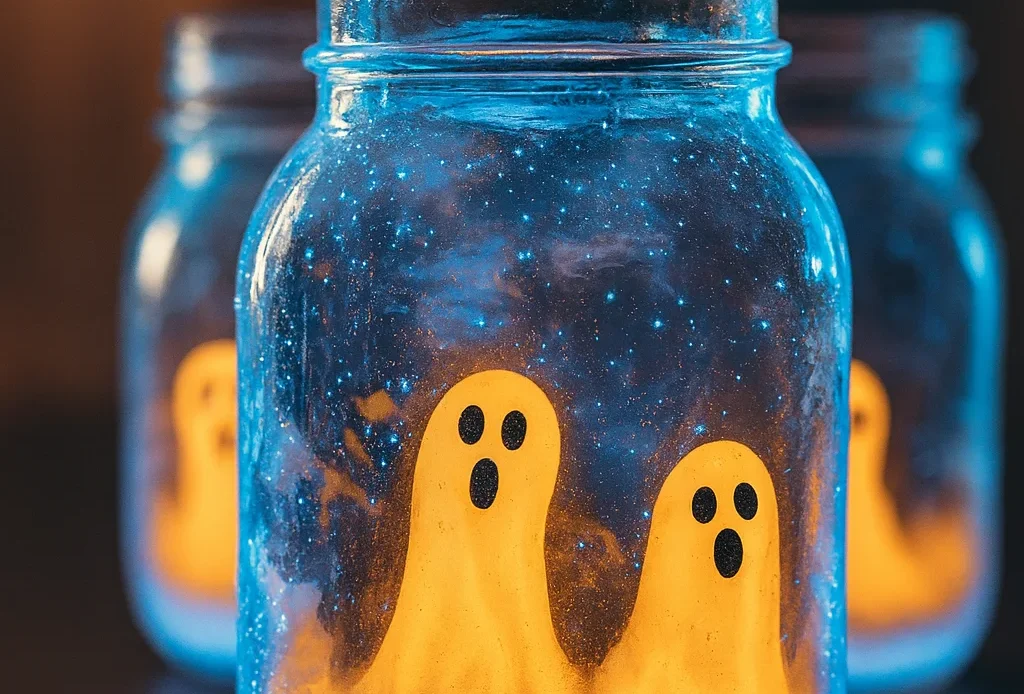
Ever wanted to mix a little science with your Halloween magic? This Glowing Baking Soda Dancing Ghost Jar experiment will make your night sparkle—literally! Using simple kitchen ingredients like baking soda, vinegar, and tonic water, you’ll create a fizzy, glowing reaction that makes your paper ghosts float and dance. Perfect for kids, classrooms, or any Halloween party that could use a bubbling touch of spooky fun. Let’s bring these glowing spirits to life!
What You’ll Need for Your Glowing Ghost Jar
Let’s be honest — there’s nothing worse than getting halfway through a DIY project and realizing you forgot something important. Been there, done that. The first time I tried making this DIY Halloween craft, I was so excited that I grabbed a jar, dumped in baking soda, and… completely forgot the vinegar. No fizz, no fun — just a sad little ghost floating in silence. So, trust me, gather everything first!
🧂 Basic Ingredients That Make the Magic Happen
You’ll only need a few simple things — most of which are already in your kitchen or craft drawer:
- 1 clear glass mason jar (pint size) — Mason jars are my go-to for any Halloween science activity because they’re sturdy and show off that glow perfectly.
- 1 cup warm water — Warm water helps the baking soda dissolve evenly, giving you that perfect bubbling base.
- 2 tablespoons baking soda — This is where the chemistry fun begins! When it meets vinegar, you’ll get that classic baking soda vinegar reaction that powers the dancing ghosts.
- ¼ cup white vinegar — The fizz-maker! I like using white vinegar because it reacts fast and looks clean against the glowing background.
- Small tissue ghosts or cotton balls — Cut up tissue paper or grab some cotton balls to form your spooky little characters. You can draw faces on them with a marker for extra fun.
- 1 teaspoon glow-in-the-dark paint or ¼ cup tonic water — This is the real secret behind the glow jar effect. Tonic water glows under blacklight thanks to quinine, while glow paint gives off that eerie soft shine.
- 1 LED tealight or mini blacklight — I’ve tested both, and honestly, blacklights win every time. The brighter the glow, the better the Halloween vibe.
Optional but totally worth it: a sprinkle of fine glitter. Because even spooky ghosts deserve a little sparkle. ✨
🧪 Quick Tip from Experience
If you’re doing this with kids or a class, prep your jars ahead of time. Label each one and keep your vinegar in a small squeeze bottle — it gives the kids that “mad scientist” moment while keeping the mess under control. I’ve used this setup for a STEM project during a school Halloween event, and it was pure chaos in the best way possible.
💡 Budget Tip for Parents and Teachers
Most of these materials cost under $10, and if you already have baking soda and vinegar, you’re halfway there. You can grab mini blacklights or glow paint at craft stores or online — they’re great for multiple projects like glow-in-the-dark crafts or even DIY Halloween decorations.
🧙 Final Setup
Once everything’s laid out, turn off the main lights and test your glow with the blacklight before starting the experiment. Seeing that faint shimmer in the jar always gets the kids hyped up. It’s one of those small moments that makes science feel like real-life magic.
So before you mix the potion, take a breath, cue up some spooky music, and line up those jars like a tiny mad scientist lab. You’re about to create one of the coolest Halloween science experiments for kids ever — and it all starts with these simple, glowing ingredients.
Making Your Glowing Ghosts
Alright, this is where things get really fun — and a little messy (in the best way). I’ve made these glowing ghosts so many times that I could probably craft them with my eyes closed. But let me tell you — the first time I tried, my ghosts looked more like soggy snowballs than spooky spirits. 😂 So here’s what I’ve learned after a few rounds of trial and error with this DIY Halloween craft for kids.
✂️ Step 1: Shape Your Ghosts
Grab your white tissue paper or cotton balls. If you’re using tissue, tear it into small 1-inch squares — no scissors needed. I crumple one piece into a tiny ball for the head, then wrap another piece around it like a mini ghost costume. Twist the bottom a bit to give it shape.
If you’re using cotton balls, pull them apart slightly to make them float better later in the jar. I discovered that the fluffier they are, the better they “dance” during the fizzing reaction. My kids even named theirs — “Spooky Steve” and “Booette.” Totally optional, but it adds to the fun.
🎨 Step 2: Add Some Glow
Now for the magic touch — the glow-in-the-dark paint (or tonic water if you’re doing a no-paint version). I’ve tested both, and honestly, glow paint gives a stronger shine, but tonic water looks more “haunted” under a blacklight.
- Dip a small brush and gently coat the ghosts.
- Don’t overdo it — too much paint makes them heavy, and they won’t float well.
- Lay them on parchment paper or a plastic lid to dry for about 10–15 minutes.
If you’re doing this for a Halloween party craft or classroom project, prep a drying station ahead of time. Nothing ruins the fun faster than little hands impatiently poking wet ghosts and turning them into mush.
😱 Step 3: Bring Out Their Personalities
Once the glow layer is dry, grab a black marker and draw your faces. Go for spooky, goofy, or even sad — every ghost deserves some character. I always end up with at least one that looks like it’s screaming for help, and somehow that one always steals the show.
Tip: Use a fine-tip permanent marker. Regular markers tend to smudge, especially if the paint’s not fully dry. Learned that one the hard way.
🧙 Pro Crafter Tip
If you want your Halloween decorations to stand out, sprinkle a little fine glitter while the paint is still tacky. Under the blacklight, it creates this eerie shimmering effect, like your ghosts are covered in stardust. Totally unnecessary — but absolutely awesome.
💡 Bonus: Make It a Kids Craft Challenge
When I did this as part of a kids’ science experiment, I turned it into a “Ghost Glow-Off.” Each kid decorated their ghost and we voted for “Most Scary,” “Funniest Face,” and “Best Glow.” It kept everyone engaged while we waited for the science magic (ahem, baking soda experiment) to start bubbling.
🕸️ Step 4: Dry and Prep
Once your glowing ghosts are dry and ready, place them on a clean napkin or plate. Keep them away from direct light — the darker the room when you start the experiment, the more dramatic the glow will be.
And there you go — your ghost squad is ready for action! 👻
These little guys might look simple, but when they start floating and fizzing inside that glow jar project, it’s pure Halloween magic. It’s part art, part science, and 100% fun — the kind of project that makes kids forget they’re learning chemistry.
Mixing the Magic Potion
Okay, this is the part where science meets sorcery — and it’s where every Halloween science project comes alive. Seriously, every time I do this, I still get a little giddy watching the bubbles form. There’s just something magical about turning boring kitchen stuff into a glowing, fizzing cauldron of fun.
The first time I made this glowing jar experiment, I poured the vinegar too fast and ended up with a mini volcano on my countertop. My cat still doesn’t trust me around jars. So yeah — lesson learned: take it slow and enjoy the magic.
⚗️ Step 1: Create the Glowing Base
Grab your clean mason jar — the heart of your DIY science experiment.
Pour in 1 cup of warm water, then add 2 tablespoons of baking soda. Give it a good stir until it dissolves.
Now, here’s where you can customize your potion:
- For a soft glow-in-the-dark effect, mix in 1 teaspoon of glow paint (non-toxic, of course).
- For a real science experiment for kids, swap the water with tonic water — it naturally glows under a blacklight because of quinine. (It’s science and spooky vibes all in one!)
If you’re feeling fancy, sprinkle in a pinch of fine glitter or a drop of food coloring. Just don’t go overboard; the more you add, the heavier the liquid, and your ghosts might struggle to dance.
🌈 Step 2: Add Some Sparkle (Optional but Awesome)
I always toss in a bit of glitter — because if your ghosts are going to haunt, they might as well do it in style. Under blacklight, the glitter catches the glow like tiny stars floating through the potion.
Bonus idea: Add a tiny drop of dish soap. It makes the fizzy reaction foam up more dramatically, which the kids absolutely love. I call it “mad scientist mode.”
🧫 Step 3: Drop in the Ghosts
Now, the fun part — carefully drop your glowing tissue or cotton ghosts into the jar. Watching them sink slowly through that glowing water is almost hypnotic. They’ll hang out at the bottom for now, waiting for the reaction to kick off.
You can even name each one before the chaos begins — trust me, it makes it more fun when “Casper” and “Spooky Steve” start dancing.
🧙 Step 4: The Magic Ingredient — Vinegar
Here’s where the chemistry happens. Slowly (I repeat, slowly) pour ¼ cup of white vinegar into the jar.
The baking soda and vinegar reaction creates carbon dioxide gas, which forms bubbles that attach to your ghosts, lifting them up like little spirits rising from the grave.
As the bubbles pop, the ghosts sink again, only to float back up when more gas forms — and just like that, they’re dancing! It’s the perfect live demo of a STEM activity and a creepy-cool Halloween moment rolled into one.
🧠 Fun Fact
This carbon dioxide reaction is the same basic process used in real chemistry experiments (and even baking). The gas forms bubbles, making bread rise or soda fizz — except, in our case, it makes ghosts groove under a blacklight.
💬 My Pro Tip
If you’re doing this for a Halloween party or classroom STEM project, pre-mix the baking soda solution in several jars. That way, each kid can pour their own vinegar and watch their mini ghosts come alive simultaneously. Just prepare for the sound of “WOW!” echoing through the room.
And that’s it — your glowing potion is mixed, bubbling, and ready to go! It’s such a fun glow in the dark experiment that sneaks in a science lesson without anyone realizing they’re learning. I mean, who knew chemistry could be this spooky and this fun at the same time?
Watch the Dancing Ghosts Come Alive
Here it is — the grand finale, the moment that turns an ordinary Halloween craft into a jaw-dropping science show. Every time I pour in that vinegar, I still get chills (and not just because I’m standing in the dark with glowing ghosts). This step is where your hard work — and your baking soda vinegar reaction — finally pays off.
The first time I tried it, I remember my kids huddled around the counter, holding their breath. Then, boom! — bubbles, fizz, and glowing ghosts floating like tiny spirits in a magic potion. You could practically hear the gasps and giggles echo through the kitchen.
⚗️ Step 1: Pour the Vinegar Slowly
Trust me, you want to go slow here. Gently pour ¼ cup of white vinegar into your jar. The slower you pour, the more control you’ll have over the fizzy science experiment — and the longer the ghosts will dance.
As the carbon dioxide bubbles form, they’ll start clinging to the ghosts. That’s when the real magic starts — the ghosts begin to rise toward the surface, glowing softly in the dim light.
It’s like watching a DIY Halloween science experiment meet a lava lamp — only spookier and way more fun.
🌬️ Step 2: The Dancing Effect Explained (Without Boring You)
So, here’s the “science-y” part — and don’t worry, I’ll keep it simple. When the baking soda and vinegar mix, they create CO₂ gas (the same stuff that makes soda fizzy). Those bubbles stick to your ghosts and lift them up. When the bubbles pop, the ghosts sink again. Then more bubbles form… and up they go once more.
It’s a little chemistry magic trick that turns into a mesmerizing STEM activity for kids — all powered by one of the easiest science experiments for kids ever invented.
I like to tell kids it’s “ghosts learning to dance,” and honestly, that’s not too far off.
✨ Step 3: Boost the Glow
Now’s the time to turn off the lights and switch on your mini blacklight or LED tealight. This step is what transforms a bubbling jar into a glow in the dark experiment masterpiece.
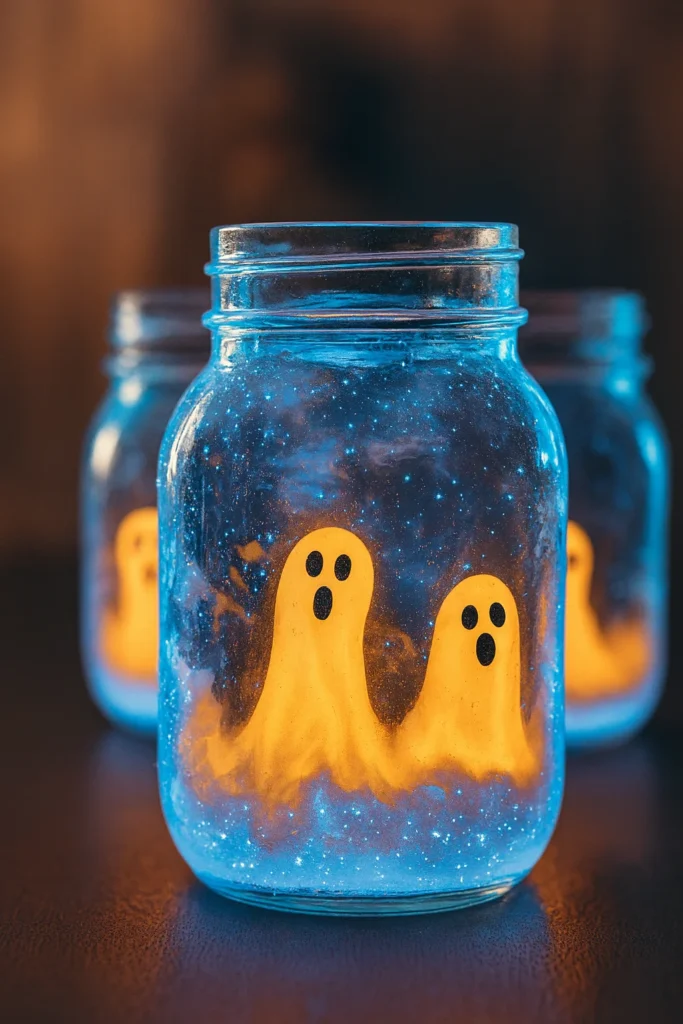
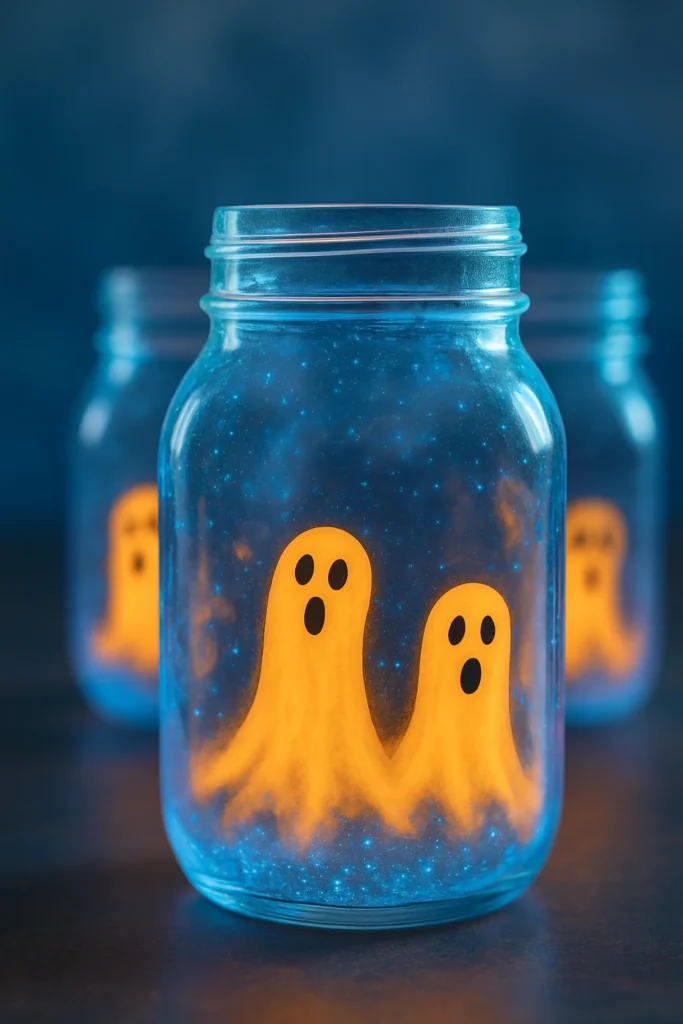
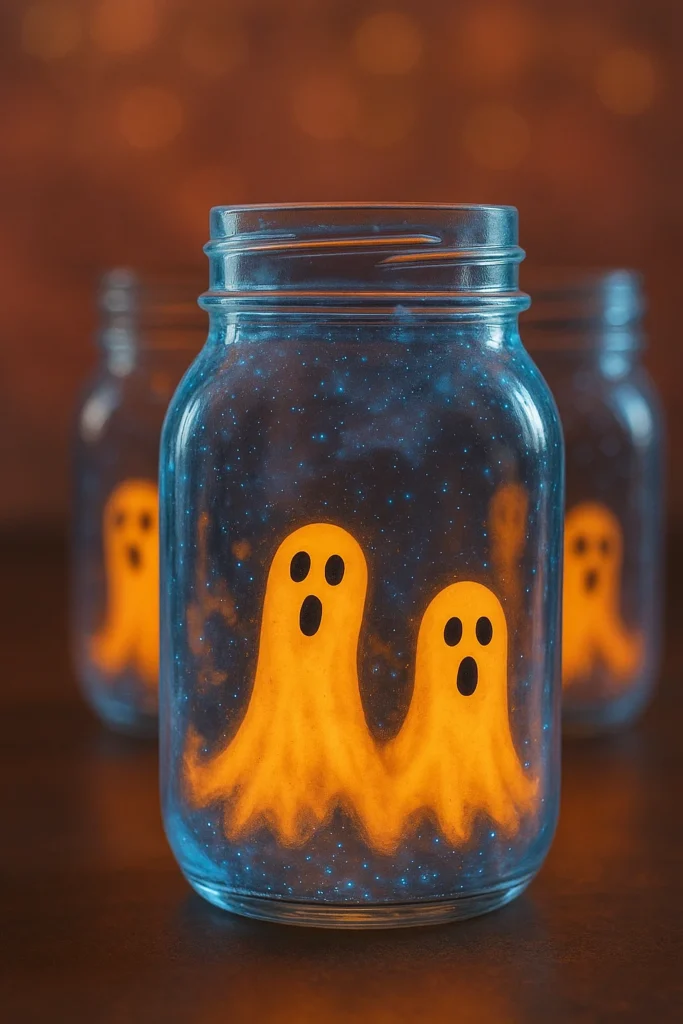
If you used tonic water, you’ll see an eerie blue glow. If you used glow paint, it’ll shine a greenish hue — both look incredible in photos. I sometimes place two jars side by side so the colors mix when they glow. It’s ridiculously photogenic and makes a killer Halloween party idea centerpiece.
🧙 Pro Tip
If the ghosts stop moving too soon, don’t panic. Add another splash of vinegar and watch them come back to life! You can even use a spoon to gently stir the water to get the reaction going again. The fizz might die down after a few minutes, but that’s just science doing its thing — the CO₂ reaction slows as the ingredients neutralize.
🎉 Step 4: Let the Fun Last Longer
Here’s a trick for longer-lasting fizz: use cold vinegar instead of warm. The cooler temperature slows the reaction, giving you more dancing time. You can even sprinkle in a bit more baking soda halfway through for a round two of ghost boogie.
This simple tweak has saved me during classroom demos — because, let’s be honest, kids never want the science show to end.
💭 Reflection Moment
Every time I do this, I’m reminded how powerful hands-on STEM learning can be. It’s one thing to tell kids about chemical reactions, but it’s a whole different thing to let them see it happen — glowing ghosts and all. It’s the kind of learning moment that sticks forever.
So take a step back, dim the lights, and enjoy the magic you just made. Those little glowing ghosts bobbing up and down? That’s chemistry, curiosity, and Halloween spirit — all in one jar. 🎃💚
Light It Up and Glow
Okay, so this is my favorite part — the reveal. You’ve got your bubbling potion, your dancing ghosts, and now it’s time to make it glow. The glow is what turns this from a simple science experiment for kids into a show-stopping DIY Halloween decoration that could rival any store-bought centerpiece.
The first time I did this, I turned off the lights and the whole kitchen gasped. The glow was so bright it looked like something out of a mad scientist movie. And honestly? That reaction alone made every bit of cleanup worth it.
💡 Step 1: Set the Mood
Before you light up your mason jar craft, dim the lights — or better yet, switch them off completely. Place your jar on a dark surface (a black towel works great to soak up stray bubbles and make the glow pop).
Now, switch on your LED tealight or mini blacklight and aim it at the jar. If you used tonic water, the jar will glow an electric blue under UV light. If you went with glow-in-the-dark paint, expect a haunting green shimmer that slowly pulses as the fizz continues.
When the ghosts start bobbing in that light, it’s like watching little spirits dancing in their own haunted ballroom.
🎃 Step 2: Turn It Into Decor
Here’s where your glow jar decor gets elevated. You can:
- Line up multiple jars in different colors for a blacklight Halloween party.
- Place one in the middle of your dining table as a Halloween centerpiece.
- Add cobwebs or fake spiders around the base for extra creepy charm.
One year, I even made a “glow station” at a kids’ Halloween event. We dimmed the lights and had ten jars glowing at once — it looked like a mini ghost rave. Parents couldn’t stop taking photos.
✨ Step 3: Capture the Glow
If you’re into photography or Pinterest posting, here’s a trick: turn off your flash and use night mode on your phone. The glow will look softer and more natural. Add a candle or small LED nearby to give the background a warm contrast. It’s that balance of eerie and cozy that makes DIY Halloween crafts go viral.
🔋 Step 4: Keep the Glow Going
Glow paints recharge under bright light, so if yours starts fading, just hold it under a lamp or flashlight for a minute. If you used tonic water, you can reuse it! Just pour it out, refill the jar with more baking soda and vinegar, and your ghosts will be ready for another spooky dance.
🧙 Bonus: Party Hack
If you’re throwing a kids Halloween activity, prep multiple jars ahead of time. Let each kid add their own vinegar when the lights go out. The synchronized fizzing and glowing looks like a science fireworks show — and it keeps everyone wide-eyed and amazed.
🕯️ Final Thoughts
Lighting up your glow in the dark craft is honestly where the magic peaks. It’s mesmerizing, it’s educational, and it makes for the most unforgettable DIY Halloween decoration you’ll ever make. Plus, when your guests ask how you pulled it off, you get to smile and say, “It’s just baking soda and vinegar.”
Who knew chemistry could double as décor, right?
The Science Behind the Glow and Dance
I’ll be real with you — the first time I made this jar, I wasn’t just impressed because it glowed. I was fascinated because it’s a full-on chemical reaction experiment disguised as a Halloween craft. You’re basically turning your kitchen into a mini science lab — and it’s way cooler than any textbook diagram.
When I do this project with kids, I always start by asking: “What do you think makes the ghosts move?” The answers range from “magic” to “a ghost wind.” (Cute, but nope — it’s all chemistry.)
⚗️ Step 1: The Baking Soda + Vinegar Reaction
Here’s what’s happening behind the scenes:
When you mix baking soda (sodium bicarbonate) and vinegar (acetic acid), they react to form carbon dioxide gas (CO₂). That gas creates bubbles in the water — the same kind of bubbles that make soda fizz.
As those bubbles form, they attach to the little tissue or cotton ghosts. Because the gas is lighter than the liquid, the bubbles lift the ghosts up toward the surface. When the bubbles pop, the ghosts lose their lift and sink back down.
That’s why your ghosts appear to dance. It’s a perfect live demo of gas formation, density, and buoyancy — basically a mini STEM learning experiment wrapped in Halloween fun.
🌬️ Step 2: Why It Glows
If you used tonic water, it’s glowing because of a compound called quinine — it fluoresces under UV light. It doesn’t actually “make light,” but it reflects ultraviolet rays, which is why it shines blue.
If you used glow-in-the-dark paint, that’s called phosphorescence — the paint absorbs energy from a light source and then slowly releases it. That’s why it glows even after you turn the lights off.
Explaining this to kids is one of my favorite parts. I usually tell them, “You just made a light-up lava lamp powered by chemistry.” It always gets a few oohs and ahhs.
🧪 Step 3: Real Science Concepts Kids Learn
This little Halloween STEM project sneaks in a lot of real learning:
- Chemical Reactions — how acids and bases interact to make gas.
- Gas Production — the creation of carbon dioxide bubbles.
- Buoyancy — why the ghosts float up and sink down.
- Fluorescence and Phosphorescence — different ways things glow.
It’s like getting a whole hands-on science activity lesson — except with glowing ghosts instead of boring lab equipment.
💡 Teacher or Parent Tip
If you’re doing this as a science experiment for kids, make them predict what will happen before adding the vinegar. Then ask them to describe what they see during the fizzing. You’ll be surprised how quickly they start using real scientific vocabulary — and how proud they look explaining why the ghosts “float.”
🔬 Step 4: Keep the Curiosity Going
Once the reaction slows down, I always encourage kids to tweak the formula. Add more baking soda and see if it changes the fizz. Use cold vs. warm vinegar. Try different glow colors. You’ll see their little scientist brains light up faster than the jar.
And that’s what makes this the perfect glow in the dark science experiment — it’s messy, magical, and actually educational. The ghosts may stop dancing, but the curiosity you spark? That’ll stick around for a long time.
And there you have it — your own bubbling, glowing, totally spooky DIY Halloween craft that doubles as a mini STEM project for kids. Every time I finish one of these jars, I can’t help but grin like a mad scientist who just discovered ghost energy. The fizz, the glow, the little floating faces — it all comes together into something magical that feels alive.
The beauty of this project is how simple it really is. You don’t need fancy lab gear or expensive materials — just baking soda, vinegar, and a little imagination. That’s what makes it one of my all-time favorite Halloween science activities. It’s proof that learning and fun don’t have to be opposites; sometimes they just need a jar and a little glow.
I’ve done this experiment at school events, family nights, and even during a rainy October weekend when everyone was bored — and it never fails to amaze. The kids laugh, the adults take photos, and before you know it, everyone’s asking, “Can we make another one?”
If you’re planning your Halloween ideas for 2025, this glowing ghost jar deserves a spot on your list. It’s budget-friendly, mess-friendly (okay, mostly), and super Pinterest-worthy. Plus, it sneaks in a little education, so you can call it a “learning activity” while secretly just having fun.
💡 My Last Bit of Advice
Experiment with it! Try different colors of glow paint, mix up your ghost designs, or add themed decorations around the jar. The more creative you get, the better it looks. And hey, don’t forget to recharge your glow paint or tonic water under a lamp before showing it off — a fresh charge makes your glow in the dark experiment pop on camera.
📌 Share the Magic
If your glowing ghosts made you smile (or startled someone in the dark — bonus points!), share your creation on Pinterest! Tag it as #GlowingGhostJar or #HalloweenScienceProject — you’ll be surprised how many other makers are out there brewing up the same fizzy fun.
So, go ahead — dim the lights, grab that vinegar, and let your ghosts dance. Because sometimes the best Halloween decorations aren’t bought — they bubble, glow, and rise from the jar right in front of you.
Happy haunting, happy glowing, and happy experimenting! 👻✨
