

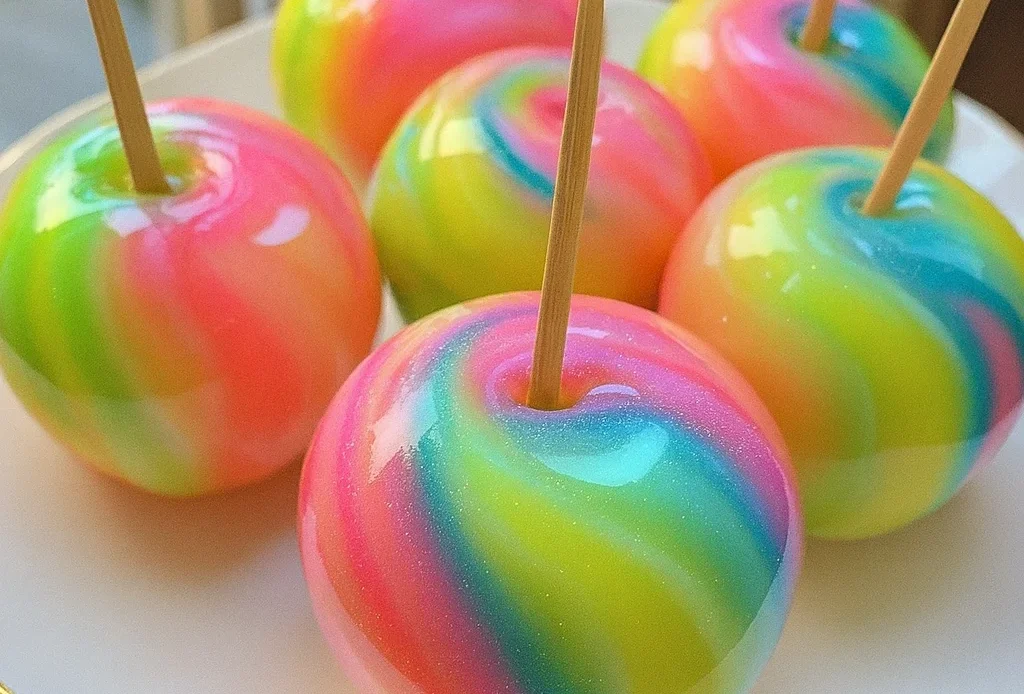
Ever seen a candy apple that glows like cotton candy at a carnival? ✨ These Cotton Candy Swirl Glow-in-the-Dark Candy Apples are the ultimate party treat—sweet, tangy, and magical under blacklight! With their swirls of pink, blue, and purple, they look like spun sugar clouds with a spooky glow. In this guide, I’ll show you exactly how to make them, what ingredients you need, and even how to pull off the glowing effect safely. Perfect for Halloween, birthdays, or any night that needs a little sparkle!
Choosing the Right Apples for Glow-in-the-Dark Candy Apples
The Apple Mistake I’ll Never Make Again…
Okay, so the first time I made these glow-in-the-dark candy apples, I picked the reddest, juiciest apples I could find. Huge mistake. I didn’t realize how important it is to actually pick the best apples for candy apples—ones that aren’t just pretty, but tart, crisp, and more importantly… wax-free.
That’s when I learned: Granny Smith apples are your best friend for this kind of recipe. Their bright green skin pops under all that neon swirl, and the tartness balances out the ultra-sweet candy shell like magic.
Why Tart Apples Are a Game-Changer
Here’s the thing: when you’re biting through a thick, sugary coating, your taste buds need something to cut through the sweetness. Tart apples do exactly that. Granny Smith is the gold standard, but you could also try Pink Lady or even Honeycrisp if you want a bit of extra juiciness.
But I still come back to Granny Smith—they’re firm, they’re crisp, and they hold up perfectly without getting mushy under the hot candy shell.
How to Prep Apples for Candy Coating (Don’t Skip This!)
If you’re like me, you’ve probably skipped the “wash thoroughly” step once or twice. With candy apples? You cannot afford to skip it. Most store-bought apples have a wax coating that will literally repel the candy syrup.
I learned the hard way. The first batch I ever made? The candy just slid right off. Like, whoosh. Gone.
Here’s how to get wax-free apples:
- Boil some water and quickly dunk each apple for about 10 seconds.
- Wipe them dry with a rough towel (this scrubs the wax off).
- Let them fully cool before dipping, or the candy won’t stick.
And always dry them completely—water and hot sugar are not friends.
Skewers or Lollipop Sticks? Use What Works
I’ve tried everything from craft sticks to BBQ skewers. Honestly, lollipop sticks are my go-to now. They’re sturdy, food-safe, and don’t splinter like the cheap wooden ones do.
Just twist them in deep enough that the apple won’t fall off mid-dip. (Yes, I’ve lost an apple in the candy pot before… not my finest moment.)
Bonus Tip: Chill Your Apples First
Want that candy shell to set faster and smoother? Chill your apples in the fridge for 30 minutes before dipping. Just make sure they’re bone-dry when you pull them out. Cold apples + hot candy = quick hard crack perfection.
Making glow-in-the-dark candy apples is honestly 50% prep and 50% candy wizardry. But trust me—nail the apple part, and you’re halfway to those swirly, glowing masterpieces. 🍬✨
Making the Perfect Candy Coating
The First Time I Burned the Sugar…
The first time I tried making candy coating, I was kind of winging it. No thermometer, no clue, just vibes. Big mistake. I ended up with a burnt mess that smelled like scorched marshmallows and ruined my pot.
Why You Need a Candy Thermometer
If there’s one tool that’s non-negotiable here, it’s a candy thermometer. You’ve got to hit the hard crack stage—that’s 300°F. Any less and your candy coating stays gooey. Any more and you’re making bitter sugar shards. Not the vibe.
Trust me, once you get used to watching that temperature climb, it’s actually kind of fun. It’s like sugar science.
Sugar + Syrup + Water = Magic
Start with:
- 2 cups granulated sugar
- ½ cup light corn syrup
- ½ cup water
Mix them in a medium saucepan over medium heat. Stir just until the sugar dissolves. Then hands off! Stirring too much after this point is how you end up with crystals, and those will totally ruin your glossy shell.
Don’t Rush the Boil
I used to crank the heat to save time, but sugar doesn’t like to be rushed. Keep it at medium and be patient. The bubbles will start small and tight, then grow as the temp rises. That’s when you know it’s getting close.
When it hits 300°F, pull it off the heat right away. Timing here is everything.
Time to Add Flavor and Color
Once it’s off the heat, stir in:
- 1 teaspoon vanilla extract
- ½ teaspoon citric acid (for that tangy kick)
- ½ teaspoon white gel food coloring (this helps the colored swirls pop later)
Mix it all gently. It’ll smell amazing, like cotton candy meets lemon drop.
One Final Tip: Keep the Pot Clean
This one’s niche, but if you get sugar on the sides of the pot, use a pastry brush dipped in water to wipe it down as it cooks. That helps prevent sugar crystallization, especially if you live somewhere humid like me.
Want that perfect, glassy candy apple shell that crunches when you bite into it? It all starts here—with a candy thermometer, steady heat, and a little sugar patience. Once you nail this part, the rest is just pure candy fun.

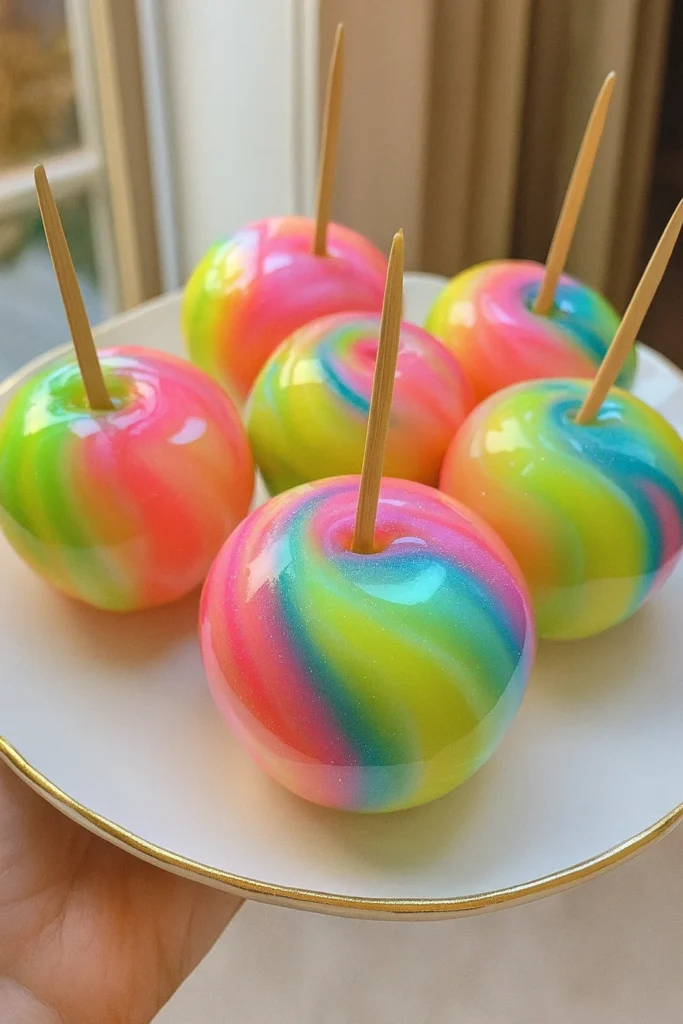
Creating the Cotton Candy Swirl Effect
The First Time I Tried to Swirl—Yikes
I’ll be honest… my first attempt at swirl candy apples looked more like a melted unicorn. I thought I could just plop all the colors in a pot and stir. Nope. That gave me a muddy gray mess—definitely not the dreamy cotton candy swirl effect I had in mind.
It took a few tries, but I finally cracked the code. If you want colorful candy coating that actually looks like spun sugar clouds, here’s exactly how to do it.
Step One: Divide and Color
Once your white base is ready (from the candy coating step), pour it into three heatproof bowls. You’ll want to work fast here—the candy sets up quickly.
Add ½ teaspoon of pink, blue, and purple gel food coloring to each bowl. Stir gently with a toothpick or skewer. Try not to introduce too much air or you’ll get bubbles.
Gel food coloring is your best bet here. Liquid colors just don’t have the same vibrancy and can mess with the texture.
Step Two: Swirl—But Gently
Now here’s the key to that cotton candy swirl effect. Take small spoons of each color and drizzle them back into your main pot—just a little at a time.
Then, using a clean skewer or the tip of a knife, swirl the colors once or twice through the pot. Do NOT stir. You’re not mixing cake batter. The idea is to create a marbled pattern, not blend everything together.
Step Three: The Candy Apple Dipping Technique
This part feels like magic. Grab your prepped apple by the stick and slowly dip it into the swirled candy, giving it a gentle twist as you lower it in.
That twist is everything—it helps pull the colors across the apple in long, dreamy streaks instead of chunky blobs.
Let the excess drip off back into the pot, then quickly flip it upright and place it on parchment paper to set.
Extra Tip: Rotate the Pot Between Apples
This helps keep the swirl pattern alive. If you just dip in the same spot each time, the colors will muddy. So after each apple, give the pot a tiny spin or re-swirl the colors with your skewer.
Pulling off these cotton candy swirl candy apples is like candy art. It’s messy, it’s fast-paced, and it’s ridiculously fun. And once you get that first perfect swirl? Oh man, you’ll feel like a candy wizard.
The Glow-in-the-Dark Magic
The Night I Discovered My Kitchen Could Glow
So the first time I tested these under a blacklight, I literally screamed. I flipped the lights off, switched on this cheap UV bulb from Amazon, and BOOM—my candy apples lit up like alien fruit. I was hooked.
Learning how to make glowing candy felt like a science experiment I actually wanted to do. It’s easier than you’d think—and totally safe when you use the right ingredients.
What Makes Candy Glow?
It all comes down to one thing: edible glow in the dark powder. Most of the good ones are made from quinine or riboflavin (vitamin B2)—both are safe and used in food like tonic water. Under UV light, they react and glow this eerie neon hue.
You’ll want to buy a powder specifically labeled food-grade and edible. Do not just use craft glow powders. Ever. Read the label like your life depends on it—because it kind of does.
When and How to Apply the Powder
Timing is everything. The candy coating has to be tacky—not wet, not hard. That perfect in-between stage when it’s just starting to set.
Here’s how I do it:
- After dipping the apple, wait about 15–30 seconds.
- Use a fine mesh sifter or dry brush to lightly dust the apple with glow powder.
- You don’t need much. A little goes a long way under blacklight.
Too early and it melts into the shell. Too late and it won’t stick. You’ll find the sweet spot after a couple tries.
Blacklight Setup Tips for Max Glow
A regular party blacklight works, but if you want those apples to pop, go with a UV LED light or bulb (10–20 watts). Position it so it hits the apples from the side—not straight on. That side lighting makes the swirls and shimmer really stand out.
I usually test one apple in the dark before doing the full batch. That way I can see how well the glow powder is showing up and adjust as needed.
Bonus: Double Glow with Neon Gel
If you use gel food coloring labeled “neon” or “UV-reactive,” you’ll get a double effect. The color glows, and so does the powder. It’s wild. The pink and blue shades tend to glow the best under UV.
This part seriously never gets old. Every time I see those glow-in-the-dark candy apples light up, I feel like a kid again. It’s one part science, one part art, and 100% showstopper. Perfect for Halloween parties, neon raves, or just impressing your friends on TikTok.
Serving & Display Ideas for Parties
My First Neon Dessert Table Was Pure Chaos
I still laugh thinking about the first time I tried to create a Halloween dessert table with these glow-in-the-dark candy apples. I had zero plan, no blacklight, and just plopped them on a paper plate. I thought the glow alone would carry the vibe. Spoiler: it didn’t.
Over the years, I’ve figured out how to actually serve glowing treats in a way that makes people go “whoa.” Here’s what I’ve learned from trial, error, and a few late-night Pinterest scrolls.
Set the Scene with UV Lighting
Lighting is everything. If you don’t have a good UV source, none of your glowing food display ideas are gonna pop.
I recommend:
- At least one UV LED bulb or strip light
- Turn off overhead lights completely
- Place the blacklight off to the side for drama
This way, your neon apples won’t just glow—they’ll shine.
Use Black, Glossy, or Neon Backgrounds
This one changed everything for me. Instead of using white or plain tablecloths, switch to:
- Black velvet or matte cloth (helps the glow stand out)
- Neon acrylic risers for height
- Reflective trays to bounce the color
Seriously, your neon candy party setup will go from “meh” to “museum-level” with a little staging.
Make Them Party-Ready with Candy Apple Party Favors
If you’re making these for a crowd, consider wrapping each one in clear cellophane with a little ribbon or glow stick tied on. I’ve handed these out at Halloween and school parties, and kids go nuts.
For favors:
- Wrap when fully cooled
- Add a custom tag or label with glow instructions (like “Place near a blacklight to watch it glow!”)
- Store in a cool spot to avoid melting or stickiness
Pair with Other Glowing Snacks or Drinks
Want the table to really pop? Don’t stop at candy apples. Pair them with:
- Glowing cotton candy (with UV-reactive sugar)
- Tonic water punch (quinine = glow magic)
- Neon cupcakes with blacklight frosting
- Glow stick jars or lanterns for ambiance
It’s all about the vibe—and once you build one, it totally sells itself.
Putting together a display for glow-in-the-dark candy apples is part recipe, part rave décor, and honestly… kind of addicting. Once you see those colors light up in the dark, you’ll never go back to regular desserts again.
The first time I made these DIY candy apples, I just wanted to try something fun for Halloween. I didn’t expect them to become the highlight of every party I brought them to. But here’s the thing: these aren’t just treats—they’re glow in the dark party treats that spark conversation, make people smile, and honestly look too cool to eat (but eat them anyway!).
From picking the right Granny Smith apples to swirling those dreamy cotton candy colors and dusting them with edible glow powder, every step is part art and part sweet science. And once you flip that blacklight on? Boom. Magic.
Whether you’re planning a spooky bash, setting up a Halloween dessert table, or just want to wow your kids with edible neon candy, this glowing candy apple recipe totally delivers.
So if this guide helped you or inspired your next party spread—why not pass it on? 📌 Pin it on Pinterest, share it with a friend, or post your own glowing creation. I’d seriously love to see what you come up with.
Stay sweet—and stay glowing. ✨🍭
