

Ever wanted to bring the magic of fireworks indoors—minus the noise and safety concerns? Well, here’s your chance! Fireworks in a Jar is one of those science-meets-creativity activities that never gets old. With just a few kitchen staples like oil, food coloring, and warm water, you’ll create a colorful explosion that mesmerizes both kids and adults. According to STEM educators, hands-on experiments like this increase engagement by over 70% in young learners. So grab a jar and let’s make some magic!
Materials You’ll Need for DIY Fireworks in a Jar
Okay, let’s be real for a second. How many times have you Googled “science activities for kids that don’t end in a mess”? ‘Cause same. I’ve tried baking soda volcanos, “grow your own crystals,” and even that weird cornstarch goop—but nothing got my little ones as hyped as Fireworks in a Jar. And the best part? You don’t need to hit up a science store or spend a dime on fancy educational toys.
Here’s what’s in my setup drawer:
The Jar—Your Stage for the Show
You’ll want a clear glass jar. Mason jars work perfectly. I like the wide-mouth ones so kids can really get a front-row view. I tried using a plastic cup once—big mistake. Didn’t look nearly as cool and started to warp from warm water. Lesson learned.
Warm Water—Goldilocks Style
Not too hot, not too cold. Just warm enough to help the food coloring drop faster but not scalding. I usually run the tap until it’s cozy to the touch—think baby bathwater warm.
Vegetable Oil—The Unsung Hero
This is where the STEM experiments at home magic starts. About 2 to 3 tablespoons does the trick. I once used olive oil, and it worked fine, but it smelled like salad, which kinda threw off the vibe.
Food Coloring—The Fireworks Fuel
You’ll need 3–4 drops of different colors. The brighter, the better! Neon or gel-based colors give a super dramatic burst. And yep, food coloring can stain—ask my counters—so prep the space if you’ve got white everything like I do.
Small Bowl + Fork—Science Tools, Not Fancy Gear
This is where the fun begins: mixing oil with food coloring before it even touches the water. The fork helps break the color drops apart into mini explosions waiting to happen. If your kid’s into learning through play, this step feels like a potion-making moment.
I used to overthink these projects, but now I keep a little science drawer stocked with basics like this. I swear, having a few go-to educational toys (or in this case, pantry finds) makes you feel like a genius parent—even when you’re totally winging it.
Also…pro tip? Keep a towel nearby. Not because it gets messy, but your kid is going to beg to do it again. And again.
Step-by-Step Instructions to Create Your Fireworks
Alright, here’s where things get real hands-on. If you’re like me, you want interactive learning for kids that actually holds their attention for more than five seconds. This one? It’s so visual, even I stood there watching it like a kid in a candy store.
Here’s exactly how we did it—and yeah, we’ve repeated this a dozen times because it’s just that cool.
Step 1: Fill the Jar with Warm Water
Fill your clear jar about ¾ full with warm water. Not boiling, just warm. Think warm enough to help the food coloring move but not enough to fog up the glass. I let my kids do this part because it’s safe and simple, and honestly, they love being “in charge.”
I once filled it too close to the top—cue a mini overflow when we added the oil. Lesson learned. Leave some space!
Step 2: Mix Oil and Food Coloring
In a small bowl, pour in 2–3 tablespoons of vegetable oil. Then add 3–4 drops of different food coloring. Try not to dump them all in one spot. Spread ‘em out so you get that multicolor vibe. My daughter calls this her “color mixing lab,” and I roll with it. Makes it sound fancier than it is.
Now take your fork and give it a quick mix. Not crazy whisking—just enough to break up the color drops into smaller blobs. This is a sneaky way to teach STEM fun at home, ‘cause they’re seeing how oil keeps the colors suspended like little bubbles of art.
Step 3: Pour Slowly and Watch the Show
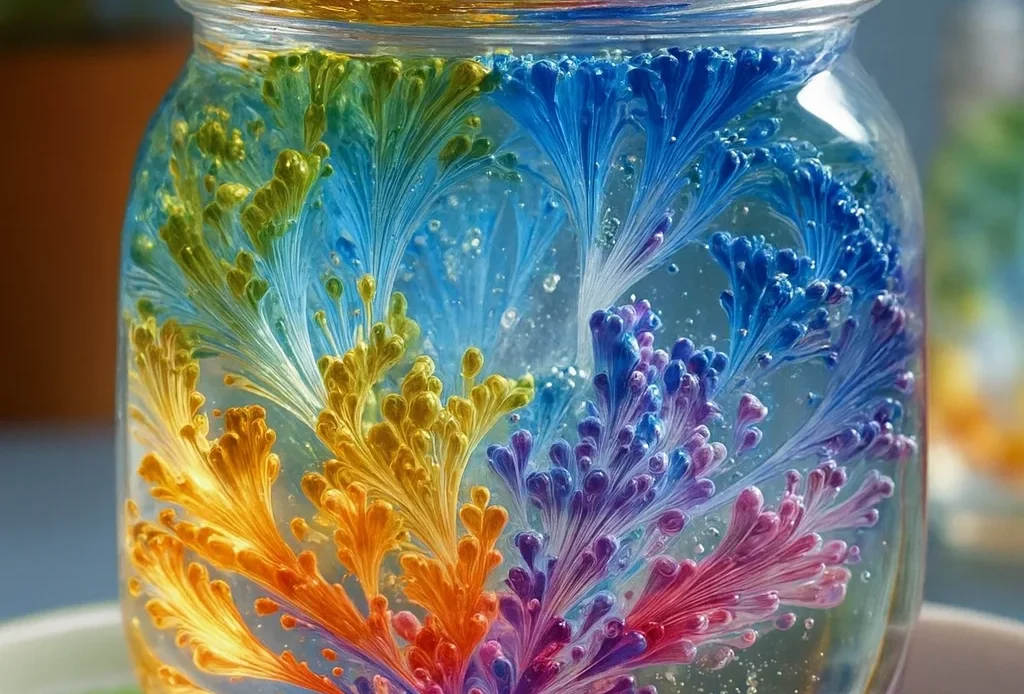
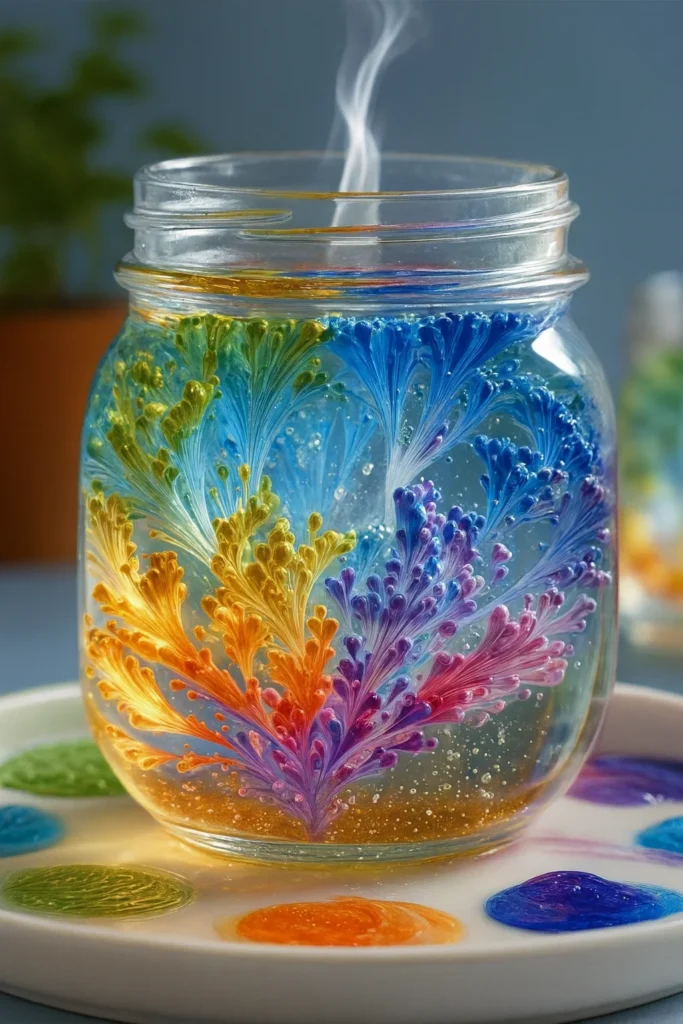
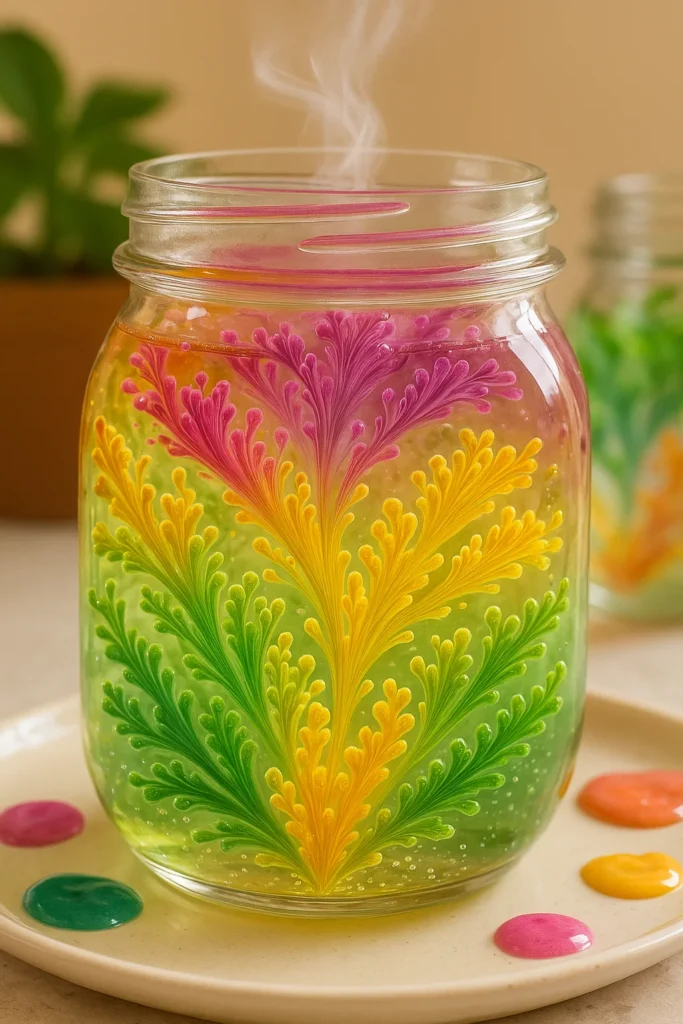
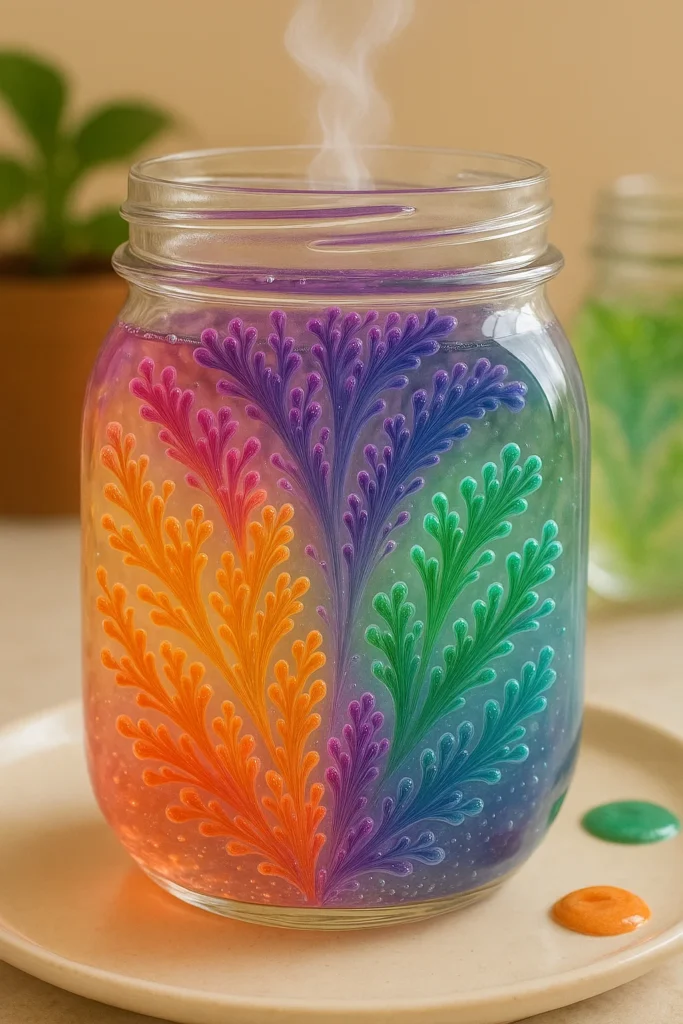
Here comes the magic. Take your colorful oil mix and sloooowly pour it into the jar of warm water. Do this gently. Like, drizzle it. If you dump it too fast? The whole thing just clouds up. (Been there. Oops.)
As soon as that oil hits the water, the colored droplets start to sink. Then—boom! Tiny bursts of color explode downward like little firework trails. It’s quiet, safe, and totally mesmerizing. Like a lava lamp had a baby with the Fourth of July.
We usually stand there silent for a sec, just watching. That’s when I know it’s a win. A real educational family activity that actually feels magical.
Honestly, this is one of those hands-on science projects that looks Pinterest-perfect but is super doable. And bonus: no loud bangs, no clean-up nightmares, and no “don’t touch that!” yelling from me.
Why This Works – The Science Behind the Magic
Okay, so the first time we did this, my son said, “It looks like the colors are racing!” And honestly? He wasn’t wrong. But of course, me being me, I turned that “whoa!” moment into a mini science lesson disguised as fun. Because this isn’t just cool to look at—there’s some wild science happening behind those bursts.
Oil and Water Just Don’t Mix
Let’s start with the basics: oil and water don’t like each other. It’s one of those classic science experiments for kids that never fails to amaze. They’re like two kids on the playground who just won’t play together no matter what.
Oil floats because it’s less dense than water. So when you pour it in, it chills on the top like a lazy pool noodle. Meanwhile, the food coloring? It’s water-based. It wants down. It sinks through the oil, heading straight into the water—and that’s when the real action begins.
Food Coloring Drops = Tiny Chemistry Rockets
So picture this: the food coloring, trapped in oil, finally hits the water. BOOM—instant fireworks. That’s because it dissolves the second it touches the water, spreading out in little colorful streaks. It’s simple chemistry for kids but feels like a mini magic show every time.
You can sneak in terms like “solubility” and “density” if you’re in homeschool mode. Or just let the kids enjoy the rainbow without any pressure. I switch it up depending on how school-ish they feel that day.
Warm Water Speeds It All Up
Here’s the part I messed up the first time—I used cold water. And it still worked, but sloooowly. Warm water helps the color burst faster. It’s like giving the molecules a little caffeine boost. Now I always go with warm because it makes the effect pop, and kids don’t lose interest halfway through.
So yeah, this isn’t just a fun rainy-day distraction. It’s an intro to how oil and water interact, how substances behave based on density, and why some things float while others sink. You’re doing full-on STEM education at home… without a whiteboard or textbook in sight.
Tips to Make It More Fun and Educational
Alright, so if you’re anything like me, you try to squeeze educational activities for children into everyday stuff. But let’s be real—not every experiment hits the mark. This one? Total crowd-pleaser. But after we did it like five times in a week (yeah, it was a hit), I started adding little twists to keep it fresh and sneak in some extra learning.
1. Use Neon or Glow-in-the-Dark Food Coloring
One night, I had the bright idea (pun 100% intended) to try neon food coloring. Game. Changer. We turned off the lights, grabbed a flashlight, and made a whole mini “science rave.” You’d be shocked how much more excited kids get when something glows. It’s one of those creative STEM projects that sticks with them.
Glow-in-the-dark is also a great way to talk about light, visibility, and color absorption. (Sneaky, I know.)
2. Turn It Into a Science Lesson
If you’re homeschooling or just want to feel like a parenting superhero for 20 minutes, add a worksheet or draw what they see in the jar. Have them guess what will happen before it starts—hello, hypothesis time! I’ve even used this as a writing prompt: “Describe what you saw like you’re a news reporter.” Suddenly, it’s science learning through play meets language arts.
3. Try Different Oils
We experimented with olive oil, avocado oil, and even coconut oil. Each one gave a slightly different effect. Some were thicker, some made the food coloring linger longer at the top. It’s a great way to teach about viscosity without sounding like a textbook.
And yes, my kitchen smelled like a salad bar. Worth it.
4. Record It in Slow Motion
Grab your phone and switch to slo-mo video mode. You’ll catch every swirl and ripple in stunning detail. It’s honestly mesmerizing—and makes for awesome keepsakes or even a little science show-and-tell. Plus, it turns your indoor activities for kids into mini film projects. Two birds, one very colorful stone.
At this point, we’ve made Fireworks in a Jar part of our rainy-day rotation. It checks all the boxes: screen-free, low-mess, cheap, educational, and FUN. And every time we tweak it, it feels new again.
So there you have it—your own colorful, quiet fireworks show, right in a jar. No noise complaints. No burnt fingers. Just a mesmerizing burst of color and wonder that teaches science experiments for kids at home without them even realizing they’re learning.
What I love most about this DIY is how it turns ordinary stuff—oil, water, food coloring—into a full-on teaching moment. And it’s not just for little kids either. Even tweens (and let’s be honest, adults too) can get lost in watching the colors swirl and burst like silent little explosions.
Whether you’re homeschooling, stuck inside on a rainy day, or just trying to keep things screen-free for 30 minutes, family learning activities like this are always worth it. And when it’s this easy and fun? Total win.
If this DIY STEM craft brought some magic to your day, take a second to snap a photo of your jar masterpiece and share it on Pinterest! You might just inspire another parent or teacher to give it a try.
✨ Pin it. Share it. Try it again with neon colors. Then come back and tell me how yours turned out—I genuinely want to know!
