

Ever looked at a sunny window and thought, “This could use some eco-sparkle”? 🌞 Let’s make it happen—bioplastics style! With landfills overflowing and plastic pollution reaching oceans, creating sustainable alternatives is more crucial than ever. One fun, artistic solution? Eco-Friendly Bioplastic Suncatchers. These colorful, translucent crafts are made from natural kitchen ingredients and let you explore both science and creativity in one hands-on project.
A recent study shows that 91% of plastic isn’t recycled—so teaching sustainability through crafts is a bright idea (literally and figuratively). Whether you’re a parent, teacher, or DIY enthusiast, these suncatchers offer an inspiring way to blend environmental education with colorful décor.
Let’s dive into how to make your windows pop—sustainably. 🌈
What Are Bioplastic Suncatchers?
“Wait, this plastic comes from cornstarch?!”
That was literally my first reaction when I stumbled on this project. I was trying to find more eco-friendly activities for kids that didn’t cost a fortune, weren’t loaded with microplastics, and actually taught something beyond just “make and toss.” Enter: bioplastic suncatchers. These babies aren’t just colorful—they’re made from biodegradable materials you probably already have in your kitchen. Total game changer.
The Basics
Okay, so a bioplastic is just a plastic made from natural, renewable sources like corn, potatoes, or even algae. Unlike traditional plastic (aka the forever-trash kind), this stuff breaks down naturally over time. Think of it like the banana peel of crafting—it’s not here to stay forever.
What makes suncatchers so cool is how they combine STEM learning with sustainable crafts. You’re not just gluing glitter to paper—you’re literally cooking up your own plant-based plastic. And it actually feels like a mini science experiment in your kitchen.
Why They’re Awesome
Let’s talk benefits. These suncatchers:
- Use non-toxic, biodegradable materials (cornstarch, vinegar, water, corn syrup)
- Are a fun way to sneak in science education without feeling all textbook-y
- Cost way less than store-bought plastic kits (hello, budget win 💸)
- Can be fully customized—colors, shapes, even sparkles if you’re feelin’ it
- Show kids that DIY eco projects are just as cool (and shinier!) than plastic toys
My daughter made one shaped like a heart with blue swirls, and I swear she acted like it was made of glass. And get this—it’s still hanging in our window 3 weeks later, catching light like a champ.
A Craft with a Message
This isn’t just about pretty window art. It’s a quiet lesson in low-waste living and environmental responsibility. My son asked why we didn’t just use plastic wrap, and we had this whole chat about plastic pollution and how long it takes to decompose. That moment? Gold.
Plus, if you’re like me and trying to cut back on screen time for the kids, this is an amazing alternative. They get messy, ask questions, and get to see the whole process—from ingredients to finished product. That’s learning.
Quick Tips From My Kitchen Fails:
- Don’t overcook the mixture—it’ll go from gel to cement real fast. I learned that the hard way.
- Food coloring is your best friend—go wild. Try layering for a tie-dye effect.
- Let them dry completely. Like, overnight. If they’re even a little sticky, they’ll turn into lint traps.
Ingredients & Tools You’ll Need
“Yep, all of this came from my pantry.”
No joke—the first time I made these suncatchers, I didn’t even have to go to the store. That’s the beauty of eco-friendly craft supplies: they’re usually hiding in plain sight. And if you’ve ever baked cookies or done a slime project with your kids, you’re already halfway there.
Let’s run through the must-haves for this DIY science kit for kids (and yes, it totally feels like one).
The Core Ingredients:
- 1 cup Water – basic but essential
- 2 tbsp Corn Syrup – gives it that bendy, glassy finish
- 1 tbsp Vinegar – this helps the plastic stay flexible, not crumbly
- ½ cup Cornstarch – the real MVP; it thickens everything into a gel
- Food Coloring – the more colors, the more fun
These are all non-toxic materials, which was a biggie for me. I’ve got two curious kids who touch everything, so not having to worry about fumes or harsh chemicals was a relief.
Pro tip: If you’re trying to avoid artificial dyes, natural ones like beet juice or turmeric can work—just know they’ll give more earthy tones than neon pops.
Tools You Probably Already Own:
- Wax Paper – crucial. This keeps your counters clean and the bioplastic from sticking
- Cookie Cutters – totally optional, but make shaping 10x easier (stars, hearts, dinosaurs—you name it)
- Small Bowls – for mixing different colors
- Paintbrushes – these are fun if your kids want to paint the goo into specific designs
I tried doing it once without wax paper… let’s just say I was scraping dried goo off my granite for a week. Don’t be like me—use the wax paper.
Make It Fancy (If You Want)
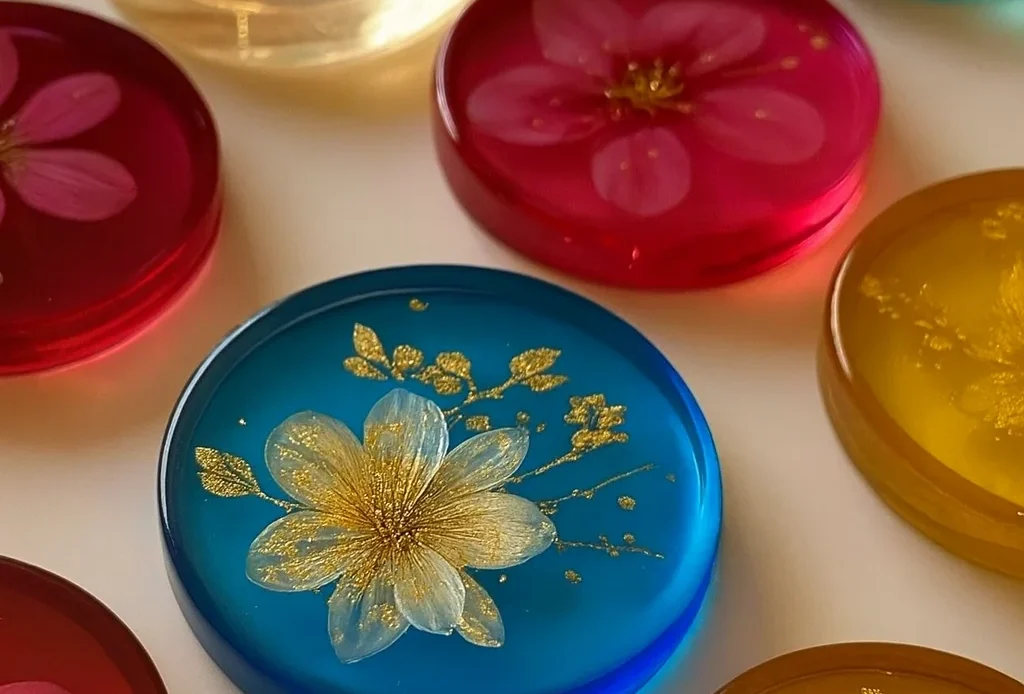
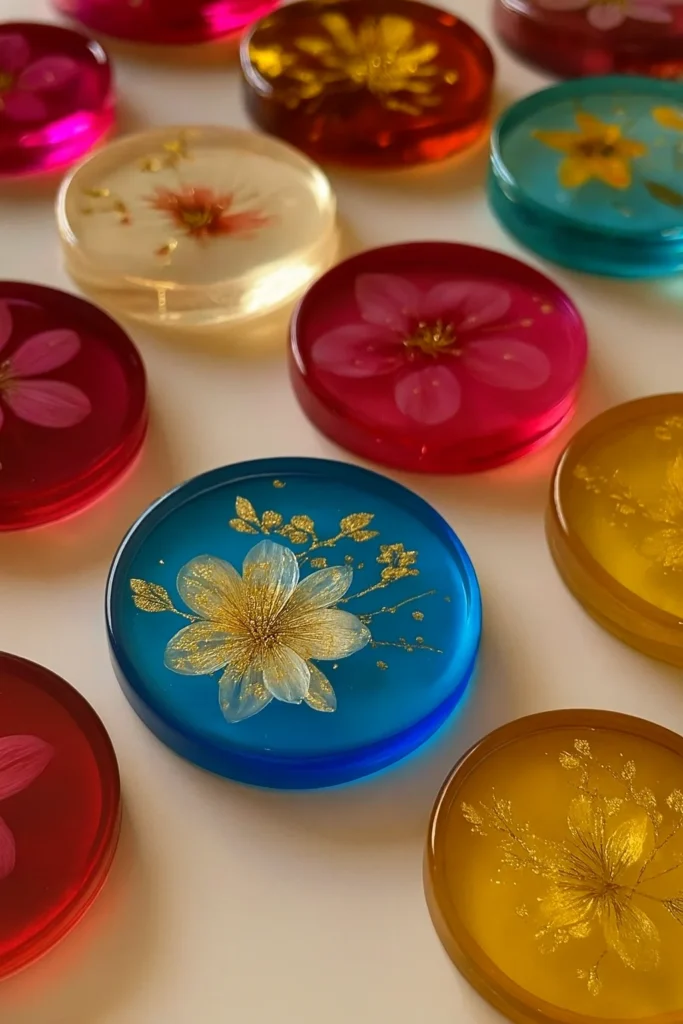
If you want to level up this sustainable art project, try tossing in a pinch of eco glitter or dried flower petals. The light catches those little bits in the window and it looks stunning—like stained glass but without the sharp edges or cost.
Oh, and don’t stress if things get messy. That’s part of the fun. My kitchen looked like a science lab meets an art studio meets a sticky pancake disaster. But the kids were thrilled, and honestly… so was I.
Step-by-Step Guide to Making Bioplastic Suncatchers
“It looked like slime, then magic happened.”
So here’s the part where things get messy—in the best way. I’ll walk you through exactly how to turn basic pantry stuff into legit biodegradable plastic that hardens into sun-catching art. If you’ve ever wanted to do a DIY eco-friendly project that actually works, this is it.
I’ve tried this a few times, and trust me: it’s all about timing and texture. The first batch I cooked way too long—it came out like rubber and cracked as soon as it dried. Now? I’ve got it down to a science. Well, kitchen science. 😄
Step 1: Mix Your Magic Gel
In a small pot, add:
- 1 cup water
- 1 tbsp vinegar
- 2 tbsp corn syrup
- ½ cup cornstarch
Whisk it all together before turning on the heat. This helps prevent any weird clumps. Once you’ve got a smooth liquid, crank the heat to medium and stir continuously.
After about 2–3 minutes, the mixture starts to thicken—like pudding meets slime. That’s your sign it’s ready. Don’t wait too long or it’ll go chunky fast. Once it looks like gooey gel, kill the heat.
Quick tip: If it clumps or separates, you might’ve overheated it. I’ve salvaged a few batches by adding a splash more water and stirring like mad.
Step 2: Add Color
Let the gel cool for a minute or two so it’s not scorching. Divide it into small bowls and add food coloring. A drop or two goes a long way. Stir gently with a spoon or toothpick. This is where the kids usually go wild with color combos.
We’ve done red swirls with glitter, earthy greens with dried herbs, and even blue with bits of lavender for a scented version. (It smelled like a spa and science fair had a baby.)
Step 3: Shape It Up
Lay out your wax paper on a tray or table. Then either:
- Pour the colored gel directly onto the wax paper into circular blobs
- Use cookie cutters as molds (great for symmetry)
- Use a paintbrush to spread and design patterns
Make them as thick or thin as you like, but thinner pieces dry faster and let more sunlight shine through. I’ve found 1/8″ thick gives the best results—not too fragile, not too gummy.
Step 4: Dry It Out
Here’s the part where patience comes in. You’ve got two drying options:
- Air dry for 6–8 hours (or overnight)
- Low-temp oven at 150°F (65°C) for 1–2 hours, flipping halfway through
We usually do a mix. I leave them out overnight, but if the kids are eager to see results now, I pop them in the oven. If they’re still tacky, give it more time—don’t rush this part or they’ll warp.
Step 5: Display Your Art
Once they’re completely hardened, peel them off the wax paper. They should come off clean and shiny. Stick them to a sunny window with clear tape or suction cups. When the sunlight hits just right? Magic.
I still have my daughter’s swirly rainbow heart stuck on our kitchen window. It glows every morning. Little things like that make the house feel… hopeful.
Creative Ideas and Customizations
“Okay… so we may have gone a little overboard with the glitter.”
The first time we made bioplastic suncatchers, I kept it simple—one color, one shape, done. But once my kids realized we could make literally anything from this gooey mix? All bets were off. We turned our kitchen into a full-on eco-friendly art lab.
And let me tell you—this project goes from science fair to Pinterest-worthy real quick when you get creative.
Play With Color Combos
Don’t just stick to single colors. Swirl two or three together in a bowl before pouring and you’ll get this gorgeous tie-dye effect. My daughter calls hers the “galaxy swirl.” It looks like space trapped in plastic (but, you know, the plastic-free kind).
Quick hack: Use a toothpick to swirl colors right on the wax paper. It gives it that marbled look without blending into brown mush.
Cookie Cutter Shapes = Instant Wow
I love using cookie cutters for this. Not just for hearts or stars, but we found a dinosaur set, and boom—now we’ve got a rainbow triceratops in the bathroom window.
Look for seasonal shapes, too:
- Snowflakes in winter ❄️
- Flowers for spring 🌸
- Pumpkins or bats for fall 🎃
Suddenly your sustainable kids project turns into year-round décor.
Add Some Flair
This is where things get real fun. Try adding:
- Eco-glitter (yep, it’s a thing—biodegradable and everything)
- Dried flower petals (lavender, rose, or whatever’s in the garden)
- Bits of colored tissue paper for texture
- Natural scents like citrus zest or vanilla extract
One of my favorites? Crushed dried mint. It smells amazing when the sun warms it up, and gives a cool speckled look.
Paint On Details
Once they dry, use a thin paintbrush and acrylic paint to add designs—dots, names, even little messages like “shine on” or “made with love.” It turns your custom DIY craft into a handmade gift.
We gave a bunch to our neighbors last Earth Day, tied with string and a little card explaining they were made from sustainable, biodegradable plastic. They were seriously impressed. It’s one of the few kids crafts that doesn’t end up in the trash a week later.
Let Kids Take Over
Here’s my big “mom win” moment—when I stepped back and just let my kids go wild with their ideas. They made suncatchers with googly eyes, ones shaped like animals, even a freeform blob they insisted was a jellyfish. It’s art. It’s science. It’s theirs.
Giving them ownership makes it feel less like an activity and more like an experiment in eco-friendly self-expression.

Teaching Kids About Sustainability Through Crafts
“We made a sun… and a point.”
I didn’t expect a craft project to start a conversation about landfills and ocean plastic, but here we are. What started as a fun afternoon with food coloring and cornstarch turned into a surprisingly powerful moment of environmental education for children.
Kids get it—way more than we give them credit for. And when they can see how something they made is different from regular plastic? That’s when it clicks.
Learning Without Lecturing
I’ve tried the whole “let’s sit down and read a book about recycling” thing. It lasted, like, seven minutes. But when you’re elbow-deep in gooey bioplastic and your kid asks, “Why don’t we just buy decorations at the store?”—that’s the moment.
That’s when you talk about:
- Why plastic doesn’t break down
- What biodegradable means in real life
- How sustainable learning activities help the planet
And suddenly, they’re not just crafting—they’re understanding.
Big Concepts, Tiny Hands
One of my favorite parts of this project is how it bridges STEM learning and real-world values. My 7-year-old asked if we were making “eco-slime,” and honestly? Close enough. It’s chemistry meets eco-conscious parenting in action.
When they mix the ingredients, they’re learning ratios. When they watch it dry and change texture, they’re observing reactions. And when they peel it off the wax paper and hang it up, they’re seeing how sustainable crafts can be just as cool (and way more responsible) than plastic ones.
Perfect for Classrooms or Homeschool
I shared this idea with a teacher friend, and now her whole third-grade class is doing it for their Earth Week science project. She says it’s the first time her students didn’t complain about a lesson involving vinegar.
If you’re homeschooling or just trying to find a hands-on STEM project, this one nails it. Plus, it sparks deeper questions like:
- “Where does plastic come from?”
- “Can we make other things out of plants?”
- “Why doesn’t everyone do this?”
Good luck answering that last one without ranting about oil companies. 😅
Making It a Habit
What I’ve learned is this: the more we normalize eco-friendly activities for kids, the more they carry that mindset forward. My daughter now side-eyes plastic packaging at the store. My son started saving paper scraps to “make something later.”
That’s the kind of ripple effect we want.
So, yeah. We made suncatchers. But we also made awareness. And if you ask me, that’s the real win.
So yeah… we made something shiny. But more than that—we made something that matters.
These eco-friendly bioplastic suncatchers aren’t just pretty—they’re proof that sustainable creativity can be colorful, affordable, and meaningful. Whether you’re a teacher looking for a classroom activity that actually sticks, or a parent like me who just wants a screen-free afternoon that doesn’t end in a glitter explosion, this project delivers.
And bonus? It gets your kids talking about waste, nature, and responsibility in a way that’s real, not preachy.
I’ll be honest—I didn’t expect my windows to look like a rainbow science museum this year, but I’m not mad about it. Every time I walk past one of our suncatchers, I smile. Not just because they’re cute, but because they remind me we can do things better. With our crafts. With our kids. With our planet.
So hey, if this sparked something for you, or if your windows could use a little sun-kissed sustainability, give it a go. And when you do?
Share your creations on Pinterest. Tag it. Pin it. Pass it on. Let’s make eco-crafting a trend that actually makes the world a bit brighter.
