

Looking for a kid-friendly science experiment that actually delivers on the “wow” factor? Firework jars are hands-down one of the easiest and most satisfying DIY projects I’ve ever tried. Using just oil, water, and food coloring, you can create a beautiful explosion of color—no fire hazards involved!
According to the National Science Teaching Association, kids retain 75% more information through hands-on experiments. So why not make learning pop? Firework jars are mesmerizing, safe, and a whole lot of fun. Let’s dive in!
What Are Firework Jars?
Okay, let me tell you—when I first heard about firework jars, I thought, “Cool, probably messy.” But then I tried it with my niece and nephew, and wow. It’s like a mini Fourth of July in a mason jar. And get this—it’s one of the simplest science activities for kids I’ve ever done.
✨ My First Time Making One
We were stuck inside during a rainstorm, and they were bouncing off the walls. I scrambled for a quick DIY experiment and stumbled on this. Grabbed a jar, filled it with warm water, added a little oil and some drops of food coloring—and boom. Instant magic.
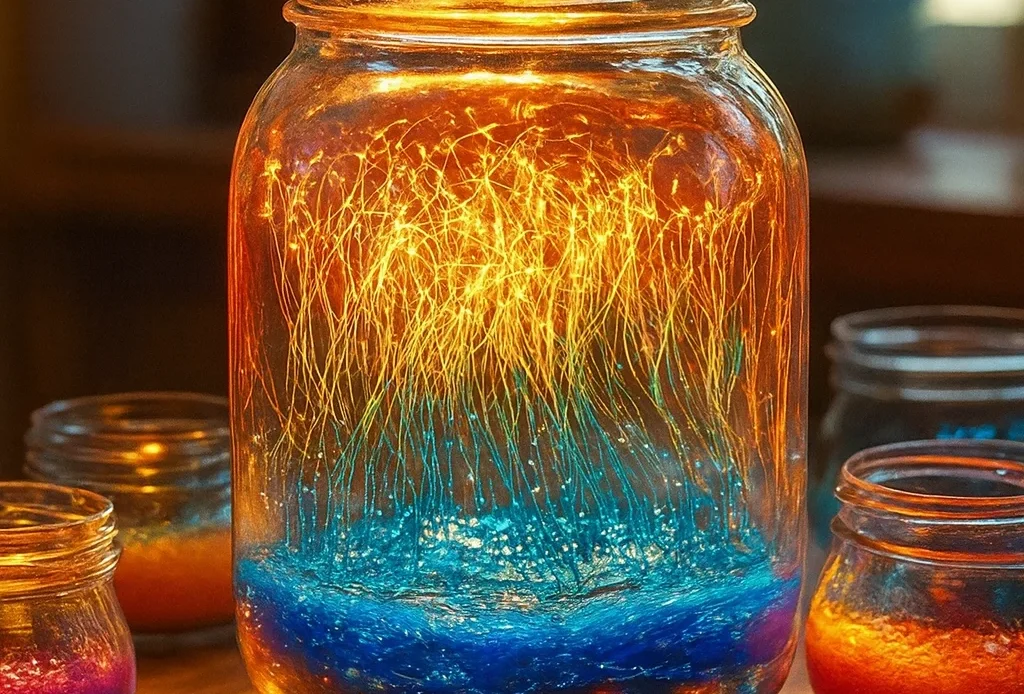
The food coloring drops burst like tiny fireworks as they fell through the oil and hit the water. The kids’ faces lit up like I’d just pulled off a Vegas magic show. We ended up making three different jars just to try different color combos.
🧪 The Science (That Doesn’t Feel Like Learning)
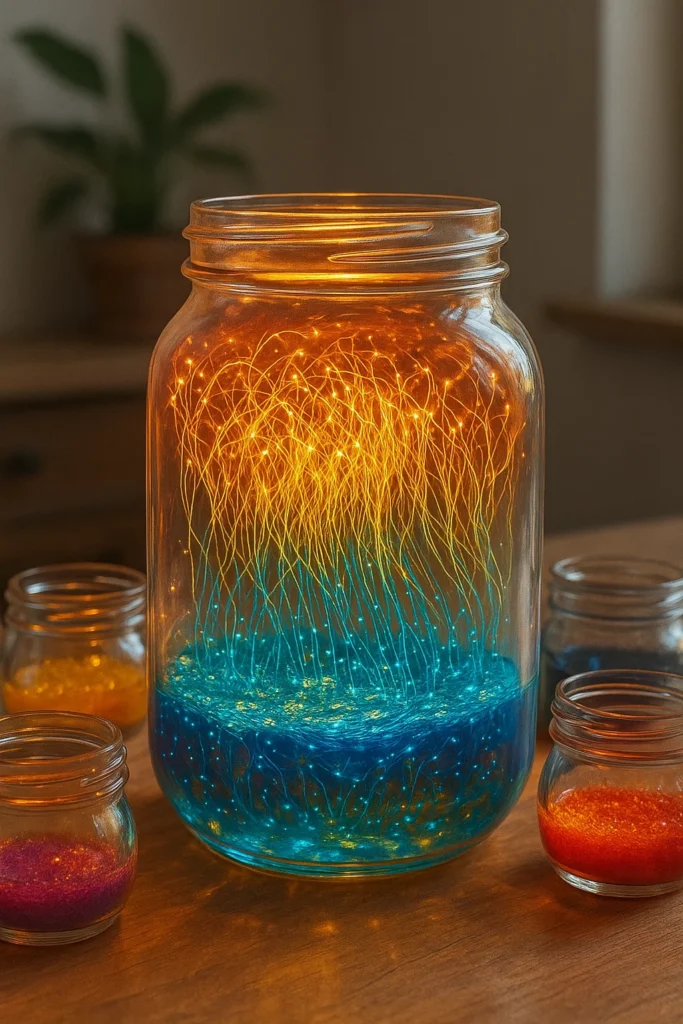
Here’s the genius behind it—STEM learning without any “ugh, this is school” vibes. Oil is less dense than water, so it floats. Food coloring doesn’t mix with oil (that’s key), so it just hangs out in little bubbles until it breaks through and hits the water. When that happens? You get this colorful explosion—like mini fireworks under glass.
We ended up talking about density, solubility, and why oil and water don’t mix. I didn’t even try to make it educational—it just kinda happened. That’s why I swear by this one when folks ask for educational crafts for kids that don’t feel forced.
👨👩👧 Why Parents and Teachers Love It
- Takes under 5 minutes to prep
- No open flames or dangerous chemicals
- Kids get to explore hands-on science experiments
- Teaches concepts like layering, chemical reactions, and color theory
- Doubles as a calming, visual sensory jar for younger kids
I’ve used this at birthday parties, summer camp, and even during a Zoom class when I was helping with homeschool stuff during COVID. Always a hit. And honestly? Watching those drops fall through the oil is weirdly satisfying, even for adults.
🔥 Real Talk: Is It Worth It?
100%. No fancy supplies, no clean-up headache, no screaming kids. Plus, they learn something. It’s the holy grail of fun science activities—cheap, fast, colorful, and low effort.
So if you’re ever stuck looking for a quick win with your kids, or need a last-minute idea for class, trust me—firework jars are where it’s at.
Supplies You’ll Need
I used to think cool science stuff required some kinda fancy STEM craft kit—but nope. When we made our first firework jar, everything we needed was already in the kitchen. Seriously. I didn’t have to step foot in a store or drop a dime on one of those overpriced science kits for kids.
🛒 What You Actually Need
Here’s the super short list of DIY supplies for kids that make this thing work like magic:
- 1 mason jar (or any clear glass—just make sure it’s see-through)
- ¾ cup warm water (not boiling, just warm to the touch)
- 2–3 tablespoons vegetable oil (clear oils work best—avoid olive oil)
- 5–10 drops food coloring (the more colors, the cooler it looks)
- 1 small mixing bowl
- 1 fork or spoon (for mixing the oil & color)
That’s it. If your kitchen has even a basic “junk drawer,” you’re probably good to go.
🌟 Optional Add-ons for More Wow
Once we got the basics down, I started experimenting—because kids always want to take it to the next level.
- Glitter – Makes the jar sparkle like a real firework finale.
- Pipettes – Good for controlled droplet release (plus they feel sciencey).
- Test tubes – Fun alternative to jars and perfect for party setups.
- Tray or baking sheet – Makes cleanup way easier, especially if you’re letting kids do their thing.
All this stuff adds a fun twist but isn’t required. Honestly, we once did this at Grandma’s house using a spaghetti sauce jar and plastic spoons. Still looked epic.
🧠 What I Wish I Knew First Time
Biggest rookie mistake? Using cold water. It slowed the color reaction and kinda dulled the whole thing. Warm water speeds up the action and makes the colors pop more. Also—don’t stir the oil and food coloring too hard. You want droplets, not full-on sludge.
And if you’ve got multiple kids, prep everything in advance like it’s a mini classroom science experiment. Saves your sanity when the “I wanna go first!” wars break out.
🧩 Why the Right Materials Matter
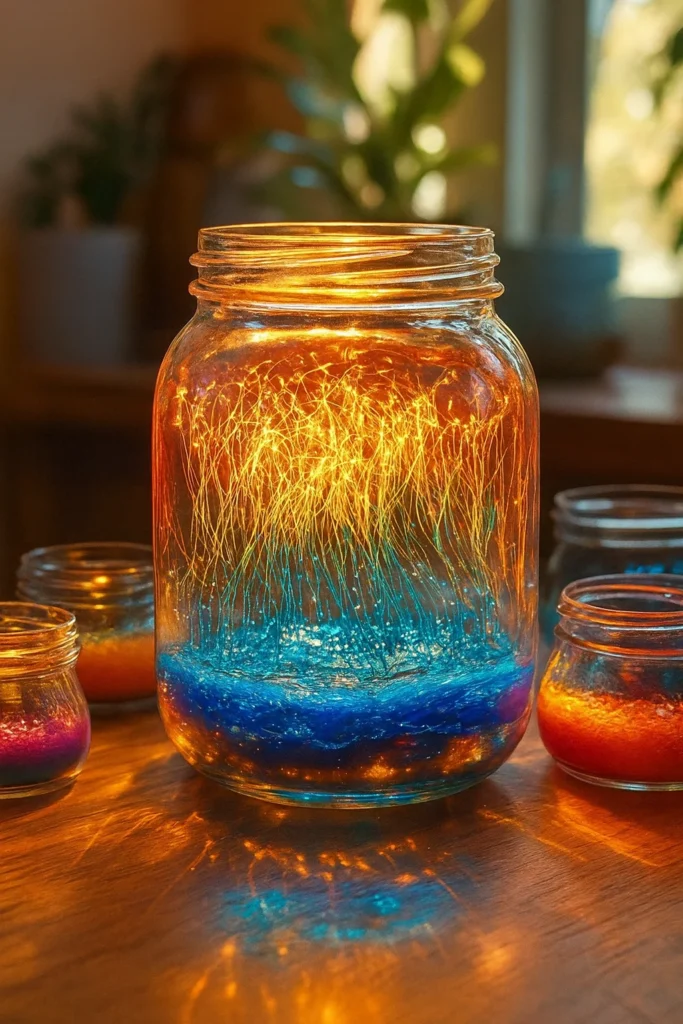
Using the right jar size and clear oil isn’t just about looks—it affects how the “fireworks” drop and spread. Bigger jars = longer color trails. Clearer oil = better contrast.
That’s what makes this one of the most genius educational activities at home—minimal setup, max engagement. It’s the kind of project that feels like play but secretly checks every box for hands-on learning materials.
Step-by-Step Instructions
Alright, so if you’re anything like me, you’ve probably been burned by so-called “easy science experiments for kids” that either make a mess or straight up don’t work. Trust me—this isn’t one of those. Firework jars are legit. Here’s exactly how I did it without losing my mind or my kitchen.
🔧 Step 1: Fill the Jar with Warm Water
Fill your clear jar about ¾ full with warm water. Not hot, just warm enough so it’s cozy. Warm water helps the food coloring break through the oil faster and makes the fireworks burst like, well, actual fireworks.
🛢 Step 2: Mix Oil and Food Coloring Separately
In a separate small bowl, pour in 2–3 tablespoons of vegetable oil. Then add 5–10 drops of food coloring—you can use all one color or mix it up. I like going wild with red, blue, green, and yellow for the full explosion vibe.
Use a fork or spoon to gently stir the oil and food coloring. Don’t overmix! You want those color blobs to stay separated. That’s what gives you the drip and burst effect later.
🌈 Step 3: Pour the Oil Mixture into the Water
Now comes the magic. Slowly pour the oil and food coloring mixture right into the jar of warm water. The oil will float to the top, and the food coloring will eventually sink through.
Within seconds, you’ll see the color droplets start to burst and streak down like mini fireworks. I swear, the first time I did it, I actually said “whoa” out loud. My 6-year-old nephew literally yelled, “That’s sick!”
🌀 Step 4: Observe and Repeat
Let the kids watch the reaction for a bit—this is where the interactive learning happens. Talk about what’s going on if you want, or just let them enjoy it. Either way, they’re absorbing a lot.
Wanna keep the party going? Just rinse out the jar and start again. Or—my favorite hack—prep a few oil-and-color bowls in advance so they can keep refilling for round two, three, or ten. It’s the kind of DIY project for children that keeps them entertained without needing a tablet.
🚫 Mistakes to Avoid
- Don’t use too much food coloring—it’ll just sink and clump.
- Cold water makes everything sluggish.
- Stirring the oil too hard makes it cloudy and ruins the droplets.
Learned all that the hard way during my second attempt. Still turned out okay, but once I got the hang of it, the colors looked way sharper and more firework-y.
🎯 Why It Works Every Time
The combo of density, solubility, and timing makes this one of the most fun educational activities out there. Kids aren’t just watching colors—they’re witnessing real science with cause and effect. It’s like teaching without actually “teaching.”
And best part? No cleanup nightmare. Just rinse the jar and wipe the table. Done.
The Science Behind the Magic
Okay, this is the part where I low-key turn into Bill Nye for a minute. Because yeah, watching firework jars is cool—but knowing why it works? That’s where the real “aha!” moment hits. And trust me, this little project is a goldmine for sneaky STEM education.
🧬 Oil and Water: Never Besties
Here’s the deal: oil and water don’t mix. Like, ever. I once tried mixing salad dressing as a kid and couldn’t figure out why it kept separating. Turns out it’s all about density and molecular structure.
Water is heavier and denser, so it sits at the bottom. Oil’s lighter and floats on top. And because their molecules are polar opposites (literally), they repel each other. That’s the whole reason this thing works.
💧 What Food Coloring Does
Food coloring? That stuff’s water-based. So even though you mix it with oil before pouring, it doesn’t dissolve. Instead, it hangs out in little blobs—floating, waiting for a chance to drop.
Once those blobs hit the water below, BAM! They shoot down and burst into swirling, colorful trails. It’s like a science lesson in slow motion.
🔬 Teachable Moments Hiding in Plain Sight
This whole experiment is loaded with chances for teaching kids science concepts without it ever feeling boring:
- Solubility – What mixes with what, and why.
- Density – Why some things float and others sink.
- Chemical reactions – Sort of! It’s physical behavior, but still exciting.
- Observation and prediction – What do you think will happen with red vs. blue?
- Trial and error – Mixing, measuring, testing… they’re learning through play.
Honestly, I’ve used this with kindergarteners and tweens, and both age groups got into it. It’s like magic, but explainable—aka the best kind of science experiment for kids at home.
🤯 When It Blew My Mind (and Theirs)
The first time my nephew asked, “Why does the blue one go slower than the red one?” I was floored. That’s when I realized this wasn’t just a fun trick—it was full-on interactive science education. And now? He wants to “test variables” every time we do it. Dude’s seven.
🧠 How to Make It Stick
Don’t just let the fireworks fizzle out—ask stuff like:
- “What do you think will happen if we use more oil?”
- “Why do the colors fall instead of float?”
- “What if we used milk instead of water?”
You’ll be shocked how curious they get. That’s why this has become my go-to for rainy day science lessons at home. It’s quick, cheap, and full of learning disguised as fun.
Creative Variations to Try
After doing this a few dozen times (no exaggeration—my niece calls it “color bomb hour”), I started playing around with ways to level it up. Turns out, firework jars are the gateway drug to a whole world of creative sensory activities.
🎆 Add Glitter for Extra Sparkle
The first upgrade I ever tried? Glitter. I tossed a pinch into the oil before pouring and—chef’s kiss—it gave the jar a starry-night vibe. The glitter floats and catches the light as the color trails swirl through the water. It’s basically a DIY lava lamp. Pro tip: use fine glitter so it doesn’t clump.
We even tried biodegradable glitter once to feel a little more eco-good about it. It worked great and made cleanup less guilt-inducing.
🎨 Theme It for the Holidays
This is where it gets real fun. We started using holiday-themed colors to turn firework jars into holiday crafts for children:
- Red and green for Christmas
- Pastels for Easter
- Orange and black for Halloween
- Red, white, and blue for the 4th of July
- Even pink and purple for Valentine’s Day
I once lined up five jars for a “firework jar rainbow” at a birthday party. It doubled as both a science experiment and a table decoration. Pinterest-worthy, for sure.
💡 Try Different Containers
Mason jars are the go-to, but don’t stop there. We’ve tried:
- Tall vases for longer trails
- Short squat jars for quicker bursts
- Clear plastic tumblers when doing this with a big group
- Even baby food jars (yes, the mini ones—they’re adorable)
It became a kind of experiment in itself. Each shape changes how the color moves, and the kids LOVED comparing them.
🌌 Glow-in-the-Dark and Neon Versions
Oh, and if you really wanna wow them? Grab some glow-in-the-dark food coloring. I found a set online that legit glowed under blacklight. Combine that with a dark room and some glitter, and you’ve got yourself a glow jar that looks straight out of a sci-fi movie.
We used these during a backyard camping night, and the kids thought they were catching magic in a jar. One even brought his to bed like a nightlight.
✏️ Let the Kids Invent Their Own Combos
After a few tries, I just started putting the DIY glitter jars setup out on the table and letting the kids invent their own. Some wanted to mix ALL the colors (which turned brown, obviously), but others tried layering oil mixtures to see which order worked best.
It turned into a real fun STEM project without me even lifting a finger. Letting them take the lead turned this from a one-time craft into a full-blown obsession.
Safety Tips and Cleanup
Alright, let’s talk about what really matters to parents: not wrecking the kitchen. I’ve done enough “harmless” DIY projects that ended with me scrubbing food dye off the countertop at midnight to know better. Thankfully, firework jars? They’re the kind of safe experiments for kids that don’t leave you questioning your life choices afterward.
👀 Supervision = Sanity
Even though this is about as safe as it gets—no heat, no chemicals, no sharp tools—I still recommend keeping an eye on little ones. Especially if your toddler thinks drinking water with floating oil looks like a good idea. (True story. We caught it just in time.)
If you’re doing this with preschoolers, pour the oil/food coloring mix for them. Let them handle the jar and observe, but maybe keep the glitter stash out of arm’s reach unless you enjoy sparkles in your coffee mug for three weeks.
🧽 Do It on a Tray (You’ll Thank Me Later)
One of my best cleanup hacks? Just stick everything on a baking tray or an old cookie sheet. That way, if anything spills—and it will—it’s all contained. Especially useful when doing this with a group of kids. I’ve used this trick during classroom demos, birthday parties, and even once at a church craft table.
Also, I keep a damp rag nearby to wipe any oil smudges. Food coloring can stain, but if you wipe it quickly, no harm done. Worst case? Magic Eraser.
🗑️ Disposal and Storage Tips
After the fun’s over, don’t dump the oil down the sink. Pour it into a disposable cup or container and toss it in the trash. Learned that one the hard way when my kitchen drain turned into a slow-motion tragedy.
If you want to reuse the jars, just rinse them out with warm, soapy water. Shake them a bit to loosen the oil, then run ‘em under hot water. Done.
And hey—if the jars turned out especially pretty? Leave ‘em on display! They make surprisingly nice little kid-safe crafts to sit on a shelf for a few days before you clean them out.
📚 Make Safety Part of the Learning
Here’s what’s cool: every step of the cleanup can be a teachable moment. Why doesn’t oil go down the drain? What happens when you mix oil with soap? Boom—bonus science lesson. That’s why I love calling these parent-approved learning activities—because they sneak education into real life stuff, even wiping the table.
So there you have it—firework jars, the ultimate no-fuss, wow-factor project that turns everyday kitchen stuff into a full-blown learning experience. I’ve done this more times than I can count, and it still blows my mind (and the kids’). It’s colorful, safe, and secretly educational. The trifecta of fun educational activities.
Whether you’re a parent looking for science at home, a teacher pulling together last-minute STEM activities for children, or just someone trying to keep a group of kids busy without screens—this one’s a no-brainer.
And the best part? It’s beautiful. Seriously, these jars are Pinterest-worthy projects that double as learning and decor. You can even snap pics of different variations and start your own collection of DIY crafts for kids on your board.
💡 Final Tip
Always have extra jars on hand. Trust me. One turns into three real quick once the first “ooh” moment happens.
📌 Inspired by this post? Pin it now and share the color magic with your community! Whether you’re a science geek or just love easy crafts, firework jars are worth the spark.
