

Looking for a quick and squishy craft that keeps kids happily entertained and teaches them basic chemistry? Say hello to Bubble Dough! This DIY play dough made from cornstarch and dish soap is soft, pliable, and smells amazing. With just two ingredients and a splash of creativity, it turns your kitchen into a science lab of giggles and goo. According to sensory play experts, hands-on activities like this can boost fine motor skills, soothe anxiety, and spark imaginative thinking. Let’s dive into this 2025 favorite that parents, teachers, and kids alike are raving about!
Ingredients You Need for DIY Bubble Dough
Alright, let’s talk supplies. I swear, the first time I made this, I was standing in my kitchen like, “Wait, that’s it?!” Two ingredients—cornstarch and dish soap. That’s all you need to whip up a batch of stretchy, soft, totally mesmerizing bubble dough. Honestly, it felt like I’d stumbled onto some kind of parenting hack.
Basic Ingredients (a.k.a. the VIPs)
So here’s the deal:
- 1 cup cornstarch – Regular ol’ pantry cornstarch works great. I’ve tried a few brands, and they’re pretty much the same. Don’t overthink it.
- ½ cup liquid dish soap – Thicker ones like Dawn or Palmolive seem to hold up better. I once used a budget brand, and let’s just say… it got a little too goopy.
The best part? These are non-toxic ingredients. So if your toddler decides to lick their fingers mid-play (yep, been there), no panic attacks necessary.
Add-Ons for Extra Fun
Okay, once you’ve nailed the basic dough, here’s where the magic happens. Think DIY sensory craft, but upgraded.
- Food coloring – A few drops go a long way. Divide your dough into sections and make a rainbow.
- Glitter – My daughter calls this the “fairy dust.” Use biodegradable glitter if you’re being eco-friendly.
- Small sprinkles or beads – They add texture, which ups the tactile sensory play factor big time.
You’ll also need:
- A bowl – Go bigger than you think. Trust me, bubble dough has a way of escaping.
- Spoon or spatula – Or just dive in with your hands. Way more fun.
Pro Tips From My Kitchen Chaos
If your dough turns out too sticky, add a bit more cornstarch. Too dry? A squirt of dish soap will fix it. One time I added too much color, and the dough stained our hands blue for a day. Not a crisis, but maybe wear gloves if you’re going all out with dark colors.
Oh, and make sure your mixing area is covered. The first time, I was cleaning up rainbow smears for hours. Now, I throw down an old towel or just mix it on a baking tray.
If you’re anything like me and love a cheap sensory activity that feels like magic, this is it. You’ll get about 20-30 minutes of uninterrupted play from kids (which is like a mini vacation), and it costs less than $2 per batch. That’s what I call a win.
Step-by-Step Instructions to Make Bubble Dough
Alright, now that you’ve got your ingredients ready, let’s turn that pile of powder and soap into something squishy and magical. I’ve done this about a dozen times, and every single batch has its own little personality. Some are stretchier, some more fluffy—but they all get squished to oblivion by the kids.
Step 1: Dump and Stir… Slowly
Start with 1 cup of cornstarch in a mixing bowl. Then pour in ½ cup of dish soap. Don’t go all wild mixing right away—this stuff turns to cloud dust if you stir too fast (been there, sneezed that).
Use a spoon or your hands if you’re feeling brave. I let my kids mix with their fingers and yeah, the mess is real—but the giggles are worth it. Just go slow and watch as it starts clumping into that smooth, stretchy homemade play dough texture.
Step 2: Adjust the Texture (Like a Dough Whisperer)
Here’s where you play mad scientist. If it’s too sticky, toss in more cornstarch, a spoonful at a time. If it’s crumbly and dry, squirt in more dish soap. You’re aiming for a soft, moldable texture—think silky slime but thicker. Not as gooey, more like soft clay.
I’ve messed this up more times than I care to admit. Once I added too much soap and ended up with this weird, foamy blob that kept slipping through our fingers. Funny? Yes. Usable? Not so much.
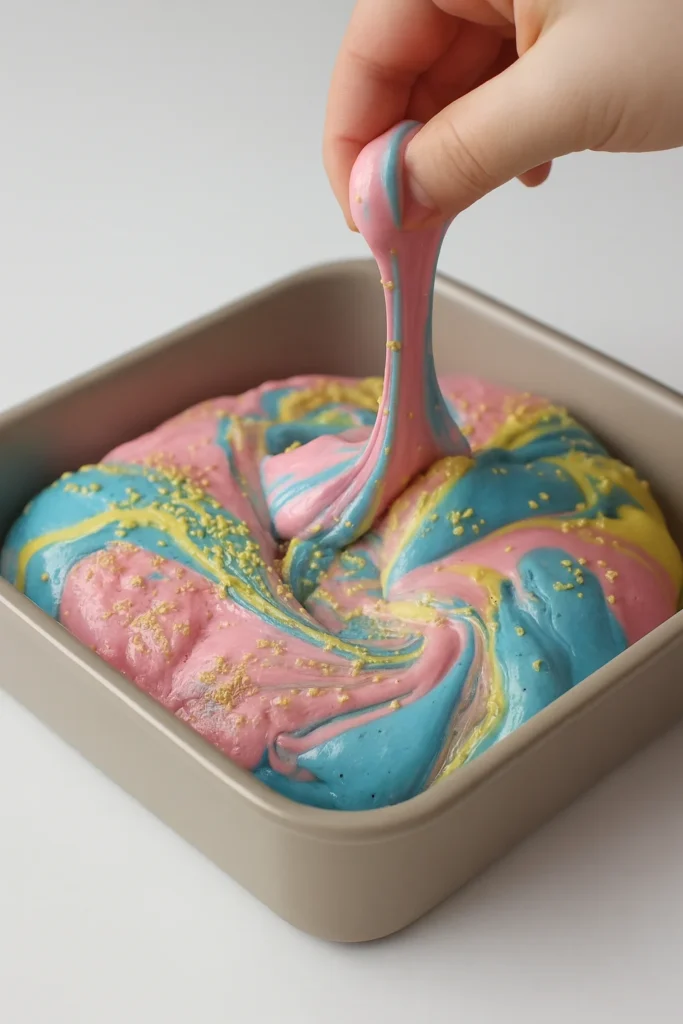
Step 3: Time to Add Color and Shine
Once your base dough feels juuust right, divide it into smaller balls and add food coloring to each. Pro tip: wear gloves or use sandwich bags as mini mixing gloves. One time my son ended up with neon green hands for two days. Not ideal for school pics.
Now, if you’re feeling fancy—add glitter or tiny beads. This turns it into a full-blown sensory play at home experience. The kids love “surprises” in the dough, like sprinkles or mini stars.
Step 4: Play Away
That’s it—you’re done! Your kids can now stretch it, smash it, roll it, or squish it into whatever their little hearts desire. We’ve made everything from fake pizzas to glittery snakes.
And here’s the part I didn’t expect—this dough has such a calming effect. My youngest, who’s usually bouncing off the walls, will sit and squish for half an hour straight. That’s gold.
Step 5: Store or Revive
When you’re done, seal it in an airtight container or a resealable bag. It keeps for a few days, depending on the weather. If it starts drying out? Just add a drop of dish soap and knead it back to life.
One time I forgot and left a batch open overnight. It turned into this chalky rock—but even then, a little kneading and soap brought it back. It’s a forgiving dough, thank goodness.
Sensory Benefits of Playing with Bubble Dough
I’ll be honest, when I first made bubble dough, I thought, “Cool, a fun little mess.” But after a few play sessions? I started noticing something way more powerful. My kids weren’t just entertained—they were focused, calm, and even a bit zen. Turns out, this stuff isn’t just a DIY craft—it’s a legit calming sensory activity.
Builds Fine Motor Skills (Without Feeling Like Work)
The squishing, rolling, poking—it all helps strengthen those tiny muscles in hands and fingers. My preschooler used to struggle with holding crayons properly, but after a few weeks of playing with this soft dough, her grip actually improved. I didn’t even connect the dots at first!
It’s kind of like sneaking veggies into a smoothie—kids just think they’re having fun, but their brains and muscles are getting a workout.
Supports Emotional Regulation (A.K.A. Kid Zen Mode)
This might sound dramatic, but bubble dough saved my sanity during a toddler tantrum once. Total meltdown. I handed him a blob of glittery purple dough, and within minutes, he was calm, squishing it between his fingers like it held the secrets of the universe.
Turns out, the repetitive motion and the cool, smooth texture help regulate sensory input. That’s gold for kids with anxiety, ADHD, or just big feelings they don’t know what to do with.
Encourages Creative Thinking and Focus
We’ve made bubble dough pizzas, bug habitats, even a snowman army one rainy Saturday. I don’t give instructions—I just let them go. And that’s when I see their little brains working overtime.
This is why therapists and teachers love DIY sensory play for toddlers—it encourages independent thought, problem solving, and lets kids express themselves in a way that’s non-verbal and pressure-free.
Reduces Screen Time Without Complaints
I can’t tell you how many times this dough has bought me 30 glorious minutes of screen-free silence. No bargaining. No whining. Just pure, engaged play.
And bonus? No batteries, no downloads, no WiFi required. It’s like hitting the reset button on overstimulated kiddos.
Not Just for Toddlers
I’ve caught my 10-year-old squishing bubble dough “just to relax.” Honestly, I’ve done it too. There’s something weirdly satisfying about the stretch and squish. Plus, it smells nice thanks to the dish soap, which makes it feel kinda spa-like. Kind of.
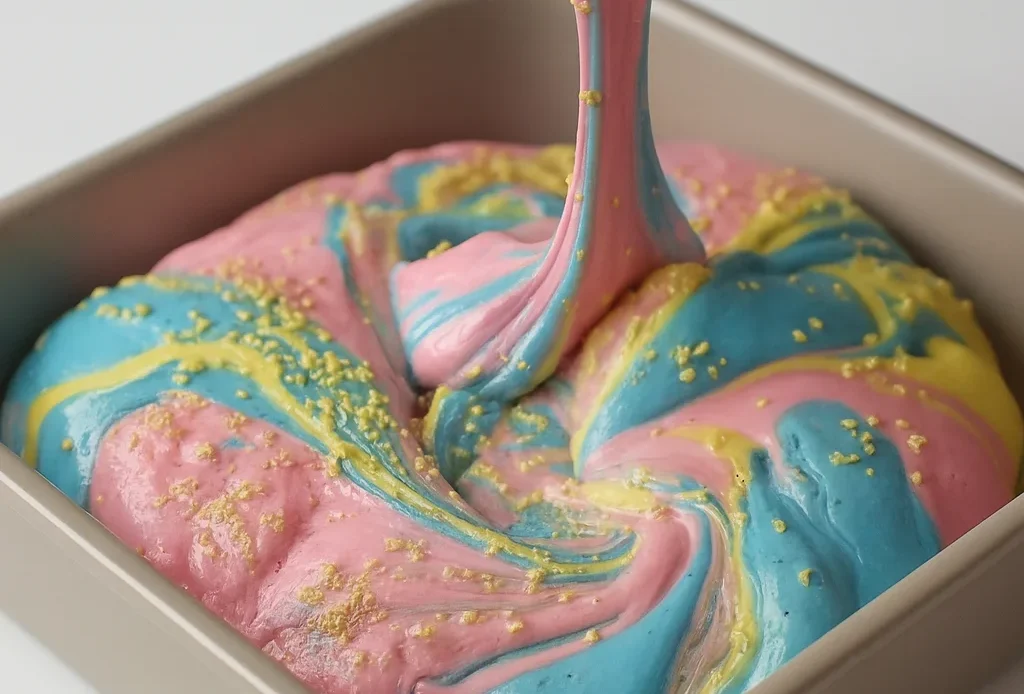
Creative Ideas for Customizing Your Bubble Dough
Once you’ve nailed the basic dough, oh man, this is where it gets fun. You can turn that plain white blob into anything from a glittery unicorn swirl to a spooky Halloween batch. I’ve gone a little wild over the years—some hits, some hilarious fails. (Note: do not mix cinnamon into red dough unless you want it to look like meatloaf.)
Add Glitter… Lots of Glitter
I swear by DIY glitter dough. There’s just something magical about sparkles embedded in that soft texture. I used to avoid glitter like the plague (hello, craft herpes), but with bubble dough, it actually stays put pretty well.
My favorite combo? Sky-blue food coloring with silver glitter—total Frozen vibes. My daughter calls it “Elsa’s squish.”
Mix in Beads, Buttons, and Sprinkles
Want to take it up a notch? Toss in tiny beads, confetti, or cake sprinkles. We made a birthday-themed dough once with rainbow nonpareils and vanilla extract for scent. It smelled amazing—but warning: younger kids might try to eat it. It’s non-toxic, but still… ew.
Another fave: clear pony beads in teal dough = ocean treasure hunt. Hide little plastic fish in it and you’ve got instant themed sensory play.
Scent It Up
This one’s more recent for me—I started adding a few drops of essential oil or even just vanilla or lemon extract. Game. Changer. Bubble dough already smells kind of fresh from the soap, but with lavender or orange oil? It’s a whole sensory spa moment.
It’s perfect for winding down before bed. Just avoid peppermint unless you want your kids zooming around like caffeinated squirrels.
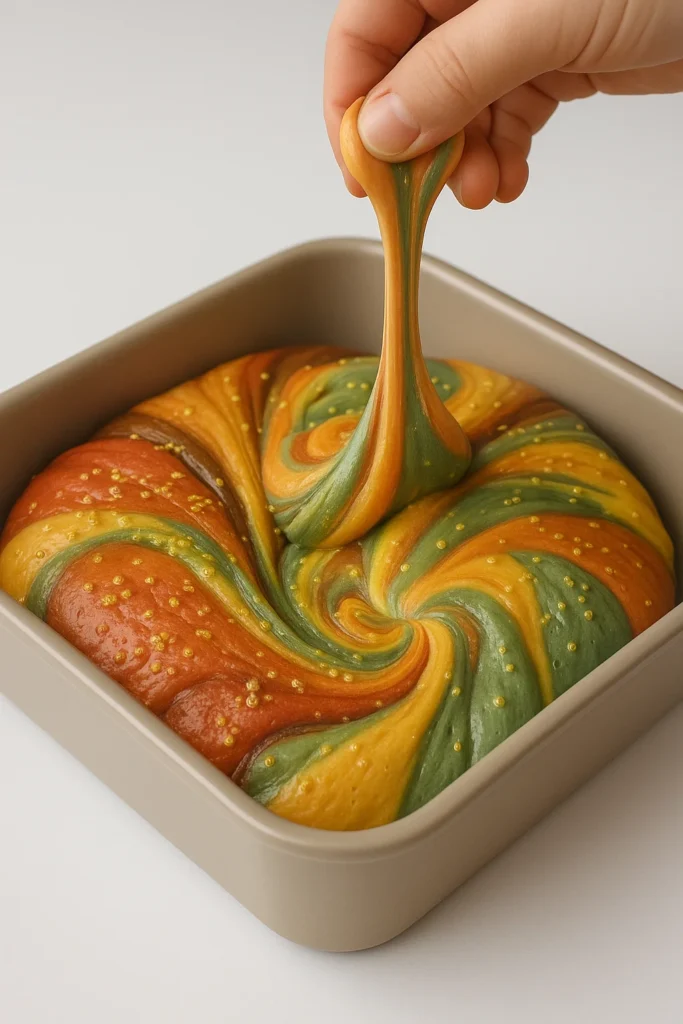
Seasonal & Holiday Ideas
Okay, I live for seasonal crafts, so of course bubble dough became part of that madness:
- Fall: Orange dough with cinnamon or pumpkin spice (don’t eat it!)
- Winter: White glitter dough with peppermint oil and snowflake confetti
- Valentine’s: Pink with red glitter and little heart buttons
- Halloween: Black and green with googly eyes (this was a HIT)
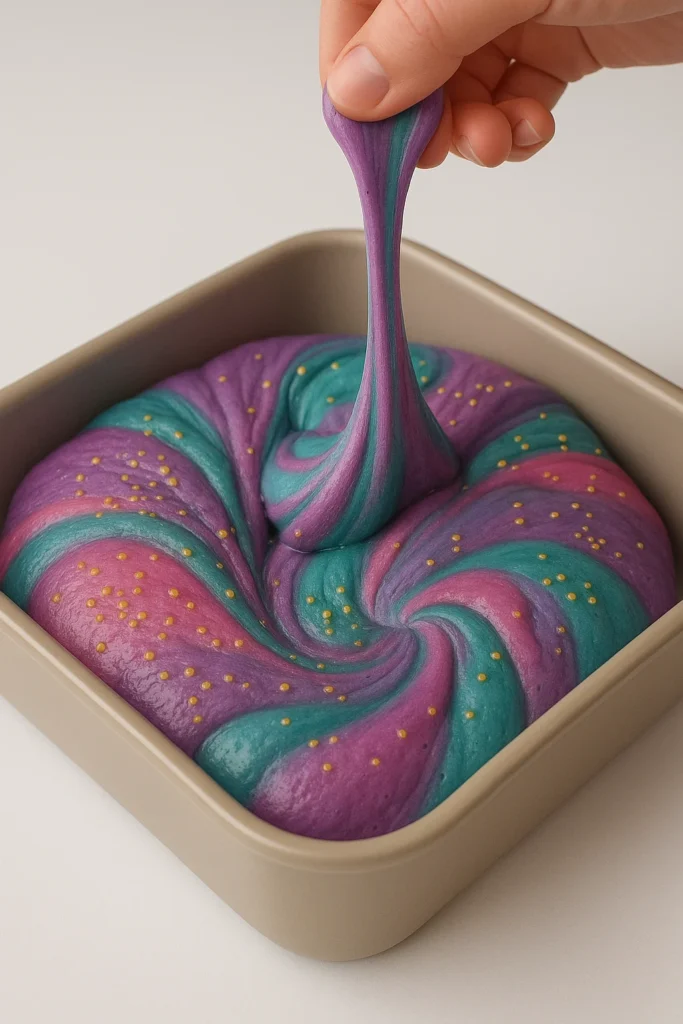
We even made a galaxy dough with black, purple, and silver streaks. It looked so cool, but fair warning—it stained our table for two days. Always use a mat!
Use Cookie Cutters and Toys
Sometimes we keep it simple—roll out the dough and use cookie cutters to make stars, animals, or letters. Other days, I let them bring out little figurines to create “dough worlds.” There’s something so satisfying about watching them build tiny scenes. That kind of custom play dough creativity just doesn’t happen with store-bought stuff.
Storing and Refreshing Your Bubble Dough
Now listen—I’ve ruined more batches of bubble dough from poor storage than I’d like to admit. At first, I thought, “Eh, just toss it in a bowl and slap some foil on top.” Big mistake. The next day it was hard, crusty, and kinda smelled like soap and sadness.
So here’s what actually works when it comes to how to store play dough the right way.
Airtight Containers Are a Must
Grab some cheap plastic containers with snap lids, or even better—those little wide-mouth mason jars. Anything with a proper seal will keep your dough soft and stretchy for days. I’ve had batches last up to a week this way.
And label them. Trust me. Especially if you’ve got multiple colors or themed versions. I once opened a glittery pink container expecting strawberry… and got garlic-scented Halloween dough. Not the vibe.
Zip-Top Bags in a Pinch
If you’re short on containers, use a resealable plastic bag. Squeeze the air out before sealing. It’s not as perfect as a jar, but it does the trick for a few days. Just keep it out of direct sunlight. Heat = dry, crumbly mess.
Bonus hack: store them in the fridge during summer. Not only does it extend the life, but it also adds a cool sensory element when the kids play.
How to Revive Dried Out Dough
Alright, so you left it out. It’s looking like a piece of sidewalk chalk. Don’t panic.
Here’s how to revive dried out dough:
- Add a small squirt of dish soap.
- Knead like crazy.
- Add a tiny bit of warm water if needed—but go slow or you’ll end up with slime soup.
I’ve brought back what I thought were total lost causes. One batch sat out overnight and was basically a brick, but after 5 minutes of working in soap, it came back better than ever.
When It’s Time to Let Go
If the dough starts to smell funky (like sour soap), grows fuzzy stuff (yup, mold happens), or just refuses to come back to life no matter what—toss it. It’s not worth the rescue mission. The ingredients are cheap, and making a new batch is half the fun anyway.
Honestly, my kids now ask to make fresh bubble dough just as much as they ask to play with it. And hey, I’m not complaining—it keeps them busy, and it’s one of the few homemade sensory play projects I actually enjoy too.
If you’re anything like me, you’re always hunting for that sweet spot between fun for the kids and easy for you. And honestly? This DIY sensory play checks every box. It’s cheap. It’s fast. It’s fun. It smells nice. And best of all—it actually holds their attention longer than a YouTube video (which, if you’ve got screen-happy kids like mine, is borderline miraculous).
From rainy afternoons to playdates to last-minute classroom crafts, this homemade play dough has become my go-to. It sparks creativity, supports sensory development, and gives me a solid chunk of quiet time while the kids are off in squishy dreamland.
And hey—if you’re into Pinterest (and I know you are), don’t keep this magic to yourself. Share your creations, color combos, or even your glitter disasters. Who knows? Your neon galaxy dough might just go viral.
So go ahead—save this to your boards, try it out, and give your kids something squishy to love.
🧼🌈 Tag it: #BubbleDoughDIY
📌 Pin it to: Fun Crafts for Kids, Sensory Play Ideas, or Rainy Day Activities
👩🔬 Try it today and make messes worth remembering.
