

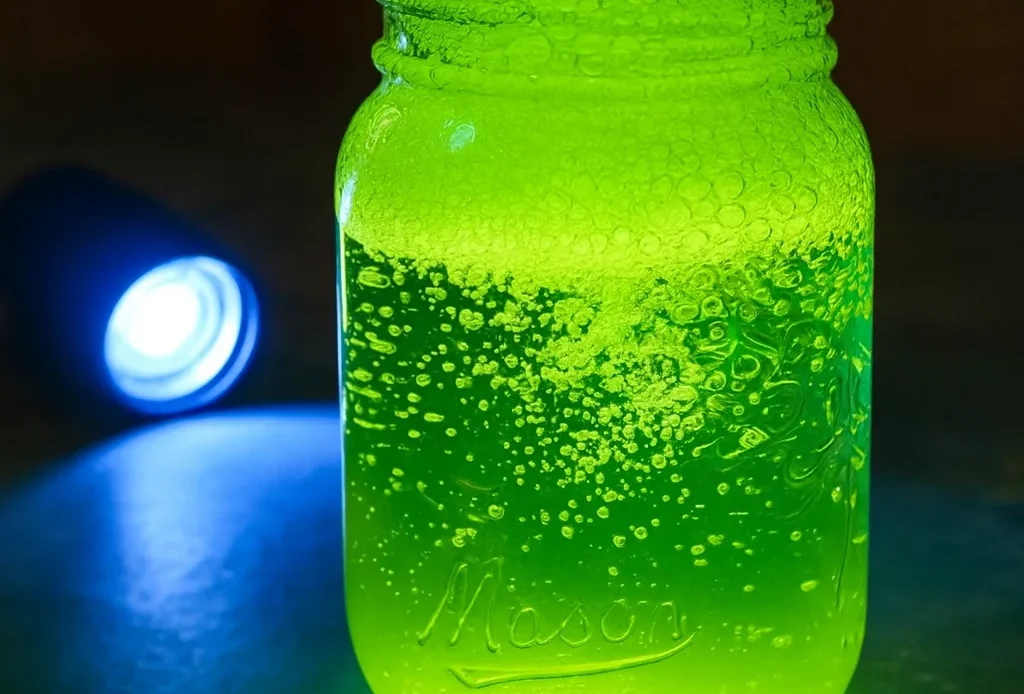
Ever wanted your own mini lava lamp that glows, fizzes, and swirls in the dark? You’re in for a treat! Making a bubbling glow jar at home is like doing a science experiment and a craft project all rolled into one. All you need are household items like baking soda, vinegar, and glow-in-the-dark paint—and in just minutes, you’ll have a mesmerizing jar that lights up your room. I first tried this with my niece during a power outage, and let me tell you—it was way more fun than just lighting candles! Whether for a science lesson or just a fun evening activity, this glow jar delivers instant wow.
Supplies You’ll Need for Your Bubbling Glow Jar
Let me tell ya—nothing kills the excitement of a fun science experiment faster than realizing you’re missing a key ingredient. I’ve been there. Once, I promised my nephew we’d make a glowing science jar, only to discover we were out of vegetable oil. Let’s just say it ended with a glow stick cracked into a cup of Sprite… not my proudest moment.
🧪 Gather Your Materials
To avoid that mess, here’s the stuff you really want to have on hand before you start your own DIY bubbling glow jar:
- 1 clear jar (glass or plastic — I love reusing mason jars!)
- ½ cup of warm water (this helps dissolve the baking soda quicker)
- ¼ cup of vegetable oil (the layering is where the magic happens)
- 1 tablespoon of baking soda
- Vinegar (white vinegar works best—cheap and fizzy)
- Glow-in-the-dark paint (look for non-toxic and water-based options — these are gold for sensory play jars)
- Optional: food coloring for that extra pop of neon
- Spoon or stir stick (don’t use your best silverware… trust me)
If you’re going the extra mile, consider a DIY science kit that includes glow paint and UV-reactive materials. Some kits even come with mini black lights, which can boost your glowing effect like whoa. Speaking of which…
💡 Hot Tip: Get a Mini UV Flashlight
I grabbed a cheap UV flashlight online for under $10, and wow—it really made the glow pop. If you’re using tonic water or neon paint, that UV light turns your jar into a full-blown UV light experiment. It’s perfect if you’re setting this up as a party trick or want to sneak in a little chemistry lesson.
🧴 Don’t Skip the Glow Paint
Here’s a mistake I made once: I thought I could just use a glow stick instead of proper glow-in-the-dark paint. Yeah, nope. Glow sticks fade fast, and the oil messes with the liquid inside them. A good glow-in-the-dark paint for kids will keep glowing again and again—you just charge it with light. Plus, they’re way safer.
🧠 Why These Supplies Work
Each of these ingredients plays a role. The baking soda and vinegar create that fizzy reaction. The oil adds that cool lava-lamp effect. And the glowing materials? That’s what gets the kids (and, let’s be honest, the adults too) wide-eyed and smiling. It’s like combining a kitchen experiment with a light show.
Step-by-Step Instructions for Making Your Glow Jar
Okay, real talk—this is where the magic happens. The first time I tried this bubbling glow jar experiment, I wasn’t expecting much. But once those glowing bubbles started rising like some sci-fi lava lamp? I was hooked. Even my skeptical teen niece couldn’t stop filming it for TikTok.
Let me walk you through the process so you don’t miss a beat. This project is super beginner-friendly. No lab coat required—just some kitchen basics and a sense of wonder.
🥣 Step 1: Make Your Base
Grab your jar and pour in ½ cup of warm water. You’ll want it warm—not boiling—so the baking soda dissolves easily. Toss in 1 tablespoon of baking soda and give it a good stir.
Keyword Tip: This combo is the heart of the baking soda vinegar reaction. It’s what powers the fizz, so make sure the mix is smooth and lump-free.
🎨 Step 2: Add the Glow Factor
Here comes the fun part—add a few drops of glow-in-the-dark paint or some glowing tonic water. Stir it in until the water looks like it’s straight out of a sci-fi movie.
Optional: If you’re like me and can’t resist a splash of drama, add a few drops of neon food coloring. I love using electric blue or hot pink—super eye-catching when it bubbles.
Mistake I’ve Made: Don’t overdo the paint. Too much and the liquid gets goopy. About a pea-sized amount is usually plenty for one jar.
🛢 Step 3: Pour the Oil (Slowly!)
Now, take your ¼ cup of vegetable oil and pour it gently into the jar. You’ll notice it just floats on top. That’s good—it’s exactly what creates the “lava lamp” vibe once the reaction kicks in.
Pro tip: Tilt the jar a bit and pour down the side for a cleaner layer. Makes a big difference if you’re filming or photographing your DIY glow jar.
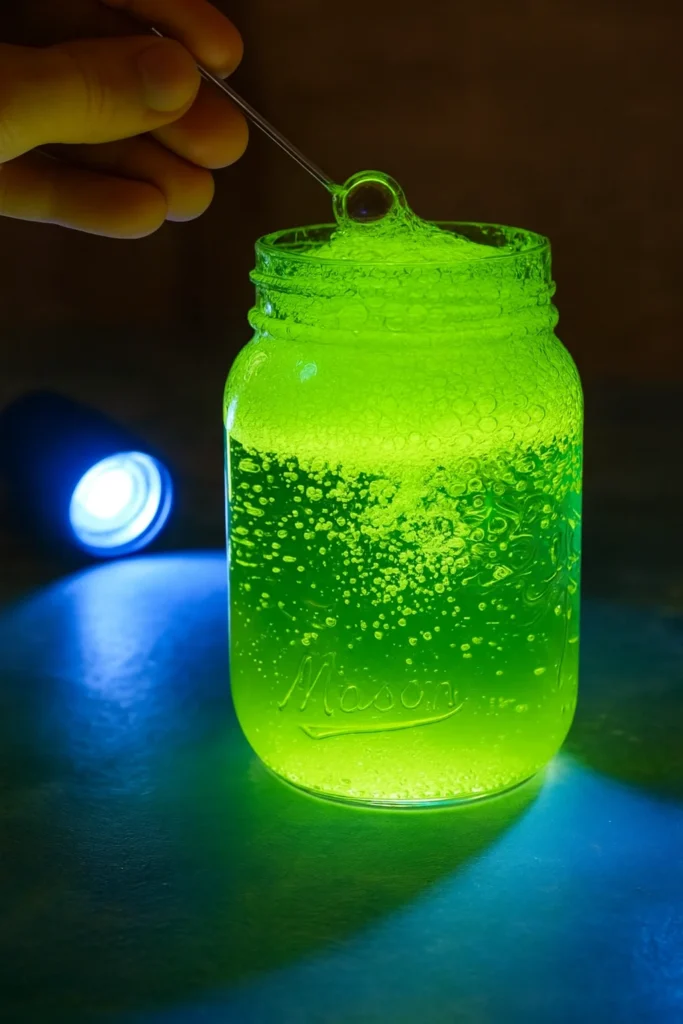
🧪 Step 4: Add the Vinegar and Watch It Go
Here’s where the fizz meets the glow. Slowly pour vinegar into the jar until it’s almost full. The reaction will start instantly—glowing bubbles will rise through the oil, then pop and swirl back down.
The more dramatic the contrast between your glow layer and oil, the better the effect. Use a UV light or charge the jar under a lamp beforehand for that extra wow.
🧯 Safety Notes (Because… Kids)
This is a safe kids science project, but I always lay down an old towel or do it in a tray. Things can bubble over fast if the jar’s too full or the vinegar’s added too quickly. Better to be safe than scrubbing sticky glow goo off your counter.
I swear, every time I do this, I get that little jolt of excitement. Like, “Wait—is it gonna work again?” Spoiler: it always does. And somehow, it never gets old.
Glow Tips to Make It Shine Brighter
So you made your bubbling glow jar… and it kinda glows. But you want that glow—the kind that makes the whole room light up like a sci-fi rave? Yeah, I’ve been there. My first jar was more of a “meh shimmer” than a glow. But after a few glow-up experiments (pun intended), I figured out what actually makes these jars shine.
🔦 Use a UV Black Light for Instant Wow
Look, if you’re not using a UV black light, you’re missing out. I picked up a cheap handheld one online, and it instantly took my DIY glow jar from “cute” to “whoa.” It makes tonic water or neon paint pop in a way regular light just doesn’t. It’s honestly the secret weapon of any good glow science experiment.
Here’s what worked best for me:
- Charge glow-in-the-dark paint for at least 2 minutes under a bright light or sunlight.
- Then switch to black light mode—you’ll see bubbles glowing as they float up. It’s wild.
☀️ Charge Your Glow Paint the Right Way
If you’re using DIY glow paint (the kind you charge with light), don’t skip this. I once tried it with the lights off right after mixing—nothing. It turns out, most glow-in-the-dark pigments need to “charge” before they’ll show off.
Just put the jar near a lamp, LED flashlight, or window light for a few minutes. The longer you charge it, the brighter the payoff.
And don’t forget: not all glow paints are made equal. Look for ones made for kids sensory bottles or crafts—they’re usually water-based and give off a stronger, safer glow.
🎨 Layer It Up for Maximum Contrast
Contrast is your friend. I get the best effects when the glowing water is a bright color and the oil is super clear. If everything’s just yellow or cloudy, you lose that crisp bubble effect.
Some quick combos that’ve worked for me:
- Electric blue glow + clear oil = dreamy galaxy vibes
- Neon green glow + orange food dye = Halloween madness
- Pink glow + purple food coloring = Barbie-core science, lol
Try one and see how it pops under light!
🧼 Keep It Clean for Longer Glow Life
If you’re like me, you’ll wanna reuse the jar a few times. No shame. Just make sure to clean it out after each use—especially if the glow paint starts to clump or stick to the oil layer.
Quick rinse with warm water and mild soap does the trick. Then re-layer and you’re good to glow again.
It honestly feels like a mini light show every time you get it right. And yeah, there’s something super satisfying about making it brighter than last time. Kind of like leveling up your own science wizardry.
Fun Ways to Use Your Bubbling Glow Jar
The first time I made a bubbling glow jar, I just set it on the kitchen counter and stared at it like it was some kind of alien artifact. But then I realized—this little jar can be way more than just a one-off experiment. There are so many cool, practical, and just plain fun ways to use it!
Whether you’re a parent, a teacher, or a total science nerd (like me), there’s something magical about glowing bubbles in a jar. Here’s how I’ve reused mine in the most fun ways possible.
🧠 Turn It Into a STEM Lesson
Teachers and homeschoolers, this one’s for you. The glow jar experiment is a perfect entry point into STEM learning. I used it to explain chemical reactions, density, and light absorption—all with zero bored faces.
- Use it to demo the baking soda + vinegar reaction (kids never forget the fizz).
- Explore liquid layering with oil and water.
- Introduce fluorescence with UV light—it’s like sci-fi science class!
Add in some questions like “Why doesn’t the oil mix with water?” or “Why do some liquids glow?” and boom—interactive lesson. Gold star guaranteed.
🧸 Make It a Sensory Play Activity
If you’ve got toddlers or neurodivergent kiddos, these jars double as sensory activity tools. The slow, glowing bubbles are super calming. I made a “quiet corner jar” with lavender-colored glow paint and soft music. Huge hit.
Pro tips:
- Use non-toxic glow-in-the-dark paint for safe sensory fun.
- Let kids shake it (gently) and observe the swirls.
- Do it in a dark room with low music—it’s like DIY meditation.
This turned into part of my niece’s bedtime wind-down routine. Seriously relaxing.
🎃 Use It as DIY Party Decor
My Halloween party last year? Glow jar central. I lined the walkway with them, each glowing a different color. Total vibe. These also look amazing at birthday parties, sleepovers, or even just ambient decor for your home office (don’t judge).
- Drop in themed confetti or glitter for extra flair.
- Coordinate colors with the party theme.
- Place them on shelves or in jars of varying sizes for that Pinterest-worthy aesthetic.
These make amazing DIY party decor pieces—way cooler than store-bought stuff. Plus, you made them yourself!
🎥 Use It as a Photo Prop or Reel Background
This one’s kind of random but… if you’re a content creator or just addicted to Reels like I am, these jars look awesome as backdrops. The glow, the bubbles, the swirling colors? Insta-worthy for sure.
Just set it on a dark surface, shine a little UV flashlight, and boom—instant moody glow for your next video. It’s been my secret background for product reviews and late-night journaling clips.
So yeah, that “silly little glow jar” you made? It’s actually super versatile. From home science fun to full-on sensory jar therapy, there are tons of ways to get creative. And honestly, it never gets old watching it fizz and glow.
And there you have it—your very own DIY bubbling glow jar, fizzing, glowing, and swirling like something straight out of a sci-fi movie! Whether you made it for a late-night experiment with your kids, a cool party centerpiece, or just because you were bored on a Tuesday (been there), this project is pure joy in a jar.
From mixing baking soda and vinegar to watching glowing bubbles rise like a homemade lava lamp, this simple setup packs a surprising punch. It’s hands-on learning, sensory magic, and stress relief all rolled into one glowing science jar.
The best part? It’s totally repeatable. Change the colors, tweak the glow ingredients, or set up a whole row of jars like a glowing rainbow. There’s no wrong way to play when you mix science and creativity.
If you had fun with this project (and I really hope you did), pin it on Pinterest and share it with someone who loves a good science experiment for kids, DIY craft, or glowing sensory jars. You never know whose day you’ll light up—literally.
