

Did you know that sensory play helps build nerve connections in the brain? That’s right! And what better way to spark your child’s creativity than with a squishy, moldable, homemade dough you can whip up in minutes?
In this guide, I’ll show you how to make bubble dough using only two household ingredients—cornstarch and dish soap. It’s a super simple, budget-friendly activity that can be both calming and wildly imaginative for kids. Whether you’re a parent, teacher, or babysitter, this activity delivers hands-on fun that’s just messy enough to be magical.
Ready to dive in? Let’s bubble up some fun!
What is Bubble Dough and Why Kids Love It
Okay, let’s talk bubble dough. First time I made it, I was actually trying to recreate one of those overpriced “sensory kits” I saw online for like $45. Yep—forty-five bucks for something you can make with pantry staples? Hard pass.
It’s Sensory Play Gold
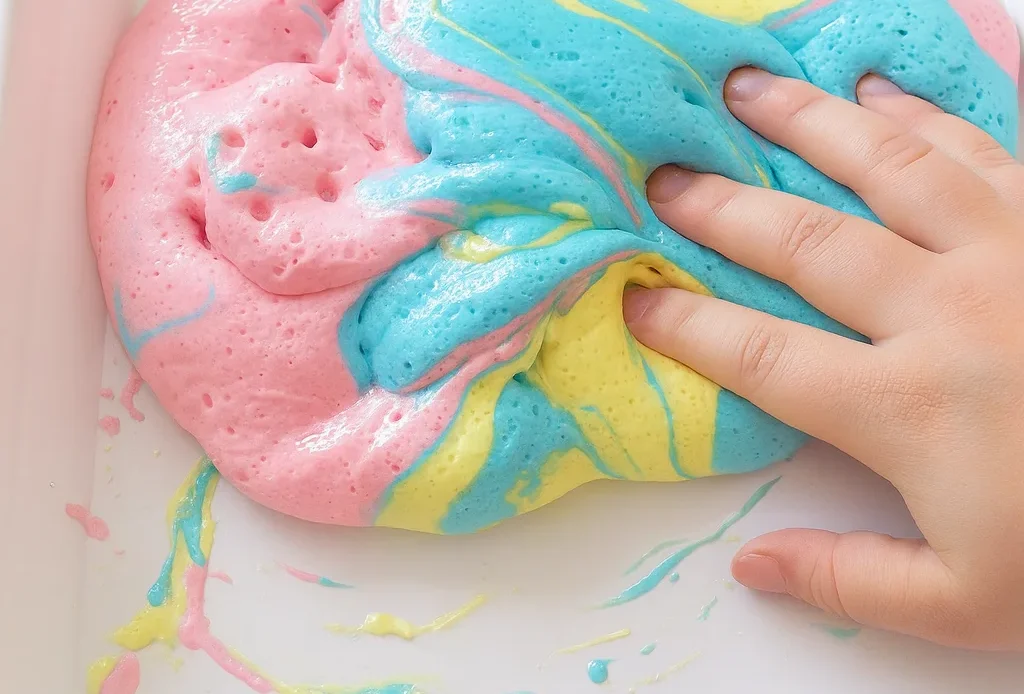
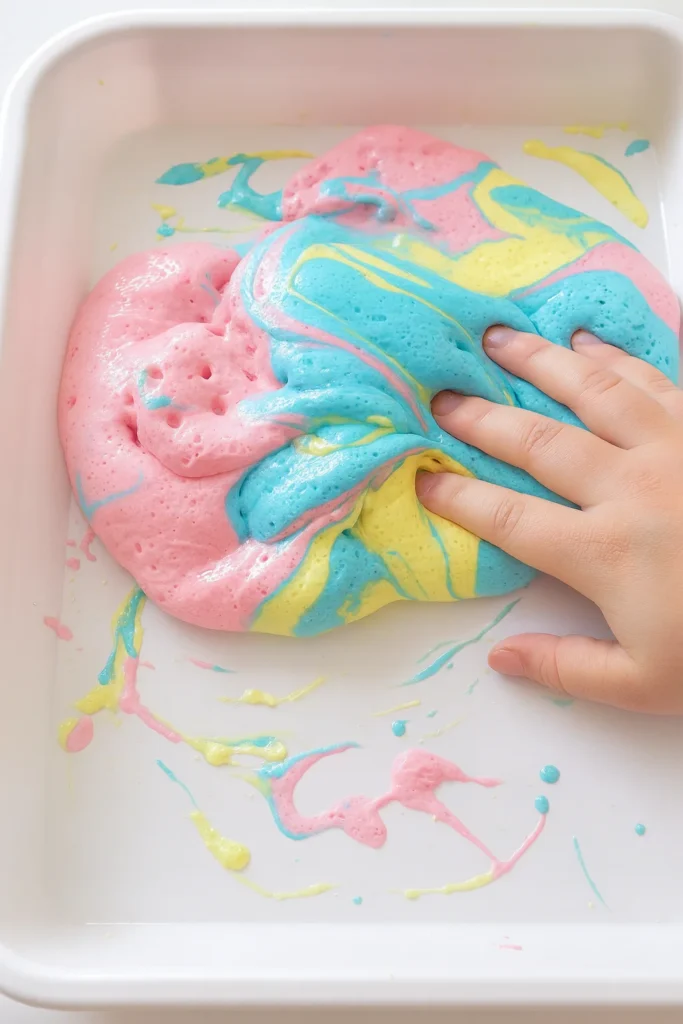
Bubble dough is basically a squishy, moldable dough made from just two ingredients: cornstarch and dish soap. That’s it. But the texture? Oh man, it’s like a cross between cloud dough and slime. It feels silky at first, then gets super stretchy when you knead it. Kids go nuts over it. And honestly, so do I—it’s weirdly satisfying.
I’ve used it as part of sensory play setups for everything from rainy-day boredom busters to calming corner bins. And here’s the kicker—while they’re squishing and rolling it, they’re secretly learning. You’re sneaking in STEM activities for kids without even trying. Texture changes, non-Newtonian fluid reactions (yep, it’s technically one), and cause-and-effect stuff.
Why It Works So Well
There’s something magical about tactile learning. My niece once spent 45 straight minutes making “bubble cupcakes” and giving them names. No screens, no meltdowns. Just her and a blob of dough pretending to run a bakery. For a kid with sensory sensitivities, it was honestly kind of therapeutic.
If your little one struggles with textures, bubble dough can be an amazing bridge. You control the consistency. A little more cornstarch if they like it dry and crumbly, a bit more soap for soft and smooth. No preservatives, no weird chemicals. And if it ends up on the carpet? It dries out and vacuums right up. Bless.
How It Beats Store-Bought Dough
Here’s where this DIY shines—it’s stupid cheap. Like, dollar-store cheap. You’re not paying premium prices for a tub of “organic playdough” that dries out in a week. Plus, since it’s a DIY craft for kids, you get that whole “we made this together” moment. Which, in mom terms, is a Pinterest win and a memory-maker rolled into one.
And unlike slime (which I’m over, by the way), bubble dough doesn’t leave a sticky residue or get tangled in hair. You can mold it, slice it, even use cookie cutters for pretend baking. We’ve made everything from bubble pizzas to spa day “mud masks” for dolls.
Ingredients Needed to Make Bubble Dough
Let’s be real—half the charm of bubble dough is how dang simple it is. I used to dread craft time because the materials list looked like a mini shopping spree. Not this one. You only need two ingredients. Yep, just two. And odds are, you already have them in your kitchen or under your sink.
The Magic Combo
Here’s what you’ll need for one batch:
- 1 cup cornstarch – basic pantry staple. I use the generic kind and it works just fine.
- 1/2 cup clear dish soap – I swear by the green apple scented one, but any clear liquid dish soap will do.
- Optional: a few drops of food coloring – Adds that pop of color kids love. I go for the gel kind because it doesn’t water down the texture.
- Optional: glitter, essential oils, or even lavender for calming play – Totally extra but kinda fabulous.
First time I made this, I didn’t have food coloring and my kid still thought it was the coolest thing ever. But add a splash of blue or pink, and now suddenly it’s “unicorn dough.” Gotta love marketing.
Why These Ingredients Work
Cornstarch thickens and binds, while dish soap adds slip and stretch. Together, they create a smooth dough that’s oddly satisfying to squeeze. It’s also a much safer option than some commercial doughs. I’ve seen my nephew lick a handful once (yikes), but with this combo, at least I knew it was non-toxic. Wouldn’t serve it as dessert or anything, but you get the point.
Plus, you can tweak it. Want it firmer? Add more cornstarch. Want it silkier? More soap. It’s like custom dough for every kid’s sensory preferences. That’s the beauty of DIY sensory activities—they flex to fit your kiddo.
Budget-Friendly and Totally Kid-Safe
I’ve made batches for birthday parties, classroom centers, and rainy day bins. Every time, it costs less than $2 per batch. That’s cheaper than one of those mystery toy balls that break in five minutes. And it lasts a few days if you store it right (more on that later).
If you’re big on kids play ideas that are both cheap and fun, this one’s a winner. Plus, it doesn’t smell like glue or make your hands dry and crusty. Win-win.
Step-by-Step Instructions to Make Bubble Dough
Alright, let’s get our hands dirty—in the best possible way. Making bubble dough is one of those rare parenting wins where the setup takes five minutes and the cleanup doesn’t make you want to cry. It’s truly one of the easiest DIYs for kids I’ve ever tried.
Step 1: Dump and Stir
Grab a mixing bowl and pour in 1 cup of cornstarch. Then add 1/2 cup of clear dish soap right on top. I usually eyeball it, but if you’re Type A, a measuring cup works fine.
Now here’s the fun part—stir. Use a spoon at first, but switch to your hands once it starts clumping. It’s a little gooey at first, and you might think, “This isn’t working.” Trust me, it is. Just keep kneading. That moment it transforms from sticky mess to soft dough? Magic.
Step 2: Add Color (Optional)
If you’re feeling artsy, toss in a few drops of food coloring. I’ve done rainbow batches before, but honestly, even one color is exciting for little hands. Knead the color in with your fingers until it’s evenly mixed. Gloves help if you’re fancy, but I go raw and just deal with Hulk hands for a day.
Step 3: Adjust Texture
Here’s where you fine-tune. Too sticky? Add a tablespoon of cornstarch and knead again. Too dry? Drizzle in a bit more soap. You’re basically a dough scientist at this point. This kind of trial-and-error is what makes it an awesome STEM-inspired activity, even if kids don’t realize they’re doing chemistry.
Step 4: Let It Rest (Yes, Really)
This step sounds fake, but don’t skip it. Let the dough sit for 5 minutes. Something about the cornstarch absorbing the soap gives it a better texture. I’ve rushed this before and ended up with crumbly bits. Now I just set a timer and go wipe down the kitchen counter.
Step 5: Play Time!
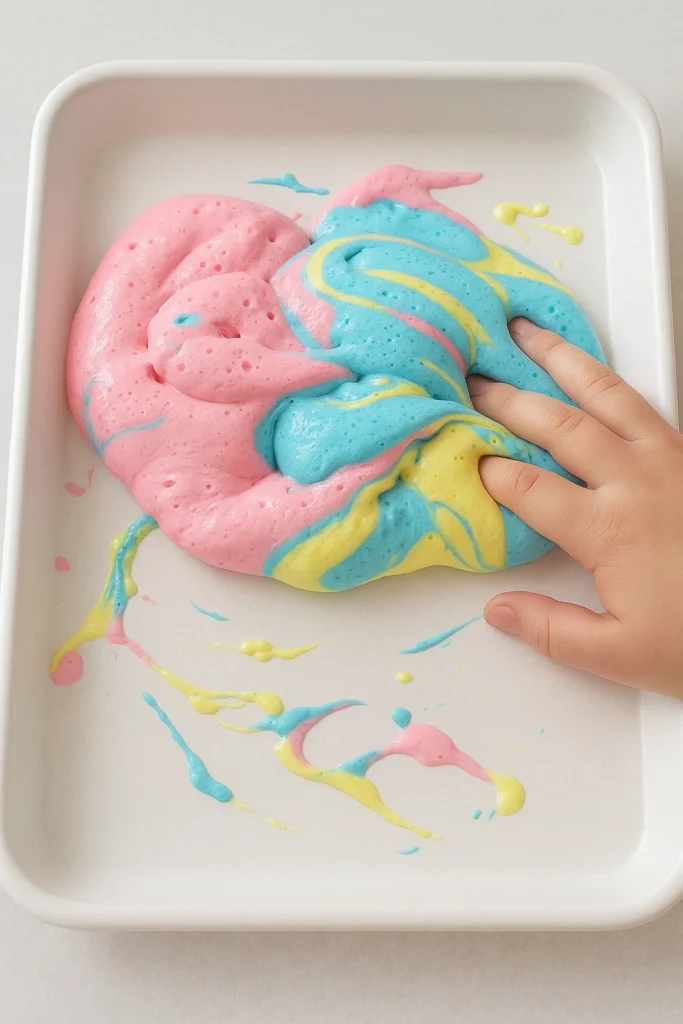
Boom—you’re done. Hand it over to your kids and watch the magic happen. They’ll roll it, squish it, make little bubble monsters or pretend cupcakes. This is hands-on, homemade sensory toy greatness. Best part? It doesn’t stick to furniture or ruin your rugs like slime.
Fun Ways to Play with Bubble Dough
This is where the real magic happens. Once you’ve got your bubble dough ready, the possibilities are endless. I’ve watched kids turn a single blob of dough into an entire imaginary bakery, complete with “frosted” cupcakes and pretend birthday cakes. No screens. No batteries. Just good old-fashioned creative play.
Run a Bubble Dough Bakery
This is hands-down my favorite theme. Set out some cupcake liners, a rolling pin, plastic butter knives, and maybe a sprinkle of glitter if you’re brave. Suddenly, your kitchen table becomes a full-blown bakery. My daughter once made a “rainbow unicorn cake” that took her nearly 30 minutes to decorate. She was so focused—it was like watching a tiny, dough-covered pastry chef in action.
And the learning? Oh, it’s sneaky. She was practicing fine motor skills, pattern recognition, and storytelling all at once. That’s the beauty of educational toys for toddlers—they don’t even know they’re learning.
Use Cookie Cutters and Tools
Bust out the holiday cookie cutters or random plastic shapes hiding in your junk drawer. We’ve done stars, dinosaurs, and even a full bubble dough “zoo.” Give kids a rolling pin and some plastic play knives, and they’ll invent whole scenes. I’ve seen bubble dough turned into pizza slices, space aliens, and a “carrot spaghetti monster.” Not sure what that last one was about, but it was hilarious.
Build Sensory Bins
When I want to take it up a notch, I toss the dough into a bin with extras: buttons, small figurines, craft sticks, or even toy cars. Add a theme—like ocean creatures or bugs—and you’ve got an interactive sensory experience that keeps them busy for ages. It’s one of my go-tos for rainy afternoons or when I need 20 minutes to myself (no shame).
Add Scents and Textures
Want to get fancy? Mix in a drop of essential oil—lavender for calming, peppermint for holidays. Or toss in some sand, rice, or crushed cereal for added texture. These are simple ways to turn the dough into a multi-sensory craft that engages more than just their hands. My son loves the cinnamon-scented version in the fall. Smells like doughnuts, plays like magic.
Play Pretend Scenarios
One time we turned our bubble dough into “mud” for toy animals. Another day it was “cement” for building blocks. That kind of hands-on learning activity helps spark imagination and teaches problem-solving in a way no app ever could.
Tips to Store and Extend the Life of Your Bubble Dough
Here’s the thing about bubble dough—it’s awesome and it’s fragile. The first time I made it, I left it on the table overnight, and it turned into a crumbly mess by morning. Rookie move. If you want to keep the fun going for more than one play session, here are some tried-and-true tips from someone who’s ruined more than a few batches.
Store It Right
As soon as the kids are done playing, scoop up the leftover dough and toss it into an airtight container. Zip-top bags work in a pinch, but I’ve had better luck with plastic food containers. Label it if you’re making multiple colors—otherwise you’ll end up with a weird brown lump after the third round of play.
Keep it at room temperature. I made the mistake of putting it in the fridge once thinking it’d stay fresh longer—nope. It got stiff and weirdly gooey. Just store it in a cool, dry spot and you’ll be golden for a few days.
Revive It Like a Pro
If your dough starts drying out, don’t panic. Drizzle in a tiny bit of dish soap—seriously, like a teaspoon—and knead it back to life. It’s wild how it bounces back. I once had a batch that looked done for, and after five minutes of mixing, it was good as new.
Too sticky? Sprinkle in some cornstarch and knead it until it’s just right again. This flexibility is what makes it such a DIY craft that lasts. It adapts, just like the kids playing with it.
Keep It Clean (Well, Sorta)
Bubble dough is a magnet for crumbs, carpet fuzz, and pet hair. My advice? Set some ground rules: clean hands, table play only, and maybe avoid the dog’s favorite rug. That’ll give you a little more mileage out of each batch.
If you’re using it in a sensory bin, make sure to cover it afterward or transfer it to a clean container. Exposed dough dries out fast, especially if left out during snack time (guilty).
Reuse and Recycle the Fun
After 2–3 days, even with the best storage, the dough loses its magic. That’s when I repurpose it for “final play.” Let the kids smash it, mix all the colors, or use it in a pretend volcano experiment. We’ve even used it to make dough stamps before tossing it out. It’s one of those eco-friendly play ideas where you don’t feel guilty tossing it, because you got every last ounce of fun out of it.
And hey, since it only takes two ingredients to remake, it’s one of the easiest reusable kids activities around.

Here’s the deal—bubble dough is the low-cost, high-reward MVP of fun activities for kids at home. It’s quick to make, endlessly customizable, and honestly, a blast for grownups too. I’ve squished my fair share while pretending I was just “helping” the kids. No shame.
From a sensory standpoint, it’s gold. It’s squishy enough to calm anxious kiddos, stretchy enough to keep their hands busy, and simple enough to whip up on a whim. I’ve used it during playdates, in the classroom, and even on road trips (yep, I packed some in a travel container—it was a lifesaver).
It’s not just a mess-free miracle—it’s a DIY learning tool that lets you sneak science, art, and even social-emotional learning into your day without a worksheet in sight. And when a craft is this easy and repeatable? That’s what I call a win.
So go ahead—gather those two ingredients, roll up your sleeves, and make a batch. Then do me a favor? Share your creations on Pinterest. Let other parents, teachers, and babysitters in on the secret of bubble dough magic. Bonus points for glitter.
