

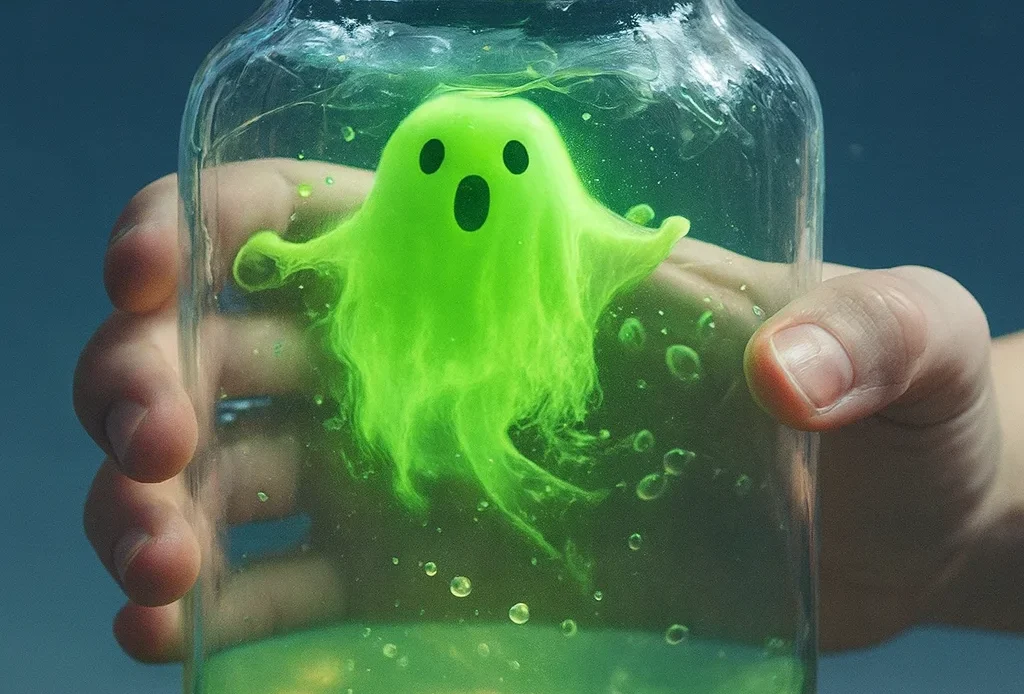
Looking for a Halloween activity that’s part spooky and part science? This DIY Glowing Bubble Ghost is like a bubbling potion come to life—glowing, fizzing, and floating all at once! It’s more than a simple craft; it’s a fun, hands-on chemistry experiment perfect for kids and curious adults alike.
Did you know that combining baking soda and vinegar creates carbon dioxide gas? That’s what powers the foamy action in this project. Add in a floating ghost and a little glow-in-the-dark magic, and you’ve got the ultimate Halloween crowd-pleaser!
Let’s dive into how you can make your ghostly bubble friend float and glow this spooky season.

Materials You’ll Need for a Glowing Ghost Experiment
Okay, let me be straight with you—I’ve tried a lot of Halloween science projects with my kiddos, but this DIY glowing bubble ghost? Easily top three. It’s got everything: glowing ooze, foamy eruptions, and a ghost that literally floats like it’s haunted. If you want that wow moment, start by grabbing the right gear.
The Must-Have Tools for Glowy Greatness
I remember my first attempt—I used an old pickle jar, didn’t check if the ghost floated (rookie mistake), and used expired baking soda. 😅 Trust me, fresh materials matter.
- Mason jar: Clear is best. Plastic works too if you’re doing this with younger kids.
- Baking soda: Don’t skimp—this is your power ingredient. Store-brand works fine.
- White vinegar: It’s the magic acid in this baking soda and vinegar experiment. That bubbly explosion? All thanks to this.
- Clear dish soap: Adds the bubbly texture. I’ve tried blue dish soap—it works, but makes the glow dim.
- Glycerin (optional but awesome): Helps the bubbles last longer. You can grab it from any pharmacy or even use leftover stuff from bubble wand kits.
- Ghost figure: I DIY mine with tissue paper and tie it to a pebble with fishing line. Just make sure it floats mid-jar.
- Glow source: Here’s where you get creative—crack a glow stick (wear gloves!), or use an LED tealight or even glow-in-the-dark paint mixed with water. It’s what turns this into a real glow in the dark experiment.
- Food coloring: Not required, but I always go with a spooky green or electric blue. Adds a mad scientist vibe.
Quick Pro Tip
Don’t dump everything in all at once. I’ve done that—ended up with a ghost projectile and foam on the ceiling. Go slow, especially with the vinegar. Use a pipette or even a straw if you need to.
You’ll feel like a total genius when your ghost starts swirling around like it’s alive, trust me. The combo of glow, bubbles, and motion? It’s textbook viral Pinterest magic. And if your goal is to teach some Halloween chemistry project with flair, this one nails it.
The Science Behind the Glow and Bubble Reaction
Alright, let’s nerd out for a second—because this isn’t just a fun craft. It’s a full-blown Halloween science experiment that sneaks a little chemistry into your spooky fun. And honestly? My inner science teacher gets just as excited as the kids when this thing bubbles over.
Baking Soda + Vinegar = Magic (Okay, Science)
Here’s the deal. When you mix baking soda (a base) with white vinegar (an acid), you trigger a chemical reaction that releases carbon dioxide gas. That gas is what creates all those fizzing bubbles. Add dish soap into the mix? Now the gas gets trapped in the soap film and poof—bubbles for days. That’s the bubbling cauldron vibe we’re going for.
I didn’t know this the first time I tried it and just dumped vinegar in without the soap. It fizzed but died out fast. Once I added soap? Game changer. More foam. More drama. Way more kid squeals.
Let There Be Glow
Okay, the glow in the dark science part is just as cool. There’s a few ways to light up your ghost:
- Crack open a glow stick (but wear gloves, it’s not the friendliest liquid)
- Drop in a waterproof LED light
- Mix in some glow-in-the-dark paint (make sure it’s non-toxic and safe for water)
The glow sticks work with a chemical called luminol, which emits light when its molecules get excited by a reaction. Sounds complex, but in practice—it just looks awesome. It gives that eerie, radioactive Halloween vibe that kids go nuts for.
Why Does the Ghost Float?
Simple physics, actually. If your ghost is made with lightweight stuff like tissue paper and is balanced with a tiny pebble or clip, it’ll stay suspended in the water column. When the bubbles start pushing around the liquid, your ghost does this slow-motion haunted float dance. It looks like something out of a Tim Burton movie.
I didn’t balance mine right the first time and it sank like a soggy tea bag. After that, I used fishing line and adjusted the weight until it hovered. Totally worth it.
So yeah, it’s more than just a jar of glowing goo—it’s a mini DIY Halloween chemistry lab in your kitchen.
Step-by-Step Instructions to Make a DIY Glowing Bubble Ghost
Alright, now we’re getting to the good part—bringing your ghost to life. This isn’t one of those complicated Pinterest fails. If I can pull it off with a hyper 7-year-old “helping,” you definitely can too.
Step 1: Get Your Ghost Ready
Make your ghost first. Seriously, don’t wait till the jar’s fizzing like I did once. You’ll panic and dunk a paper towel in there and regret everything.
- Take some white tissue or cloth, wrap it around a pebble or marble.
- Tie the top with fishing line or string, leaving enough slack to suspend it in the jar.
- Test it in plain water—it should float or hover. If it sinks, use something lighter. If it floats too high, add a teensy bit more weight.
Step 2: Add the Glow
This is your glow-up moment.
- Carefully crack a glow stick and pour the liquid in (use gloves—seriously).
- OR drop in a waterproof LED light.
- OR mix glow-in-the-dark paint into your water. This one gives a subtle but creepy ghostly glow, especially if you shine a blacklight.
I’ve tried all three. For kids? LED is the easiest. For spooky night parties? Glow stick liquid wins—hands down.
Step 3: Build Your Potion Base
This is where it gets witchy.
- Pour 1 cup of water into your clear jar.
- Add a good squirt of clear dish soap—I don’t measure, just swirl it in.
- Add 1–2 teaspoons of glycerin if you have it (it makes your bubbles stronger and slower to pop).
- Optional: Add a drop or two of green or blue food coloring. Just don’t go overboard or you’ll turn your ghost into sludge.
Step 4: Add the Ghost
Lower that little guy in with love. Make sure the fishing line holds him mid-jar. If he clings to the side, nudge him gently. You want him to look like he’s floating just right—not clinging for dear life.
Step 5: Add the Magic Powder
Time for the baking soda and vinegar reaction!
- Spoon in 1–2 tablespoons of baking soda right into the bottom.
- Don’t mix yet!
Step 6: Activate the Ghost Dance
Now for the magic. Use a pipette (or even a spoon if you’re brave) to slowly add white vinegar to the jar. Do it a bit at a time and watch as the bubbles rise, the ghost starts to swirl, and the glow kicks in.
I swear the first time I did this, the kids screamed like the ghost was real. 😂 One tip—don’t dump all the vinegar at once. It’ll fizz fast and be over before you even get your phone out for pics.
Optional Pro Hack:
Repeat the reaction! After the fizz dies down, just add more baking soda and vinegar. It’s reusable fun—and the ghost just keeps coming back. Like a proper Halloween haunt should.
Tips for Glowing Success and Fun Variations
So you’ve got your ghost glowing and fizzing—awesome! But wanna level up your Halloween STEM project? I’ve tested this thing enough times to know what makes it pop (literally) and what can totally flop. Here’s everything I wish someone had told me before I turned my kitchen into a haunted science lab.
Tip 1: Don’t Skip the Gloves with Glow Sticks
If you’re going full mad scientist and cracking open a glow stick, wear gloves. That glowing liquid looks cool, but it’s not skin-friendly. I once got it on my fingers, then rubbed my eye… yeah, rookie mistake. If you’re worried about safety, LED lights are the MVP for glow in the dark experiment ideas—no mess, no stress.
Tip 2: More Bubbles = More Drama
Want your ghost to swirl like it’s caught in a spirit vortex? Add a little extra dish soap and glycerin. Glycerin is the secret sauce. It makes the bubbles thicker and last longer—perfect for dramatic slow-motion ghost action.
Also: Don’t use warm water. Cold or room temp works better. Warm water makes the bubbles pop faster. Learned that the hard way when I used hot tap water and my ghost vanished in under 30 seconds.
Tip 3: Personalize Your Ghost
This is where things get fun! Instead of using just tissue:
- Try ping pong balls for the head with drawn-on spooky faces
- Use glow-in-the-dark fabric if you want an extra glowing ghost
- Add a little glitter in the water for a magical, floaty look
- Stick Halloween confetti or fake spiders in the jar for spooky extras
I once made a whole haunted “family” with mini ghosts and called it a DIY haunted jar. It was a hit at my kid’s science fair booth. 🙌
Tip 4: Try It in the Dark
Seriously, lights out. Set your jar on a black plate or surface, turn off the lights, and let the glow do its thing. It’s perfect for party displays or classroom demos. For extra points, shine a blacklight near it and watch your jar light up like a mad scientist’s beaker.
Tip 5: Repeat the Fun
Here’s a cool thing—this isn’t a one-and-done activity. You can keep adding baking soda and vinegar as many times as you want. Let the foam settle, add more of both, and it bubbles all over again. It’s like a never-ending Halloween potion.
Just maybe do it over a tray or towel. One time I got a little too enthusiastic and ended up with foam dripping off the dining table. Oops.
And there you have it—your very own DIY Glowing Bubble Ghost, bubbling with spooky vibes and glowing like it came from a mad scientist’s lab. Whether you’re doing this as a Halloween science for kids project, or just want a break from carving pumpkins, this experiment brings the perfect mix of fun, fizz, and fear.
I can’t tell you how many times I’ve reused this activity—class parties, rainy weekends, even a few grown-up Halloween hangouts (yes, adults love this too). It’s that sweet spot where DIY Halloween activity meets full-blown chemistry lesson.
And hey—don’t keep this ghost to yourself. Snap a pic of your bubbling creation and pin it to your Halloween board on Pinterest. Add a twist, share a tip, or tag your own version. That’s how we keep the magic (and the science!) spreading every spooky season.
Happy haunting—and happy bubbling! 🎃💀
