

There’s something magical about turning everyday kitchen ingredients into lasting holiday treasures. Salt Dough Stars are a childhood favorite of mine—and now they’ve become a cozy annual tradition. Did you know that salt dough has been used for crafts since the 1800s? Yep! It’s that classic.
In this guide, I’ll walk you through how to make your own Salt Dough Stars right from home. Whether you’re looking for charming Christmas ornaments, handmade gift tags, or fun crafting time with the kids, these stars shine in every way.

Ingredients & Tools You’ll Need
My First Messy Attempt
I’ll never forget the first time I made Salt Dough Stars. I thought, “How hard can it be?” Spoiler alert: my dough turned into a sticky mess that glued itself to everything—including the rolling pin. 😅 But once I figured out the right flour-to-water ratio and swapped my dull knife for a proper star-shaped cookie cutter, everything got way easier.
Prep First, Craft Happily
Before you dive in, gather everything up front. Trust me—nothing kills your creative vibe faster than having to search for salt mid-dough. I like to lay out all my tools like I’m hosting a mini baking show.
Pantry Staples You’ll Need
2 cups of all-purpose flour (don’t use self-rising)
1 cup of regular table salt
1 cup of water, added gradually
Stick with the basics here. Don’t try pink Himalayan salt or anything fancy—it’s not worth the mess or cost.
Tools That Make It Easy
Mixing bowl for stirring everything together
Rolling pin (a wine bottle totally works in a pinch)
Star-shaped cookie cutter
Baking sheet lined with parchment paper
Straw or skewer to poke hanging holes before baking
Once, I forgot to poke holes and had to drill into the stars afterward. Don’t be like me. Do it before baking!
Optional But Fun Decorating Stuff
Acrylic paint in holiday colors
Glitter (fine glitter sticks better)
String or ribbon for hanging
Acrylic paint works best for bold, bright colors that don’t smudge. I once tried watercolor and ended up with soggy ornaments. Live and learn!

Step-by-Step Instructions for Making Salt Dough Stars
The Moment I Got the Dough Right
I’ll be real with you—I messed this up the first two times. My salt dough was either too dry and crumbly or so sticky it clung to my hands like glue. Turns out, the trick is to add the water slowly, not dump it all in like I did that one time (oops). Once you nail the consistency, it feels just like soft playdough.
Step 1: Mix It Up
In a large mixing bowl, combine the flour and salt first. This helps everything distribute evenly. Then, slowly add water, stirring as you go. You’re aiming for a smooth, pliable dough—think sugar cookie dough, not pancake batter.
If it’s too dry, add a tiny splash of water. If it’s sticky, dust in more flour.
Step 2: Time to Knead
Sprinkle a bit of flour on your counter and knead the dough for about five minutes. It should feel soft and not too sticky. Don’t skip this step. It helps bind the dough and gets it ready for cutting. My hands always feel like I’ve had a spa day after this—flour everywhere, but oddly satisfying.
Step 3: Roll It Out
Roll your dough to about ¼ inch thick. Any thinner and the stars may crack after baking; thicker takes longer to dry. I use a standard rolling pin and check the thickness by eye—nothing fancy. My niece once used a toy hammer. It… did not go well.
Step 4: Cut Your Stars
Grab your favorite cookie cutter and get to work! Press straight down and lift cleanly for sharp edges. If you’re planning to hang these as ornaments, don’t forget to use a straw to poke a hole at the top of each star. I’ve skipped this before and had to get creative with a nail and hammer post-bake.
Step 5: Bake Low and Slow
Line a baking sheet with parchment and arrange your stars. Then, pop them in the oven at 200°F (93°C). Bake for 2–3 hours or until they’re completely dry and hard.
Keep an eye on them—some ovens run hot. I once cranked it to 350°F to “speed things up” and ended up with puffed, brown stars that looked more like cookies than ornaments. Lesson learned.
Let the stars cool completely on the tray. They should feel light and firm with zero moisture inside.

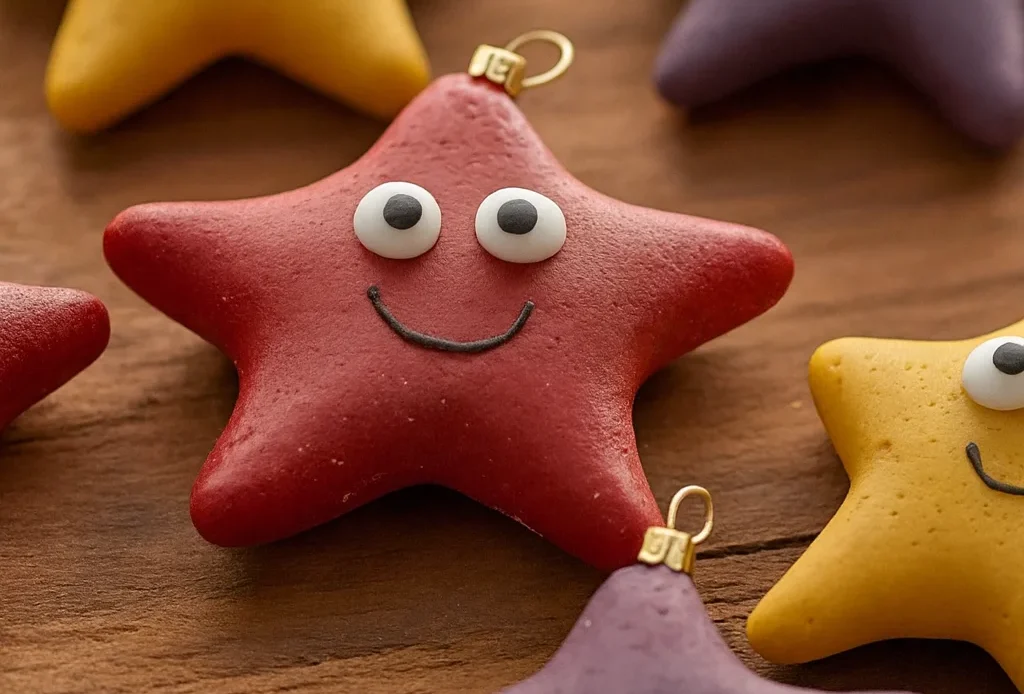
Decorating Your Salt Dough Stars
My Favorite Part? Turning Plain Dough Into Holiday Magic
Here’s where it gets fun. Once your salt dough stars are fully baked and cooled, it’s time to get creative. I honestly look forward to this part the most—it’s when the simple dough turns into something special. I’ve made glittery ones for the tree, rustic ones with twine, and even essential-oil-scented stars for gifts.
And yes, I’ve totally spilled red acrylic paint on my jeans more than once. It’s worth it.
Start with a Clean, Dry Surface
Before you begin, make sure your stars are completely cool and dry. I once started painting too soon and the dough flaked right off. Lay down newspaper or parchment paper unless you’re okay with turning your dining table into a permanent craft zone.
Choose the Right Paint
Acrylic paint is the MVP here. It sticks well, dries fast, and gives you bold colors. Watercolor or markers just don’t cut it—they either bleed or look dull. I’ve had the best results using small brushes for detail and foam sponges for base coats.
You can go full Christmas theme with reds, greens, and golds—or get creative with pastels, metallics, or even a galaxy vibe. My cousin made blue stars with white dots that looked like snowflakes. So cute!
Add Some Sparkle (or Not)
If you’re into shimmer, add glitter before the paint dries. You can sprinkle it over wet paint or mix it directly into your paint for a more subtle sparkle. One time, I tried glitter glue… big mistake. It took forever to dry and cracked weird.
For a more natural look, leave them unpainted and tie with twine. Sometimes simple is just right, especially if you’re into rustic holiday decorations.
Want a Scented Twist?
Here’s a fun hack: mix a drop of essential oil (like cinnamon or peppermint) into your paint or dab it onto the back of the finished star. Just don’t go overboard. One year I added way too much cinnamon oil and it smelled like a spice factory exploded in the living room. 🤢
Final Touch: Add a String
Once your paint is totally dry (give it a solid few hours), loop some ribbon, twine, or string through the hole and tie it off. Done!
Creative Uses for Salt Dough Stars
They’re Not Just Ornaments, Y’all
The first year I made Salt Dough Stars, I only planned to hang them on the tree. But by the time I was done, I had so many stars I started sticking them everywhere—on presents, in stockings, even glued one to a wine bottle I gave as a gift. They’re way more versatile than I expected!
Classic Christmas Ornaments
This one’s a no-brainer. Use your stars as Christmas ornaments by threading ribbon through the hole and hanging them on the tree. They catch the lights beautifully, especially the glittery ones.
I made a set in red, white, and gold last year, and honestly, they looked better than the store-bought ones. Plus, they don’t break when the cat knocks them off (ask me how I know).
Personalized Gift Tags
Salt dough stars make the cutest gift tags. Just write the person’s name on the star with a permanent marker or paint pen and tie it onto the present with twine. Boom—instant handmade charm.
One time, I made a batch and wrote everyone’s names in metallic gold. My aunt was so obsessed she kept hers and used it the next year too. 😄
Handmade Keepsakes
Want to make it extra special? Press a kid’s handprint, a pet’s paw, or even a leaf into the dough before baking. You’ve got yourself a handmade gift that’s personal, cute, and lasts for years.
My nephew did one with his baby foot when he was six months old. Now it’s the star at the top of their tree every year. Melted my heart.
Holiday Table Decor
Add a rustic or festive touch to your holiday table by placing one on each plate as part of your tablescape. Tie a name tag to the ribbon and boom—now they’re place cards, too.
I even used them for my daughter’s school party. We hot-glued them to paper bags filled with cookies, and the kids loved them more than the actual treats.
Scented Drawer Fresheners
Here’s a weird but great one—drop some essential oil on the back and toss one in a drawer. Salt dough holds scent surprisingly well. I have a star in my sock drawer that smells like vanilla sugar cookies. Just don’t use them near food—they’re not edible!

Storage & Preservation Tips
Don’t Let Your Stars Crumble into Dust
Okay, real talk—my first batch of Salt Dough Stars didn’t even make it to the next Christmas. I threw them all in a box, stuck them in the garage, and by December, half had cracked and the others were weirdly soft. Total rookie mistake.
Now I know how to seal salt dough properly and store it so it lasts for years. You only need to mess up once to become a pro. 😅
Always Seal Before Storing
This is the #1 rule. You can use Mod Podge, clear varnish, or even an acrylic spray sealer to give your stars a protective coat. It locks in the paint, keeps out moisture, and helps prevent cracking.
I usually brush on a layer of matte Mod Podge—two coats if I’m feeling fancy. Glossy looks great too if you want a shiny, glass-like finish. I tried skipping this one year and let’s just say… salt dough and humidity do not get along.
Let Them Dry. Like Really Dry.
Even after baking, I let mine air dry overnight before painting, then again after painting and sealing. Don’t rush this. It’s not like cookies—you want them hard as rocks. I once sealed slightly damp ornaments and they got gross real fast. Lesson learned.
Use the Right Storage
Pack your stars in a plastic container with a lid or a sturdy holiday storage box. Wrap each one in tissue paper or bubble wrap if you’re extra cautious (especially if they have 3D paint or glitter). And definitely keep them out of damp spaces like basements or garages.
I use old shoeboxes lined with parchment, stacked by size like a little star army. It feels weirdly satisfying.
Label Your Box
I’ve wasted way too much time digging through “Christmas Stuff” bins looking for one tiny box of ornaments. Label your storage box clearly—something like “Salt Dough Ornaments – Fragile” works great.
Oh, and throw in a silica gel packet if you’ve got one from an old purse or shoe box. Helps keep moisture out. Trust me, your stars will thank you.
It’s honestly wild how something as simple as flour, salt, and water can turn into the most charming holiday decorations. Making Salt Dough Stars has become a yearly tradition in our house—sometimes messy, always memorable. From glitter-covered ornaments to personalized gift tags, these little stars do it all.
If you’ve never tried this before, I hope this guide gave you the confidence to go for it. And if you’ve done it before but needed a refresher (or a laugh at my past craft fails), I hope you picked up a few new tricks.
So go grab that cookie cutter, preheat the oven, and whip up some handmade magic. And hey—if your dough turns into a sticky disaster at first, just know you’re in good company. 😂
Got a batch you’re proud of? Share your Salt Dough Stars on Pinterest and tag this guide! Let’s inspire more people to turn pantry staples into holiday treasures.
