

Did you know that over 57 million Americans feed wild birds annually? Whether you’re a birdwatching buff or just want a fun, nature-friendly craft for the kids, making your own birdseed ornaments is a wholesome way to bring more birds to your backyard.
Hey, I get it—keeping kids entertained while doing something eco-conscious can feel like a juggling act. But this DIY? It’s a game-changer. Using simple ingredients like birdseed, gelatin, and a cookie cutter, you’ll have cute, biodegradable decorations in no time. Plus, birds love them.
This guide walks you through every step, packed with tips that blend science, creativity, and kindness to nature. Ready to make some feathered friends?
Ingredients and Supplies You’ll Need
Alright, let’s dive into the nitty-gritty of what you need to make these adorable birdseed ornaments. The best part? Most of it is probably already in your kitchen or craft bin.
Basic Must-Haves
So, first off, the star of the show: birdseed. I always go for a wild bird blend—it pulls in everything from finches to cardinals. Don’t cheap out here. The better the mix, the more feathered visitors you’ll get fluttering in.
You’ll also need unflavored gelatin. I’ve made the mistake of accidentally using the sweetened stuff once (facepalm), and the birds were not fans. Stick to plain gelatin—it’s what binds everything together without adding harmful sugar.
Oh, and water. Yep, boring ol’ water. Just warm it up enough to dissolve the gelatin.
Here’s a quick list of what goes into the basic birdseed ornament recipe:
- 2½ cups birdseed
- 2 packets of unflavored gelatin
- ½ cup warm water
- Cookie cutters (any shape that makes you smile)
- String or twine (more on this in a sec)
- Straw (for making holes)
- Parchment paper or wax paper (less mess = happy you)
Optional But Awesome Add-ins
Wanna level up your DIY bird feeders? Toss in some unsalted peanuts, dried cranberries, or sunflower seeds. Not only do they look festive, but they also give birds an energy-packed snack, especially important in the colder months. I swear, when I started adding cranberries, the number of backyard visitors tripled.
For the eco-friendly crafts crowd (that’s me too), make sure everything you use is biodegradable or recyclable. Skip plastic straws and synthetic ribbons. I use natural twine or even strips of old cloth. Plus, it gives that rustic, cottagecore vibe. Win-win.
Real Talk on Strings
Don’t overlook this. If you’re hanging these outdoors—and I mean really outdoors where rain and snow happen—go with waterproof string. Learned this the hard way when a whole batch plopped to the ground overnight thanks to soggy yarn. Nothing ruins a good nature craft for kids like a squirrel party at 2 a.m.
Tools That Make Life Easier
Using cookie cutters with deeper edges works better. The thin metal ones sometimes don’t hold the seed mix well, especially if kids are doing the pressing. I love using stars, hearts, and even little gingerbread men around the holidays. Get creative—it’s part of the fun.
Have kids? Let them pick the shapes and stir the mix (with some help, obviously). It becomes more than just a backyard birdwatching activity; it’s an afternoon they’ll actually remember.
Step-by-Step Instructions for Making Birdseed Ornaments
Alright, here’s where the magic happens. I’ve made dozens of these over the years, and trust me—once you nail this process, it’s as addictive as making cookies. Plus, the birds get all the snacks, and you don’t gain the calories. Win-win, right?
Step 1: Mix the Gelatin
First, warm up ½ cup of water—just hot enough to dissolve stuff but not boiling. In a bowl, sprinkle in 2 packets of unflavored gelatin and stir like your life depends on it. Seriously, keep stirring until it’s totally dissolved.
I once got lazy and didn’t mix it fully… ended up with weird lumps in the seed mix that hardened like rocks. Lesson learned. If you’re doing this with kids, this is a fun part for them to stir and feel like little chefs.
Step 2: Add the Birdseed
Once your gelatin’s smooth, start adding about 2½ cups of birdseed. I add it gradually, like a scoop at a time, mixing after each. You’ll know you’ve added enough when it turns into a thick, moldable mash. Kinda like sticky rice meets granola.
I like using a spoon for the first part, then just going hands-in to finish it off. Messy? Yeah. But weirdly satisfying.
If you’re wondering how to make bird feeders that actually hold up—this texture is the trick. If it’s too loose, it won’t keep shape. If it’s too dry, it crumbles after drying.
Step 3: Fill Your Cookie Cutters
Line a tray with parchment or wax paper. Place your cookie cutters on top, and start spooning in the mixture. Pack it in hard—like, really hard. I press it down with the back of a spoon first, then give it a good palm-smash to make sure it’s snug.
Pro tip: Lightly oil the cookie cutters beforehand so they pop out easier later. Not necessary, but it saves frustration.
Step 4: Make a Hole (Don’t Forget This!)
Use a straw or chopstick to poke a hole near the top of each ornament. This is where the string goes, and yes, I have forgotten this step before. There’s nothing worse than having the perfect ornament and nowhere to hang it from. Major facepalm.
Make sure it goes all the way through, and give the hole a little wiggle so it doesn’t seal shut while drying.
Step 5: Let Them Dry Completely
This is the hardest part… waiting.
Leave them to dry at room temp for several hours, or overnight if you can. I usually flip them once or twice to speed it up and help them dry evenly.
Humidity can be a problem—especially down south. In summer, I sometimes pop them in the fridge to help set faster. For winter eco-friendly bird feeders, just leave them by the window; the cold helps ‘em dry firm.
Step 6: Remove and String
Once they’re rock solid, gently push them out of the cookie cutters. Thread a piece of natural or waterproof twine through the hole, tie a knot, and boom—you’ve got yourself a homemade bird treat ready to hang.
I like placing them near windows or trees I can see from inside. Makes morning coffee 10x better when you’ve got blue jays or chickadees dropping by.
Fun Customizations and Seasonal Twists
Okay, this is the part where things get seriously fun. Once you’ve mastered the basic recipe, you can start playing around and giving your DIY bird feeders a little flair. This is where the kids light up, too. I mean, who doesn’t love a snowflake-shaped snack for a bird?
Go Nuts with Shapes
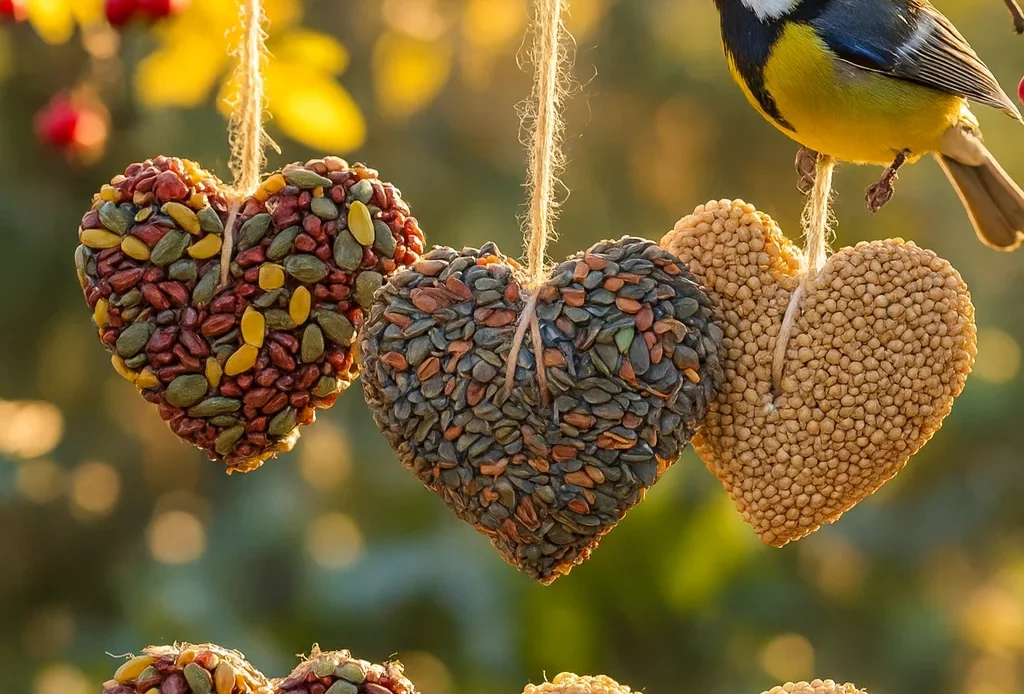
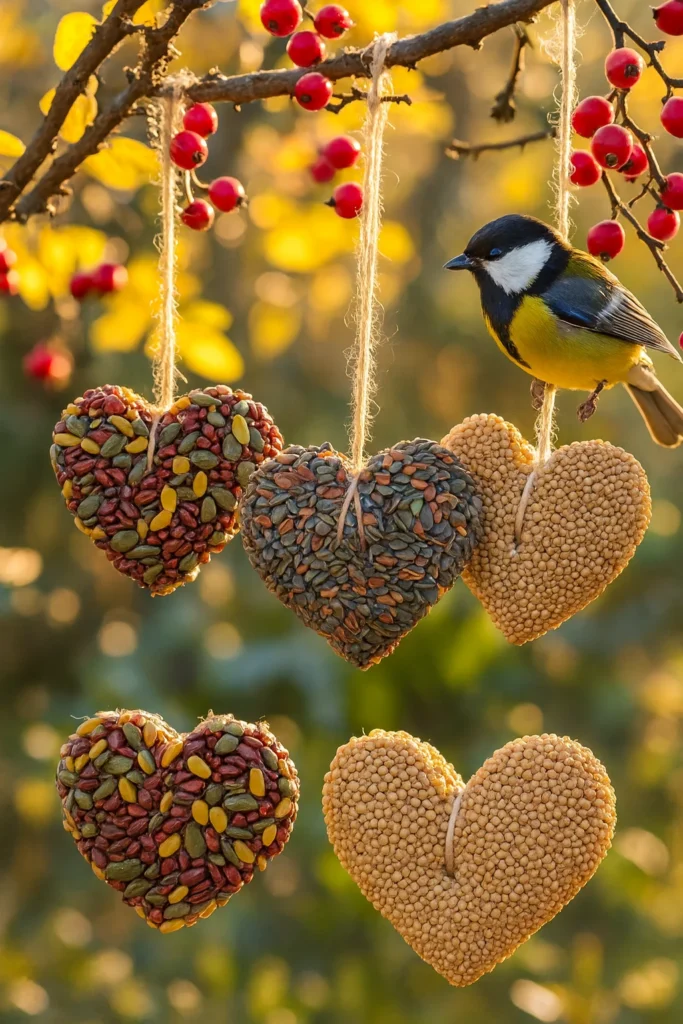
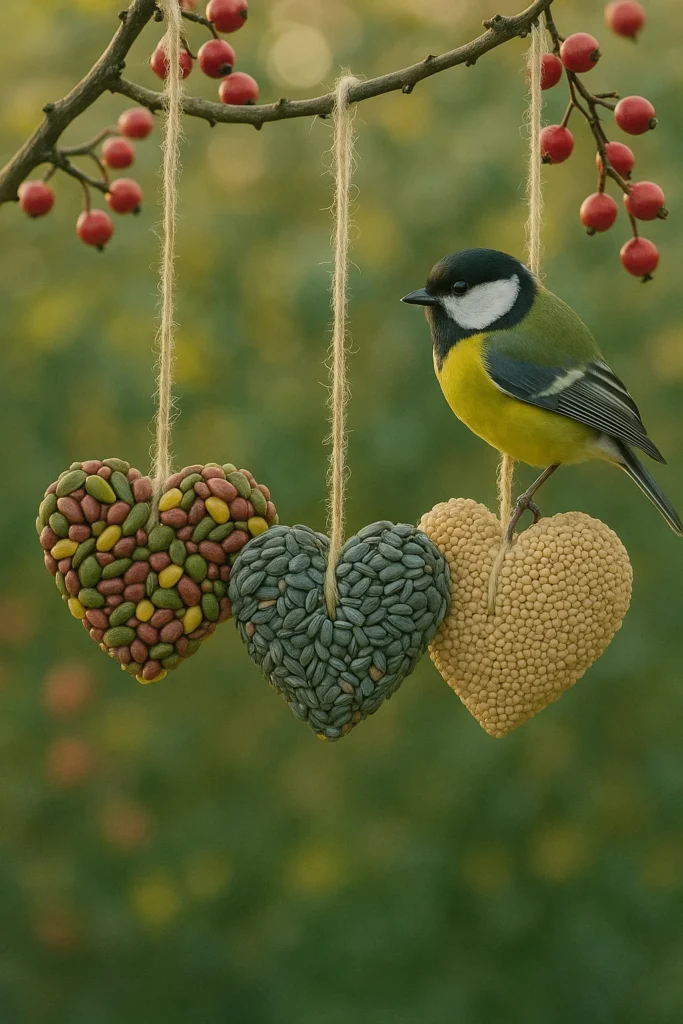
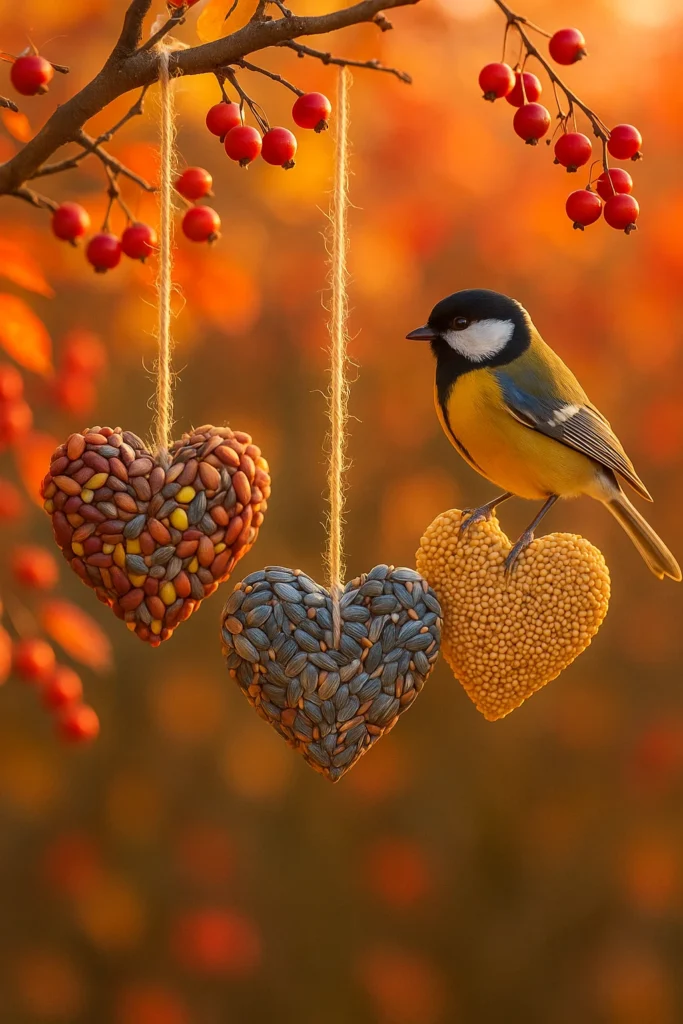
I started with basic circles and stars, but now? I’ve got a drawer full of cookie cutters—hearts for Valentine’s Day, leaves for fall, pumpkins for Halloween, and yep, tiny turkeys for Thanksgiving. Don’t judge. The birds don’t care what shape they are, but I do. It makes the whole thing feel like a festive project, not just another messy kitchen experiment.
For Christmas, I love doing trees and gingerbread men. We even made mini wreaths once using small bundt pans. Just line it with cling film and fill like normal. When it pops out, tie a little red bow on top, and voilà—festive bird feeder vibes all around.
Color Without Chemicals
Here’s a cool trick: if you want to add a pop of color, mix in natural dyes. Beet juice gives you a soft red, turmeric for gold, and spirulina (that algae stuff) gives a neat green-blue. I mix a bit into the gelatin water before adding birdseed. Just a few drops go a long way.
Don’t use artificial food dye—birds can be sensitive to it, and let’s be real, this is supposed to be an eco-friendly craft.
Add Extra Bird Snacks
Want to attract more birds? Go gourmet.
Try mixing in:
- Crushed peanuts (unsalted)
- Dried cranberries or chopped raisins
- Hulled sunflower seeds
- Cracked corn or millet
Not only do these make the ornaments look prettier, but they’re also loaded with nutrients birds need—especially in colder months. My winter feeders with added cranberries? I swear the chickadees line up like it’s a food truck.
Layered Seed Art
One day, just for fun, I poured in different seed types in layers—kind of like those sand art bottles from the ‘90s. I didn’t think it’d work, but it looked amazing and held together great. You have to press each layer down firmly before adding the next, but it’s worth it.
These are great if you’re gifting them. Yep, holiday bird crafts make awesome neighbor gifts. Tie a cute tag on it that says, “For your feathered friends”—people love it.
Glitter Look (Without Real Glitter)
Please never use glitter. Like, ever. Birds might eat it, and it can mess up their digestive system. But if you want that sparkly wintery look, mix in a sprinkle of chia seeds or uncooked quinoa. It gives a shimmering texture when it dries.
I call this trick “glitter without guilt.” Makes your bird-themed decorations Instagram-worthy without hurting nature.
Why Birds Love These Ornaments (And How to Attract More!)
I still remember the first time I hung up my DIY birdseed ornaments. I wasn’t sure if they’d even work—looked kinda goofy, if I’m honest. But the next morning? BOOM. A full-blown bird brunch. Sparrows, chickadees, a bold little blue jay, even a downy woodpecker. I felt like Snow White.
Turns out, birds aren’t picky about aesthetics—they care about calories, especially in winter.
Packed With the Good Stuff
These ornaments are basically a protein bar for birds. Between the seeds, nuts, and dried fruit, you’ve got a solid mix of fats, carbs, and protein. That’s exactly what they need during cold months when bugs and berries are scarce.
A good winter bird food blend keeps your backyard buzzing with feathered visitors. Bonus: it’s way more fun than filling up a plastic feeder for the hundredth time.
They’re Safe (If You Make Them Right)
I get asked this a lot—“Is gelatin safe for birds?” Yes, as long as it’s unflavored and unsweetened. Skip the Jell-O packets. Trust me, homemade bird treats are only helpful if they’re natural. Additives and sugar? Big no.
Same goes for what you hang them with. Birds sometimes peck at the string too, so use cotton or natural jute. I’ve even used strips of an old t-shirt. Looks shabby-chic and keeps plastic out of the garden.
Where You Hang Them Matters
Here’s where a little strategy goes a long way. If your ornaments just disappear overnight, chances are a squirrel’s throwing a midnight rave. I hang mine:
- From thinner branches that can’t hold squirrels
- Near shrubs or bushes for bird cover
- Close to windows (but not too close—bird strikes are a thing)
- A few feet apart to avoid crowding and pecking matches
If you’re into attracting backyard birds, positioning is everything. They want food, but they also want to feel safe. No one likes eating lunch in a danger zone, right?
What Birds Will Show Up?
Depending on where you live and what seeds you use, you might get:
- Chickadees
- Titmice
- Sparrows
- Finches
- Nuthatches
- Jays
- Woodpeckers
My personal favorite? The northern cardinal. They show up in pairs, and seeing that splash of red against the snow? Pure magic.
Pro Tip: Keep It Fresh
If it’s rainy or snowy, these things can get soggy fast. I usually replace mine every week or so. If they look moldy or mushy, toss ’em. Clean feeding = healthy birds.
You can also freeze extras! Yep, birdwatching for beginners meets meal prepping. Just store them in a zip bag and pull one out when you’re ready.
Man, it’s kinda wild how something so simple—birdseed, gelatin, and a cookie cutter—can turn into something that brings your whole backyard to life.
These DIY bird feeders aren’t just a fun craft; they’re an act of kindness for your local wildlife. They’re also a sneaky way to get kids into nature without dragging them on a hike they don’t want to take. It’s a win for you, the birds, and your cluttered brain that just needs an easy, feel-good project.
Whether you hang them up during the holidays, use them for a classroom science project, or just wanna stare out the window while sipping coffee and pretending you’re in a Disney movie—this craft delivers. Every. Single. Time.
So give it a go! And if you do, I’d love to see what you made. 📸 Snap a pic, pin it, and share your feathered masterpieces on Pinterest. Let’s spread the seed—literally—and inspire more people to try this eco-friendly project.
Trust me, once the birds show up, you’ll be hooked.
