


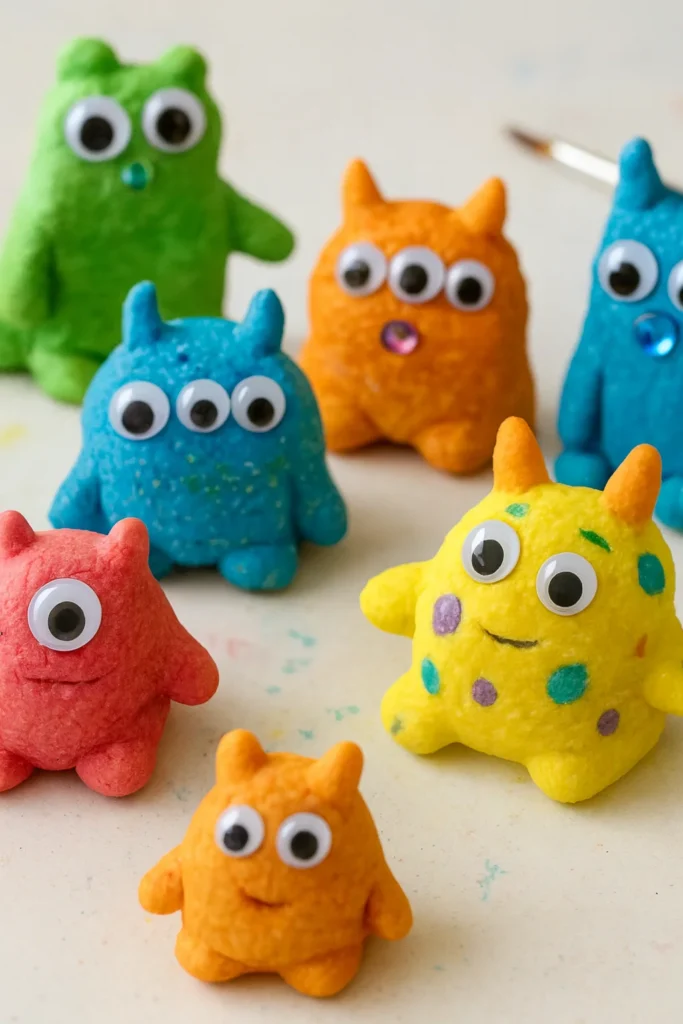
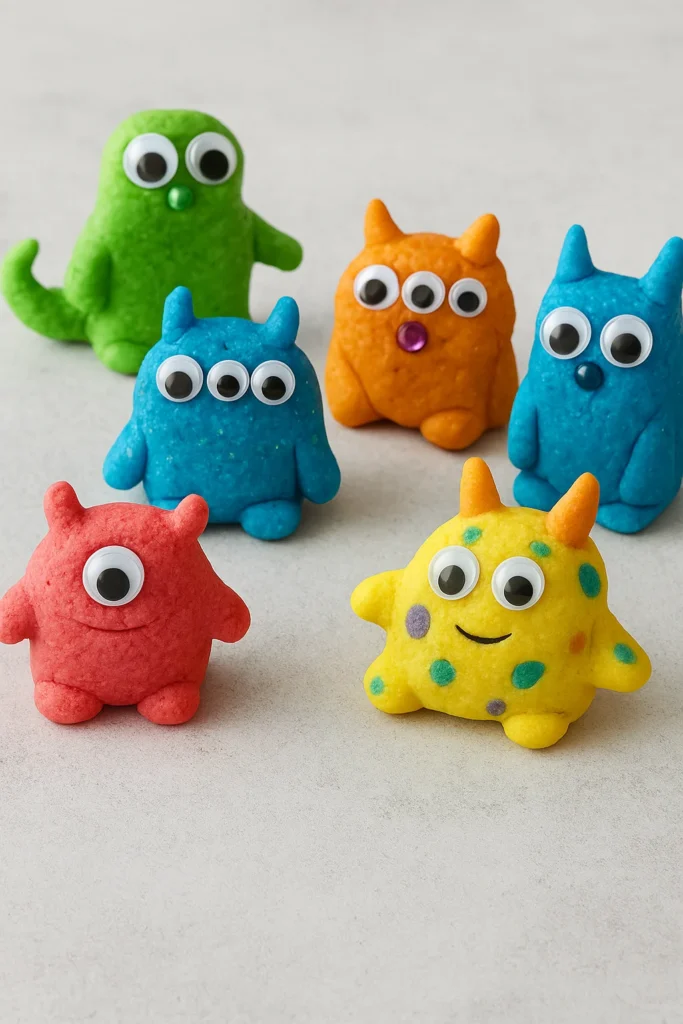
Who says monsters have to be scary? With a pinch of salt, a scoop of flour, and a splash of water, you can make your own Salt Dough Monster Pets right at home! This simple craft is a hit with kids (and secretly, adults too). Salt dough has been a classic for decades—cheap, safe, and incredibly fun. In this guide, we’ll walk you through everything you need to create, bake, and decorate these colorful little creatures that let imaginations run wild!
What You’ll Need for Salt Dough Monster Pets
I’ll be honest — I’ve tried a lot of kids crafts over the years, but nothing beats the simplicity (and the mess!) of DIY salt dough projects. You don’t need fancy gear or expensive supplies. Most of this stuff is probably sitting in your pantry right now. And if it’s not, you can grab everything cheap from any craft supplies online store — way easier than another grocery trip with sugar-crazed kids in tow.
The Basic Ingredients
For your Salt Dough Monster Pets, you’ll just need three pantry staples:
- 2 cups all-purpose flour
- 1 cup salt
- 1 cup water (add slowly till the dough forms)
That’s it. No weird chemicals, no toxic nonsense. This is one of those educational crafts for kids that doubles as a mini science lesson — my son still calls it his “flour volcano.” You can even sneak in a quick chat about how salt helps harden the dough. That’s mom-level multitasking right there.
Optional Add-Ons That Kids Love
Now, if your little monsters (the human kind) love sparkle and chaos like mine do, you can add:
- Googly eyes — because every creature deserves a personality.
- Sequins or beads for that shiny, over-the-top look.
- Washable paints or markers to bring their creatures to life.
- Glitter glue if you’re brave. I wasn’t, but I tried it once… let’s just say, my floor sparkled for a week.
These extras turn a simple DIY project for kids into something Pinterest-worthy. Plus, they make your monsters feel like real pets — each one totally different.
The Right Tools (a.k.a. Stuff You Already Have)
You don’t need a craft room or any special tools. Just grab:
- A mixing bowl
- A spoon
- A rolling pin (or just use your hands — we all do)
- A baking tray lined with parchment paper
That’s your entire setup! Super low-cost, which is why I call this my go-to budget-friendly family activity. The best part? When your kid proudly says, “I made this!” — it’s priceless.
A Quick Pro Tip
If you want smoother dough, add a tablespoon of oil. It makes shaping those monster arms and tentacles easier. Oh, and don’t forget to preheat your oven before the chaos begins — I’ve forgotten way too many times.
How to Make Salt Dough for Monster Pets
If you’ve never made salt dough crafts before, prepare for a little chaos — the good kind. The first time I tried this, my kitchen looked like a flour blizzard hit it. But honestly? It’s half the fun. This is one of those DIY crafts for kids that feels like a science experiment, art class, and playtime all in one.
Step 1: Mixing the Magic
Start by dumping your flour and salt into a big bowl — 2 cups flour, 1 cup salt. Stir it a bit before adding water slowly. Don’t pour it all in at once unless you want a goopy mess (been there, done that). Mix with a spoon until it starts clumping together, then dive in with your hands.
Here’s my favorite tip: if it’s too sticky, sprinkle a little extra flour. Too dry? Add a teaspoon of water at a time. You’ll know it’s right when it feels like smooth, soft play dough — firm but still bendy. My daughter calls this the “squish test,” and she’s not wrong.
Step 2: Knead It Like Pizza Dough
This is where the real fun begins. Get the kids involved — they’ll love the kneading part. Push, fold, squish, repeat for about 5–10 minutes. You’re building structure and texture here, which makes your monsters hold their shape while baking.
And yeah, I totally count this as family bonding time (and a sneaky upper-arm workout). The best creative home projects are the ones that make you laugh in the middle of the mess, right?
Step 3: Shape Your Monster Pets
Now the imagination part kicks in. Roll out the dough a bit, then shape it however you want. My son made a one-eyed blob named “Goop.” I made a monster that looked suspiciously like a potato. You can add arms, horns, or hair by pressing small dough pieces together — the possibilities are endless.
This part is perfect for educational play ideas. You can teach symmetry, patterns, and even storytelling. “What’s your monster’s name? What does it eat?” My kids always say spaghetti, which… honestly makes sense.
Step 4: Prepping for the Bake
Once your creatures are shaped, place them on a parchment-lined tray. Space them out so they don’t stick together — these monsters need personal space too! Preheat your oven to 250°F (120°C). They’ll bake for about 2 hours, but don’t rush it. The slower they bake, the harder they get.
When the smell hits, it’s warm, salty, and weirdly comforting — like baking bread without the payoff of actually eating it.
Baking Your Monster Creations
Here’s where things get real. You’ve mixed, squished, shaped, and maybe even argued a little about whose monster looks “the scariest.” Now it’s time to bake those Salt Dough Monster Pets into hard little masterpieces. Don’t worry — it’s easier than baking cookies (and no one eats these… hopefully).
Step 1: Get the Oven Ready
Set your oven to 250°F (120°C) — low and slow is the trick here. I’ve learned (the hard way) that higher temps might make your monsters puff up like bread rolls or crack down the middle. My first batch looked like they went through a horror movie, but hey, that’s part of the charm, right?
While the oven preheats, lay your creatures on a parchment-lined tray. This helps them bake evenly and not stick. I use this time to grab a quick snack or clean up the flour chaos before the next round of fun begins.
Step 2: Bake and Wait (Patience = Parenting Superpower)
Pop those little beasts in the oven and let them bake for about 2 hours. If you made thicker monsters (mine always end up chubby), give them an extra 30 minutes. The key is drying them out slowly so they harden without burning.
Here’s my favorite pro tip: halfway through baking, flip them over gently. It helps both sides dry evenly and prevents weird cracks on the back.
This whole process gives me serious family bonding project vibes — the house smells salty and cozy, like homemade bread that you can’t actually eat. I usually put on some music, dance around the kitchen, and sneak a peek at the oven every 10 minutes, like it’s some sort of craft version of The Great British Bake Off.
Step 3: Cool Down Before Decorating
Once they’re solid and cool to the touch, you’ll know you nailed it. Don’t decorate while they’re hot — trust me, melted paint and googly eyes are not a good look. Set them on a cooling rack or countertop and let them chill for about 20 minutes.
If you’re doing this as part of a creative learning activity with younger kids, this is a great moment to talk about patience, heat safety, or just how baking changes materials. It’s sneaky science wrapped in fun.
Step 4: Storage Tips (If You Don’t Paint Right Away)
If you’re saving decorating for later, store your baked monsters in a dry container or zip-top bag. Moisture can soften them up again — and no one wants floppy monsters. I learned that after leaving a few on the counter overnight. They got… weirdly chewy.
Decorating and Personalizing Your Monster Pets
Okay, confession time — this is hands down my favorite part. Once those little salt dough creatures cool off, it’s like staring at a blank canvas full of potential. Decorating your Salt Dough Monster Pets is where creativity explodes! No rules, no perfection. Just pure, silly fun.
When I did this with my kids, the kitchen turned into a mini art studio. Paint splatters everywhere, googly eyes rolling across the table… it was chaos in its most beautiful form.
Step 1: Set Up the Painting Station
Lay out some old newspaper or a plastic tablecloth (trust me, it’s worth it). Then grab your craft paint for kids — acrylics work best because they dry fast and don’t flake off. If you’ve got washable paints, even better for tiny hands. I usually order mine from a kids art supplies online store because they always have fun color sets and glitter pens that my local shop never carries.
Keep a few brushes of different sizes handy. My daughter loves using a toothbrush for splatter effects. Pro tip: old makeup brushes actually work great for shading details if you’re feeling fancy.
Step 2: Let the Imagination Loose
Now’s the time to bring your monsters to life! Big eyes, bright colors, crazy patterns — there’s no such thing as “too much.” Encourage your kids to tell stories about their creations. “Mine’s a rainbow alien that loves cookies.” I still remember that one vividly.
If you’re doing this as a creative art project for kids, it’s the perfect way to boost fine motor skills and confidence. Let them decide every detail. One of the best things about DIY home crafts like this is watching kids feel proud of something totally their own.
Step 3: Add Fun Extras
Once the paint dries (give it 20–30 minutes), break out the fun stuff — googly eyes, sequins, tiny beads, even yarn for monster hair. Use craft glue or a low-temp glue gun (with supervision, of course). You can even seal them with a thin coat of Mod Podge or clear varnish if you want your monsters to last forever.
My son once glued three eyes on his monster “because it could see the future.” Honestly? I respected that artistic vision.
Step 4: Display Your Monster Pets
This part makes it all worth it. Line them up on a shelf, make a monster village, or tape them to popsicle sticks and turn them into puppets. These creatures don’t just sit around — they’re characters in your home now!
This step turns family craft ideas into a display of imagination. I even posted our creations on Pinterest and got a few “This is adorable!” comments, which totally made my day.
Creative Ways to Play with Salt Dough Monster Pets
Once your monsters are painted, dried, and full of personality, the fun’s just beginning! I used to think we were done after decorating, but nope — these little creatures have so much more potential. Our house turned into a full-blown monster world for days. My kids even made name tags and mini homes out of cardboard boxes. That’s when I realized this wasn’t just crafting — it was learning through play.
Step 1: Turn Monsters into Storytime Buddies
Grab a few Salt Dough Monster Pets and create your own bedtime stories. My son’s monster, “Blop,” was a superhero who saved lost socks (because, of course, he was). Storytelling helps spark creativity, and kids build communication skills without even realizing it. Plus, it’s one of the easiest educational toys you’ll ever make at home.
I usually let my kids take turns being the “monster narrator.” It’s hilarious — and somehow, their grammar gets better every time. So if you’re hunting for preschool learning crafts that actually teach something, this is gold.
Step 2: Build a Monster Habitat
We made tiny monster houses out of shoe boxes — complete with paper grass, pebbles, and toilet paper tube tunnels. This became a full-on STEM craft for kids project because we started talking about “monster ecosystems” (a.k.a. “where do monsters sleep?”). It got us into science without any worksheets involved.
If you’ve got older kids, challenge them to engineer monster traps or obstacle courses. My daughter once built a “lava bridge” out of Legos and was so proud she called her grandparents to show them.
Step 3: Use Them for Sensory Play
Salt dough monsters are perfect for sensory play activities. Put them in a bin with rice, beans, or kinetic sand and let kids dig for their “hidden creatures.” It’s calming, creative, and gives them a break from screens. I can’t tell you how many rainy afternoons this little trick has saved me from meltdowns.
If you’re homeschooling, this doubles as hands-on learning. You can sneak in color sorting, counting, or texture exploration while everyone’s just “playing.”
Step 4: Seasonal Monster Fun
Don’t stop at one batch! Make new monsters for every holiday — pumpkin monsters for Halloween, heart-shaped ones for Valentine’s, even bunny monsters for Easter. It keeps the activity fresh and ties into creative family games year-round.
We even started a “Monster of the Month Club” at home. Each month, we create a new creature, name it, and write its “special power.” The kids still talk about our “Sleepy Summer Monster” that only came out during naps.
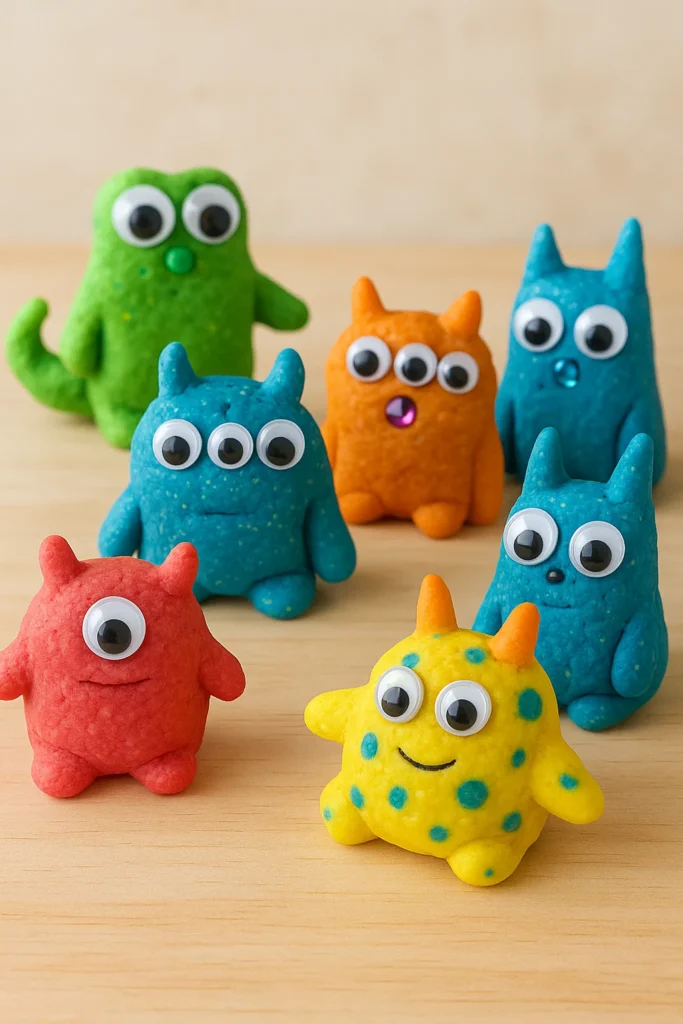
And there you have it — your very own little monster family, baked, painted, and full of personality! Making Salt Dough Monster Pets isn’t just about crafting; it’s about connection. Every squish, giggle, and splash of paint turns into a memory. What I love most about these DIY creative projects is how they mix fun and learning so effortlessly.
We started this as a rainy-day activity, but it quickly became one of our favorite family craft ideas. The kids get to shape their imaginations, and I get a quiet moment (well, sometimes). The best part? It costs next to nothing, and you can make dozens of new monsters whenever inspiration strikes.
If you’re looking for simple educational activities for kids that actually hold their attention — this one’s it. It teaches patience, creativity, and teamwork without feeling like a lesson. Plus, these monster pets look adorable sitting on shelves or hanging out in your kid’s playroom.
So next weekend, grab some flour, salt, and a little imagination, and dive into your own batch of Salt Dough Monster Pets. Take pictures, name them, and make them part of your family stories. Then — don’t forget to share your creations on Pinterest! Tag them with #SaltDoughMonsters or #FamilyCraftFun so other families can join in.
Because honestly? The only thing better than creating your own monsters… is inspiring someone else to make theirs. 💚
